Documentation Index
Fetch the complete documentation index at: https://developers.hubspot.com/docs/llms.txt
Use this file to discover all available pages before exploring further.
Scope requirements
Scope requirements
- Before you get started
- Define your custom action
- Test and publish your custom action
- Custom action examples
Before you get started
- You’ll need to create an app. Your app logo will be used as the icon for the custom action.
- When your custom workflow action needs to make requests to HubSpot APIs, you must authenticate those calls using OAuth tokens (for Marketplace apps) or static auth tokens (for single-account apps) based on your app’s authentication configuration.
Define your custom action
To create a custom workflow action, you’ll need to define the action using the following fields. This also specifies the request format for requests coming from HubSpot, as well as the handling of responses from your service.-
actionUrl: the URL where an HTTPS request is sent when the action is executed. The request body will contain information about which user the action is executing on behalf of, and what values were entered for the input fields. -
objectTypes: which CRM objects this action can be used with. -
published: by default, custom actions are created in an unpublished state. Unpublished actions are only visible in the developer portal associated with your HubSpot application. To make a custom action visible to users, update the published flag on your action definition to true. -
inputFields: the inputs that the action receives. These will be filled by the user. -
inputFieldDependencies: these rules define the relationships between two or more inputs, based on theirdependencyType. You can use the followingdependencyTypeoptions:SINGLE_FIELD: these rules allow fields to be grayed out until other fields meet specific conditions. Use this to make sure a field is pre-filled before allowing visitors to continue filling out the rest of the form. Controlling (parent) fields will provide values to the corresponding dependent (child) fields.CONDITIONAL_SINGLE_FIELD: these rules allow fields to be hidden until other fields meet specific conditions. Use this to show or hide specific fields based on a previous selection. For example, if your business is a bakery, you can add a checkbox to ask visitors if they like cake and, only if the checkbox is selected, display a field to ask what flavor of cake they like.
-
outputFields: the values that the action will output. These values can be used by later actions in the workflow. A custom action can have zero, one, or many outputs. -
objectRequestOptions: properties of the enrolled object included in the payload to theactionUrl. -
labels: copy that describes to the user what the action’s fields represent and what the action does. English labels are required, but labels can be specified in any of the following supported languages as well:- French (
fr) - German (
de) - Japanese (
ja) - Spanish (
es) - Brazilian Portuguese (
pt-br) - Dutch (
nl) - Polish (
pl) - Swedish (
sv) - Italian (
it) - Danish - Denmark (
da_dk) - Finnish (
fi) - Norwegian (
no) - Traditional Chinese - Taiwan (
zh-tw)
- French (
-
executionRules: a list of definitions you can specify to surface errors from your service to the user creating the workflow. -
functions: code snippets that are run in order to transform the payload being sent to a url or transform the response from that url.
Example custom action definition
- Field option fetches: populate a list of valid options when a user is configuring a field.
- Action execution requests: made when an action is being executed by a workflow that includes your custom action.
Test and publish your custom action
After creating your new custom action, you can test then publish it.Testing custom actions before publishing
Before publishing your custom action, you can test action execution and fetching options by pointing the URL to webhook.site. This allows you to inspect the payload and return a specific response. You can also test the action in your developer portal by creating a workflow in the workflows tool. Then, adding your new action. When you complete your testing, it’s recommended to archive your test actions.Publishing custom actions
By default, custom actions are created in an unpublished state. Unpublished custom actions are only visible in the developer portal associated with the corresponding HubSpot application. To make a custom action visible to users, update thepublished flag on your action definition to true.
If an action is unpublished, portals that have already added the action to their workflow will still be able to edit and execute already added actions. But, they won’t be able to add the action to the same or any other workflows again.
Custom action examples
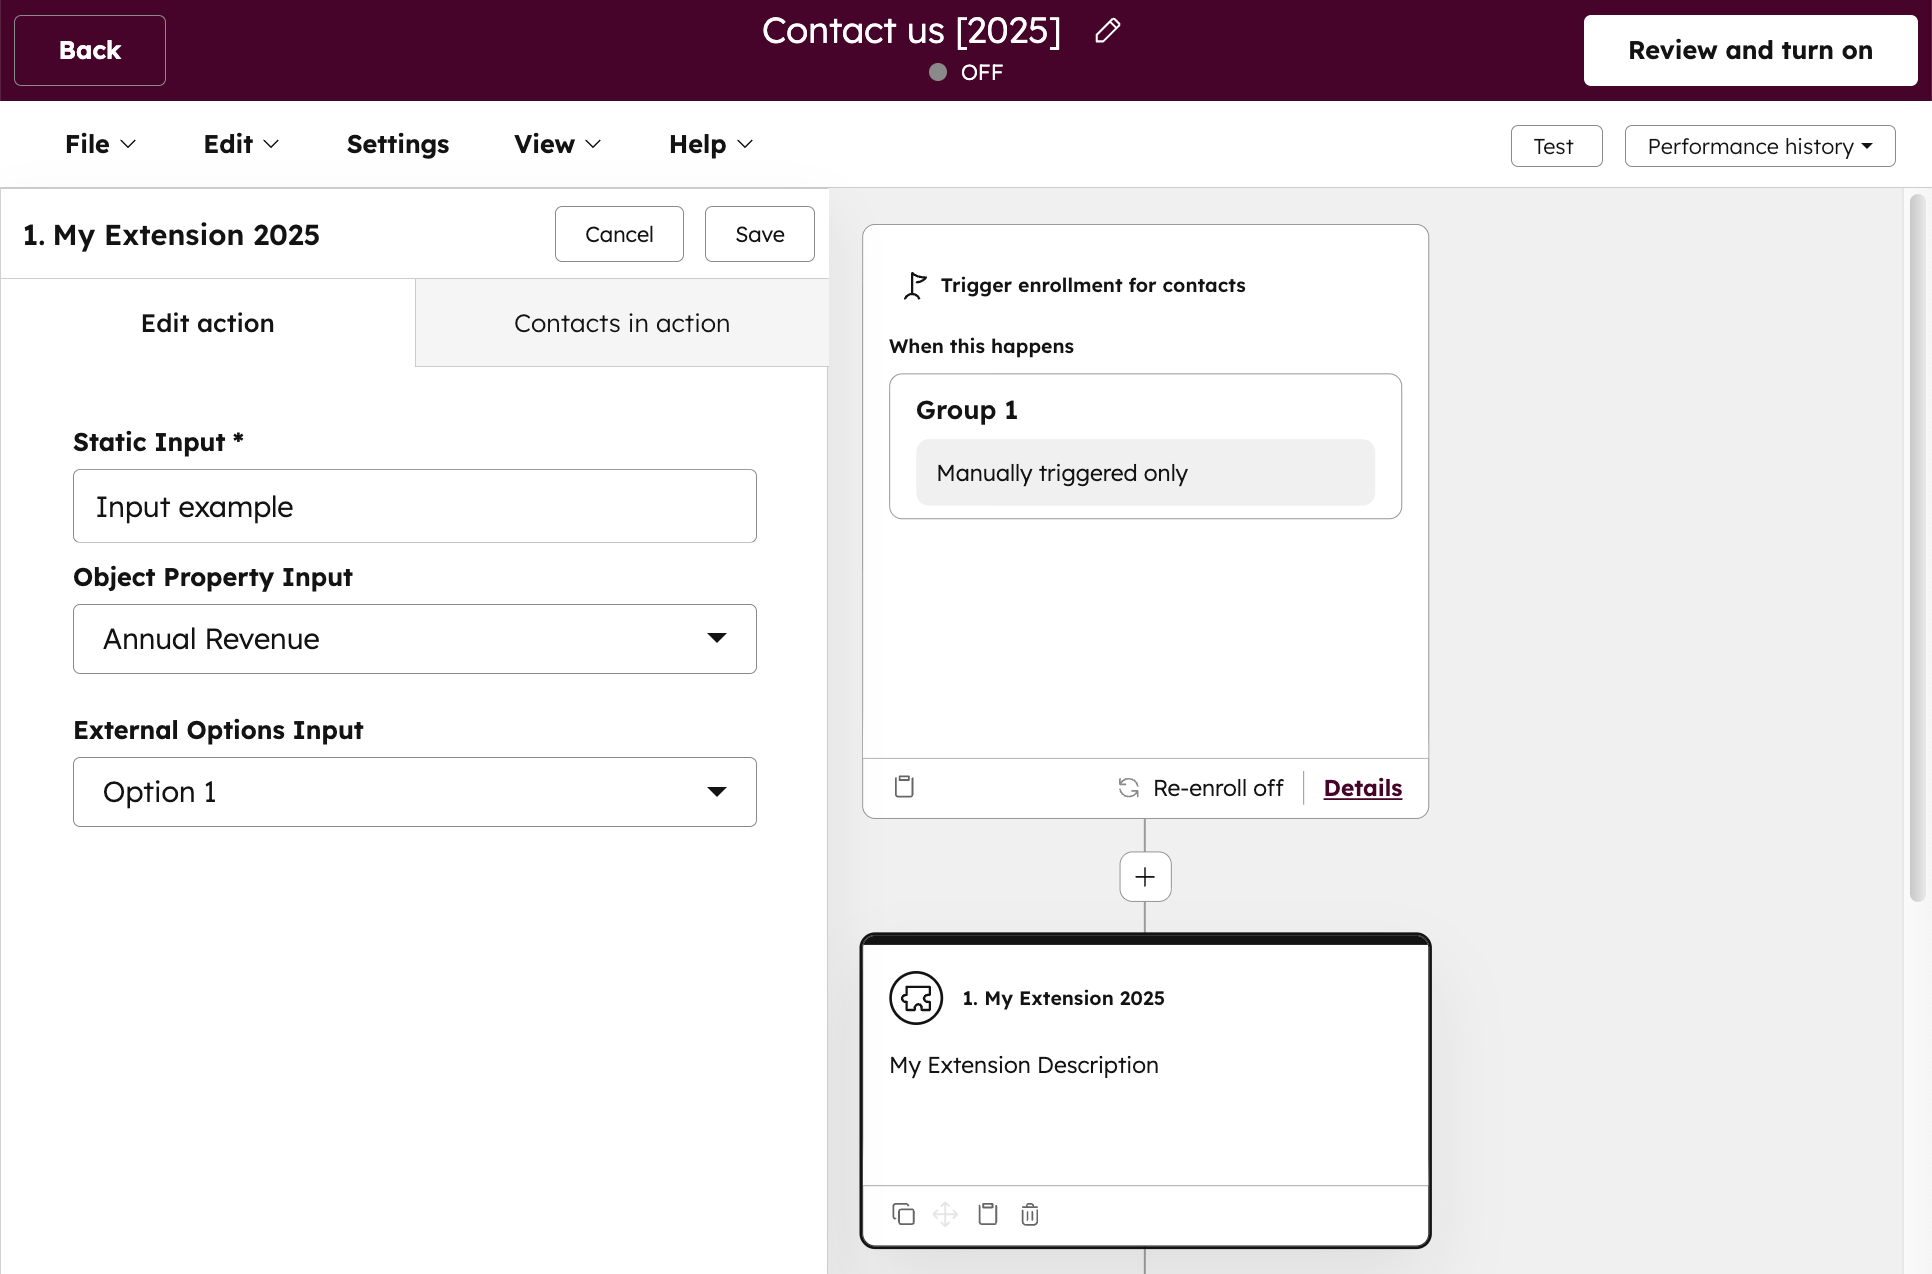
The code snippets below provide examples of several common use cases for custom actions, such as defining a widget or invoking a serverless function.Defining a widget
The following example sends data to create a new widget in your external system whenever the workflow is triggered. This example features the following input fields, created for contact and deal workflows:widgetName: a static input fieldwidgetColor: a dropdown field with optionswidgetOwner: a field representing a HubSpot owner.widgetQuantity: a field that’s derived from a property (that the user creating the workflow selects) on the enrolled object.
Invoking a serverless function
The following custom action example uses a serverless function to transform the payload that is sent to the configuredactionUrl.
Since the objectTypes field isn’t specified in the custom action definition, this action will be available in all workflows types.