Scope requirements
Scope requirements
v3 timeline events defined in a public app, you can use this API to send data from external systems into HubSpot for display in the activity timeline of contact, company, deal, and ticket records. If you’d prefer your data to be editable by users but none of the default CRM objects fit your needs, consider using custom objects.
Create an event template
Before you can start creating events, you must create an event template. Event templates describe actions your app will add to the timeline of a contact, company, deal, or ticket record in HubSpot. Examples of these actions include viewing a video, registering for a webinar, or filling out a survey. A single app can create up to 750 event templates. Event templates are created for contacts by default, but they can be created for companies, deals, or tickets using theobjectType field. See creating a timeline event template for more details.
Each event template has its own set of tokens and templates. You can use events created for contacts as criteria when creating new contact lists or workflows, such as: ‘Create a list of all contacts with a Video Like where the video name contains XYZ,’ where your event template is named “Video Like” and has an event token named “video name.”
Create event templates through the API
For this example, we’ll create a new ‘Example Webinar Registration’ event template. For authentication, use the developer API key found in your app developer account.<appId> with your own App ID, which can be found on both the My Apps and app details pages in your developer account. You’ll also need to replace <developerHapikey> with your own developer API key, which you can find by navigating to Apps > Get HubSpot API key.
The properties headerTemplate and detailTemplate could also be provided here. For more information, see Define header and detail templates below.
This POST request will return the full, saved event template definition. Be sure to note the id property in this response. This is the event template ID, which you’ll need to make any updates to this event template or tokens in the future.
You can see all event templates defined for an app via this GET command, which will also return the event template IDs:
Create event templates in HubSpot
In addition to using the API to create and manage timeline event templates, you can also manage event templates in your HubSpot developer account. In your app settings, navigate to Timeline events, then click Create event type to create a new event template for this app. If you’ve created any event templates before, you’ll see them here as well.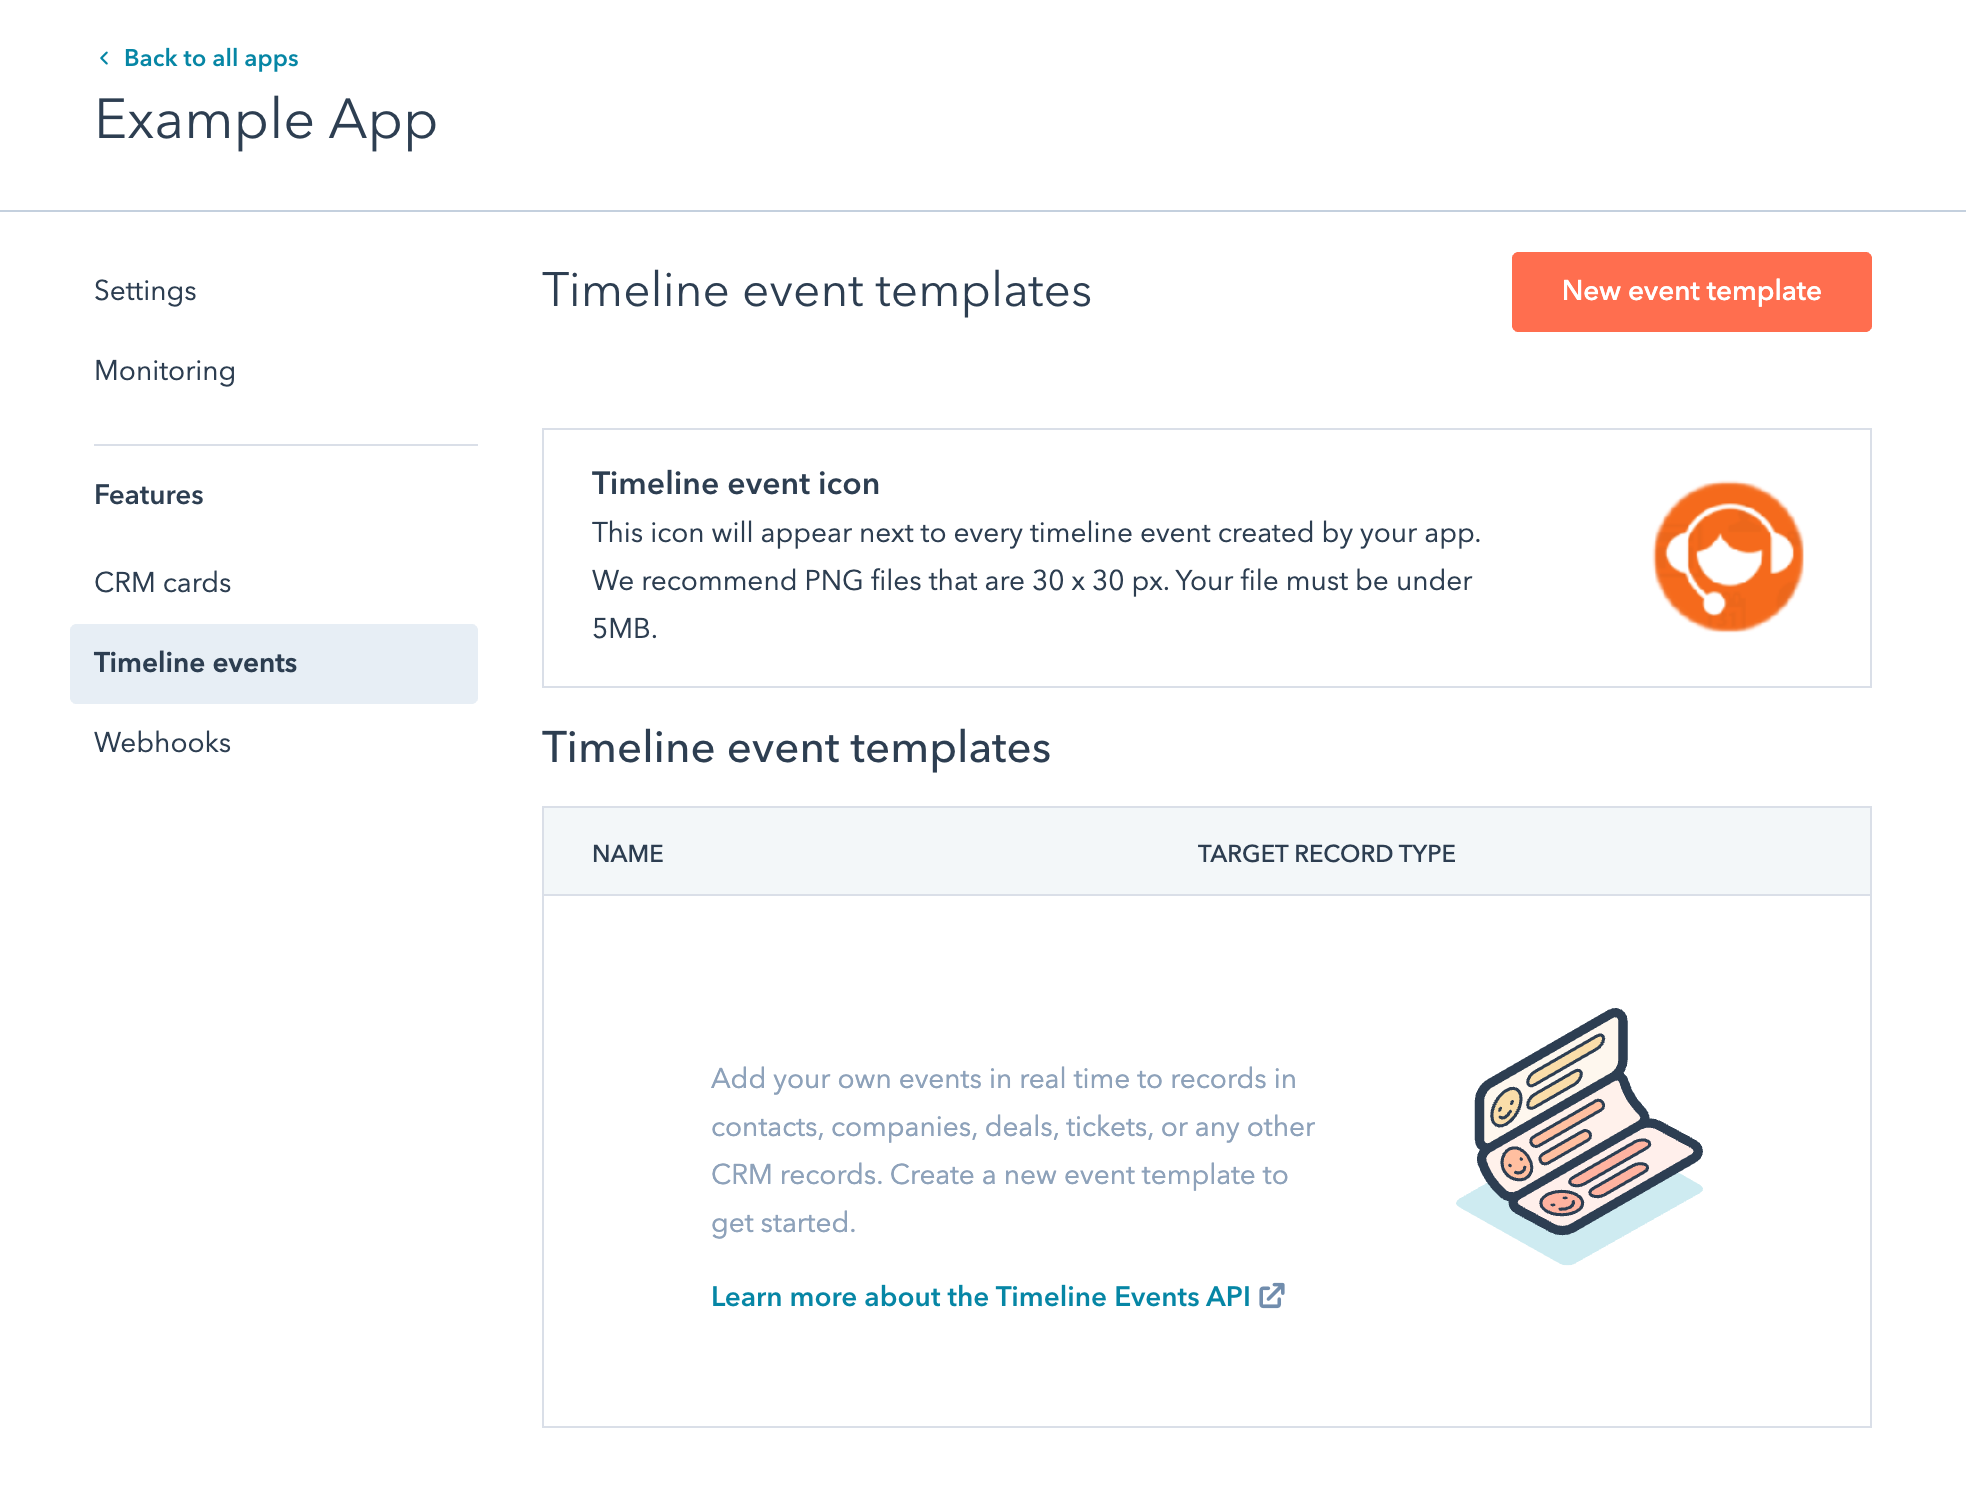
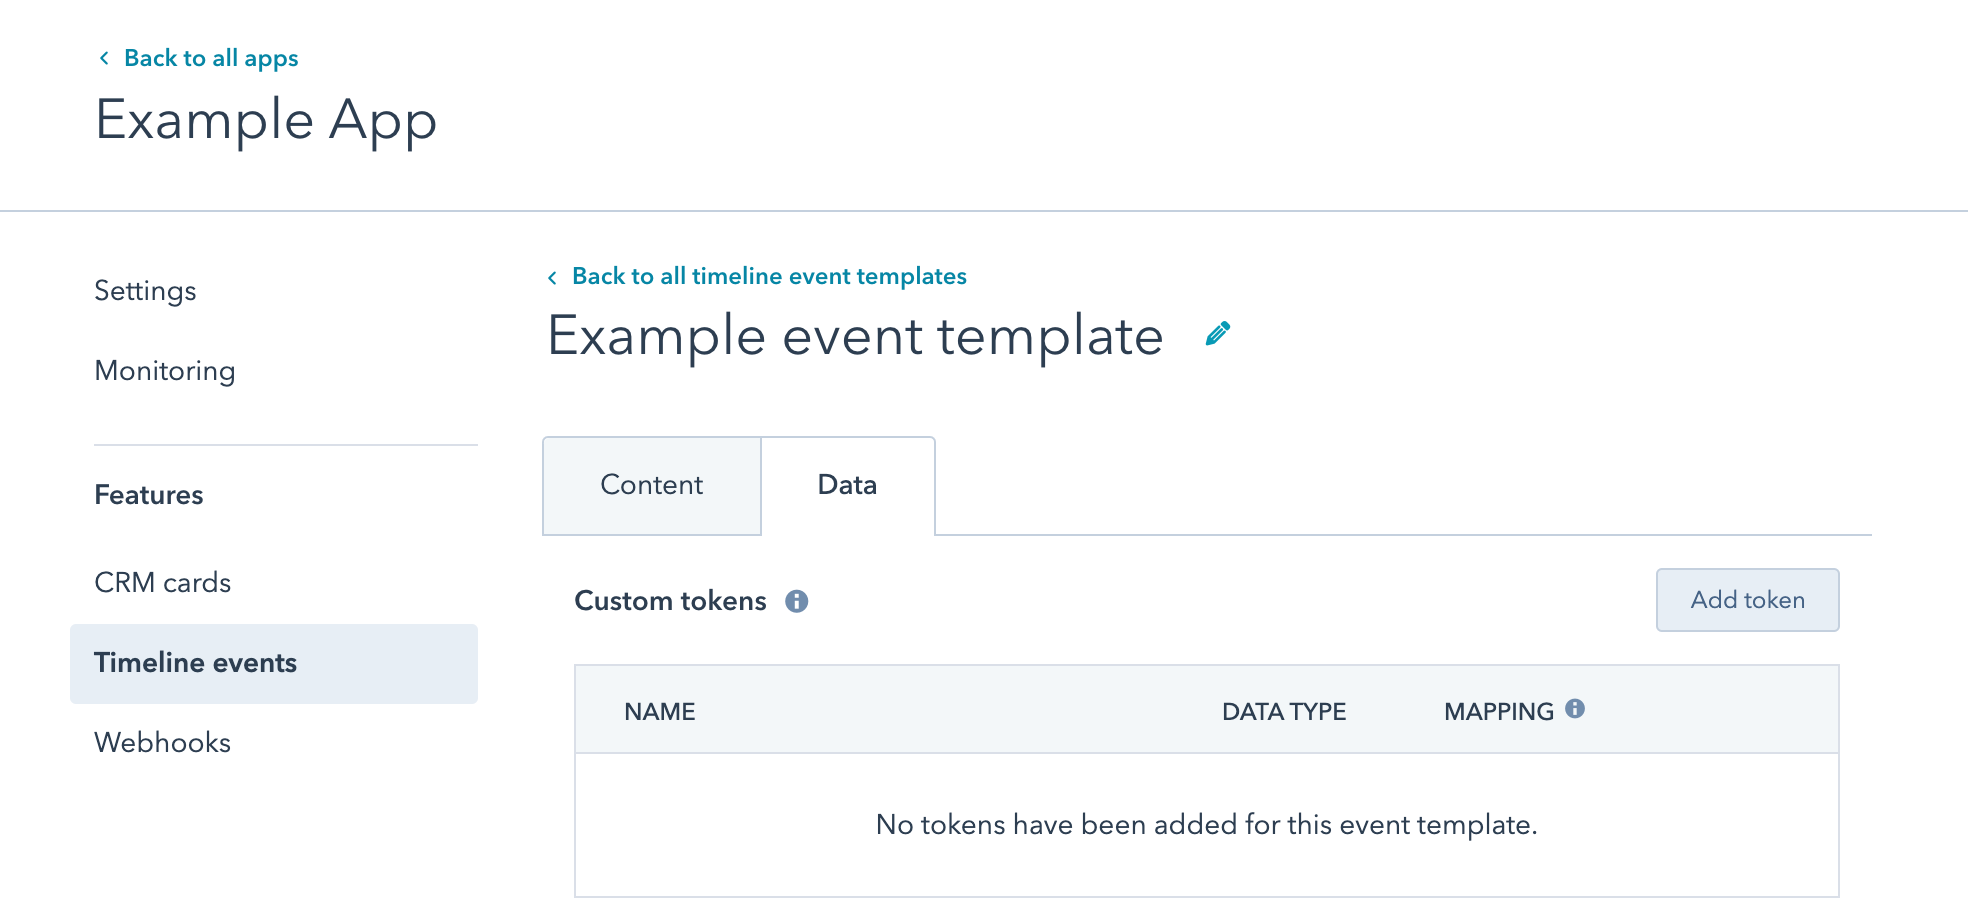
Define event tokens
Once you’ve defined an event template, you’ll likely want to define its tokens as well. Event template tokens allow you to attach custom data to events that can be displayed in the timeline and used for automation in workflows. For contacts, they can also be used for list segmentation. You can create up to 500 tokens per timeline event template.Create event tokens through the API
Using the event template ID created in Step 1, we’ll add some tokens to identify the webinar our contacts registered for.GET will return all tokens defined on an event template:
stringnumberenumeration— One of a set of options. See the webinarType example above.date— All dates must be in milliseconds in Unix time.
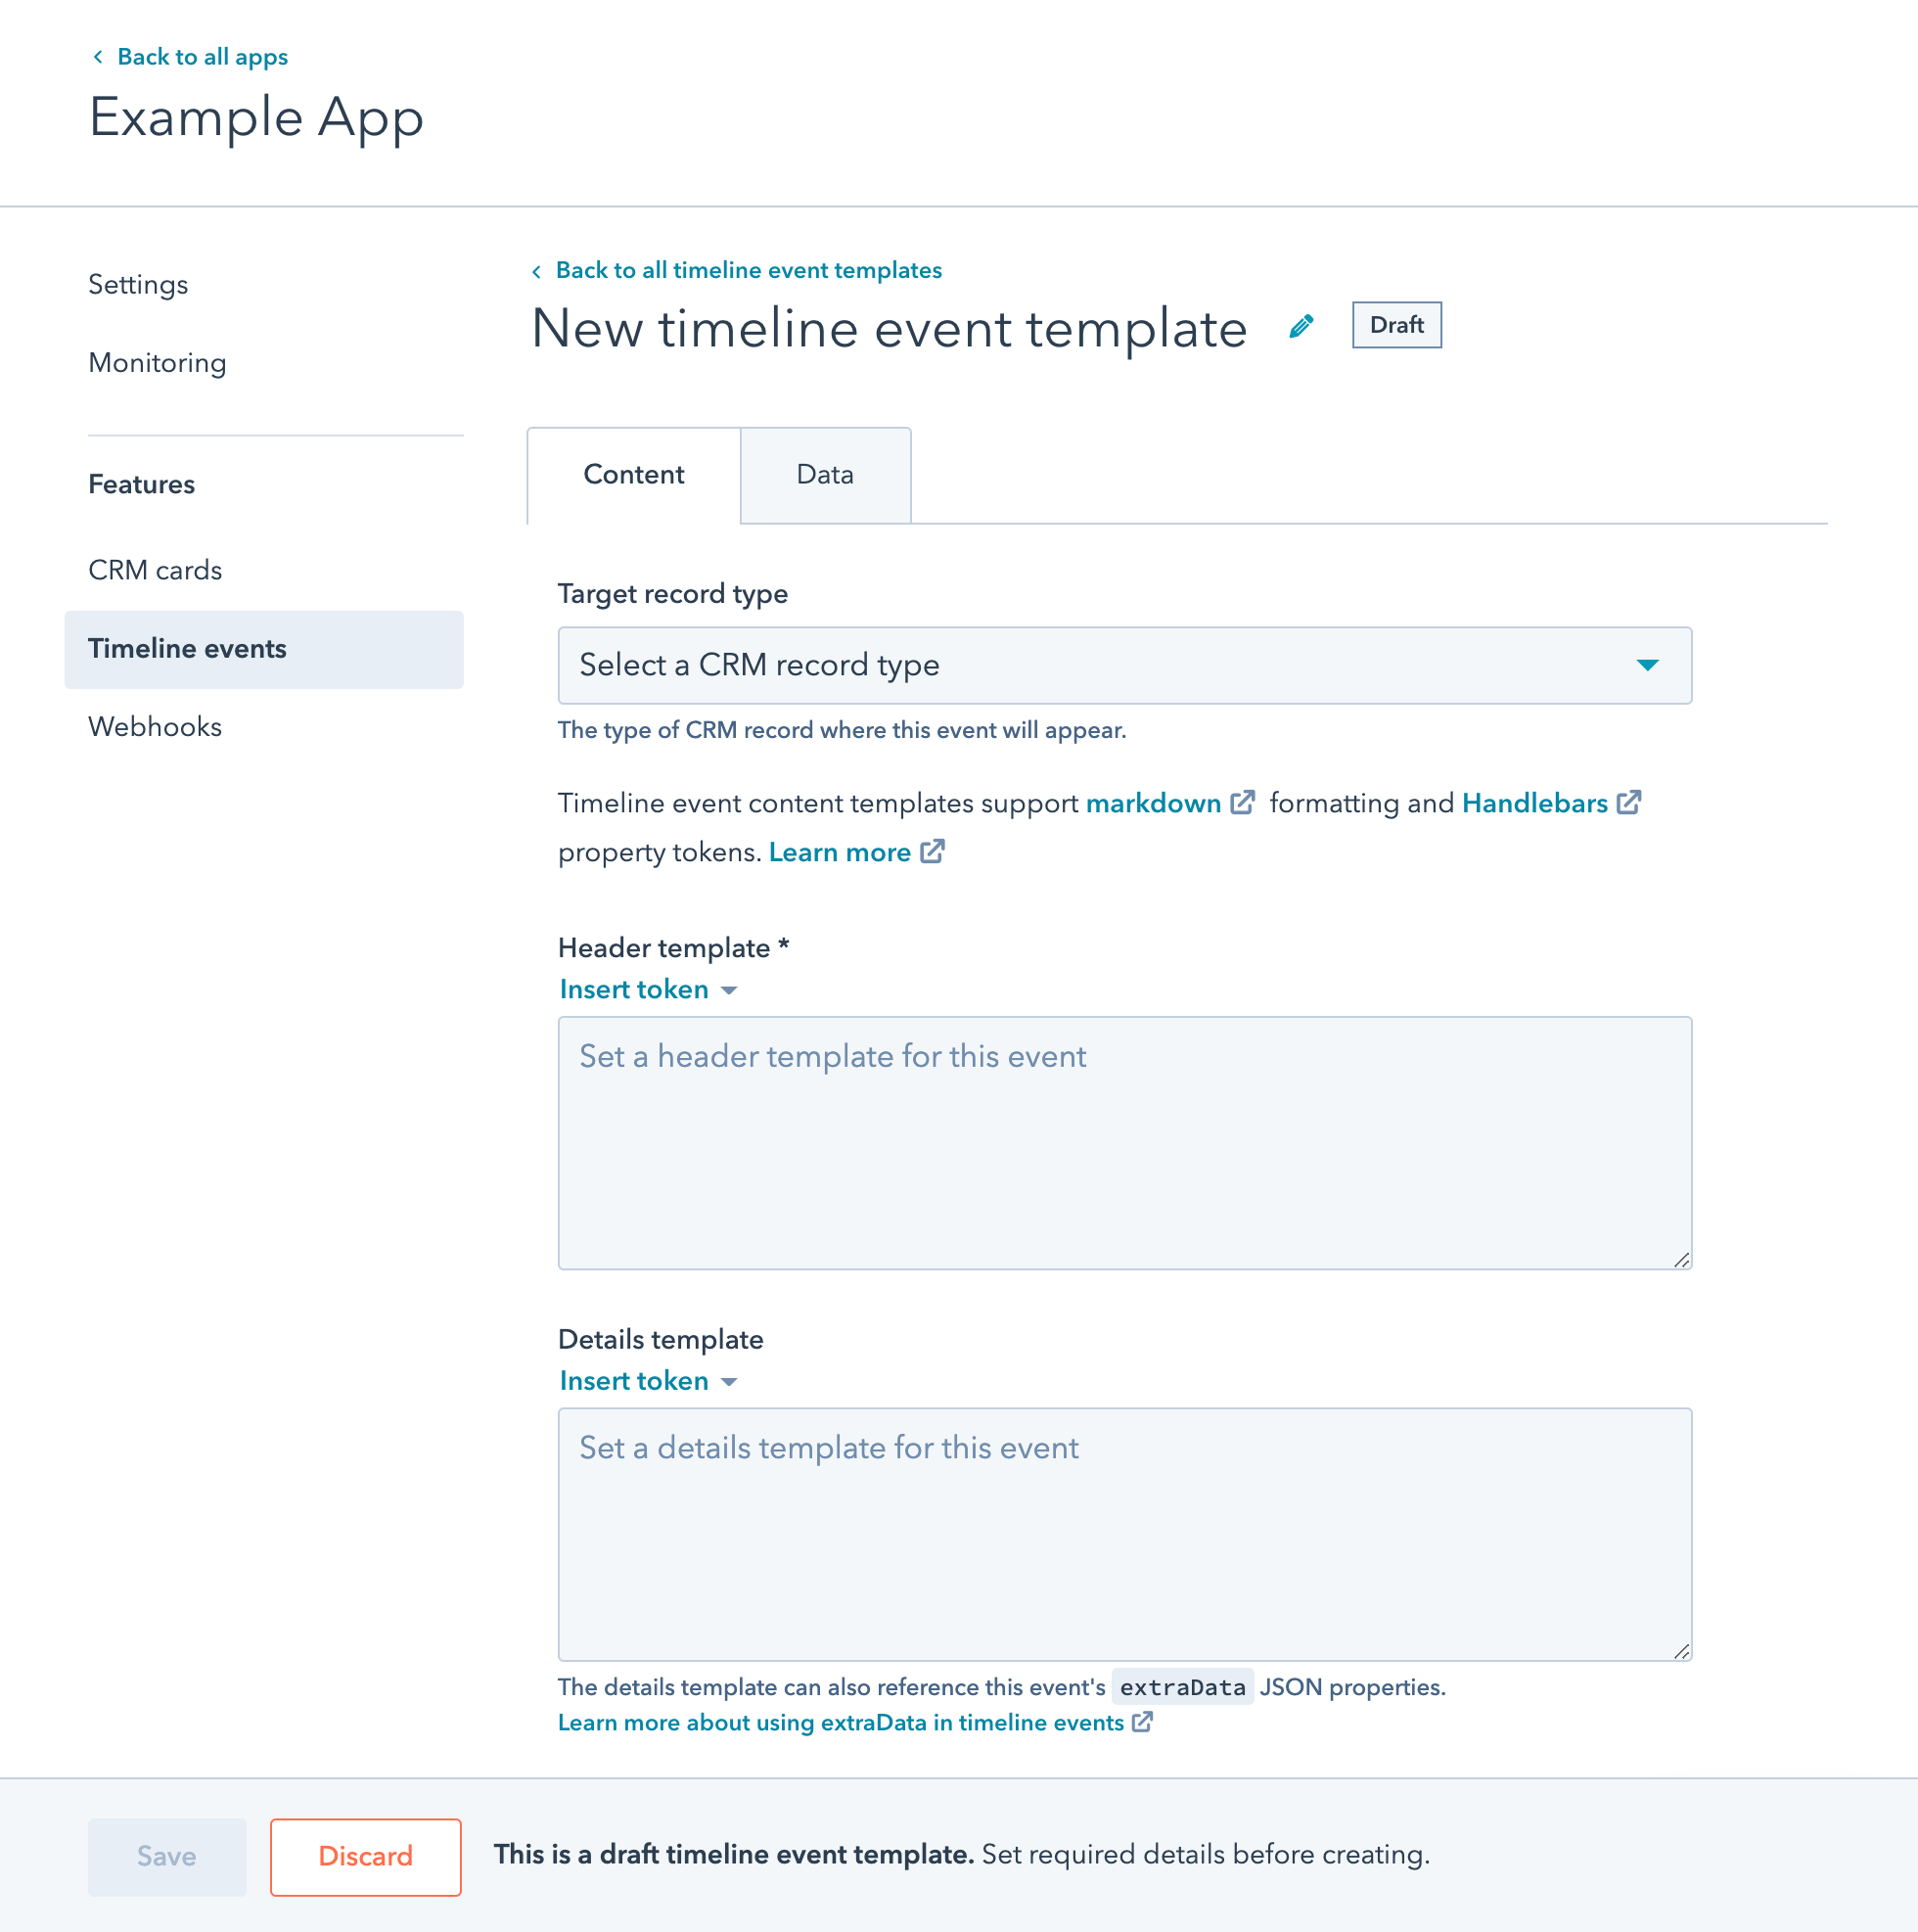
Define header and detail templates
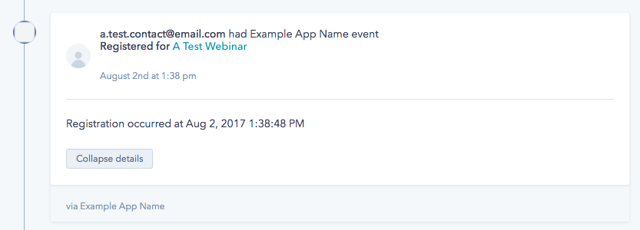
Header and detail templates define how to display a timeline event. You can specify Markdown documents with Handlebars templates. The header template should be a one-line description of the event; and the details template is the drill-down view of the event (examples below). The event tokens are passed as data to the templates. Using our example, you can reference thewebinarName token in the template by using {{webinarName}}
The extraData of an event (discussed below in “Understanding extraData”) can only be referenced in the details template.
Define header and detail templates through the API
Header and detail templates can be defined on the event template via the event template endpoints. For example, we can add templates to our ‘Example Webinar Registration’ by modifying that with aPUT:
#formatDate directive—it’s something we’ve defined to allow for user-friendly date formatting.
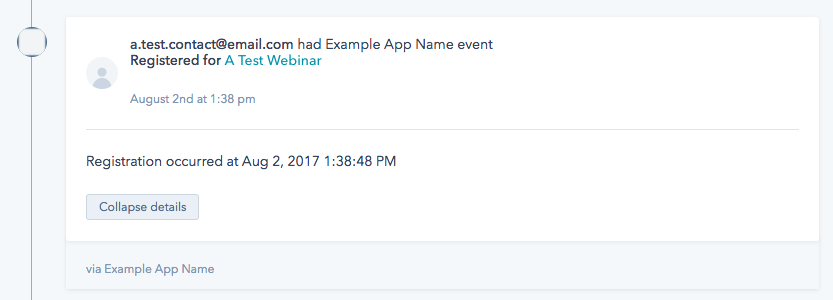
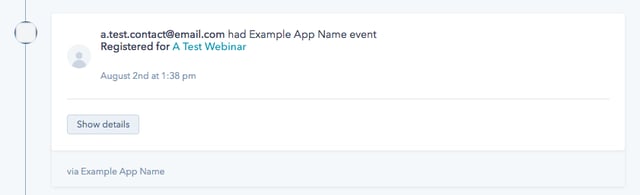
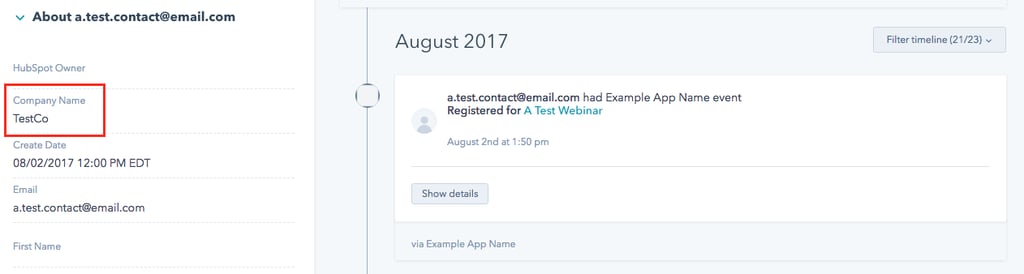
Once an event is created for a contact using this (see “Creating an event” below), here’s what will show up in that contact’s timeline:
Define all aspects of an event template in a single call
Now that you’ve seen each aspect of an event template is progressively defined, you can define it all in onePOST call.
Create an event
Now that an event template is set up with tokens and templates, we’re ready to create events for our customers’ contacts, companies, deals, and tickets. The examples below assume we’re working with thecontacts event template created above. If the event template above is not set up to have the tokens webinarName and webinarId, then you will get an error when trying to create the event. Here’s an example POST for creating an event:
a.test.contact@email.com’s timeline (assuming the templates in ‘Defining Templates’ above):
Set the event timestamp
The timestamp of the event determines where the event will appear in the record’s timeline. By default, the event timestamp is when the POST command is sent. You can customize the event time by providing it in the request body in a timestamp property:Associate an event with a CRM record
In order to create an event, you must be able to associate the event with a contact, company, deal, or ticket in the customer’s account. In the examples above, theobjectType was set to contact, and we used email to associate the event with a contact. Email addresses must be unique for contacts in HubSpot, so if there’s an existing contact with the provided email, that contact will be updated. If there isn’t an existing contact, a new contact will be created. By default, this new contact will only have the email contact property provided. Learn more about stamping event data onto contact properties to add additional data to contact properties.
vid to associate the event. In those cases, you would use objectId in the request JSON. You must include the vid of an existing contact, as you will not be able to create new contacts using objectId. This example uses the objectId instead of email:
utk. The usertoken is used by the HubSpot tracking code to track visitors, and is stored in the hubspotutk cookie. Use the utk parameter to associate an event with a contact by usertoken. Note: It is not possible to associate events with anonymous visitors using the usertoken, so if the event is associated using only the utk, and the provided usertoken is not already associated with a contact, no new contact would be created and the event would not be visible in HubSpot. However, the event would appear in the timeline if a new contact was associated with the usertoken through another means (usually through a form submission including the hutk, or through the identify method of the Tracking Code API). For this reason, we recommend including the email in addition to the utk to make sure that the event gets associated with a new or existing contact.
If you’re working with an event template for contacts, it’s possible to include multiple identification parameters with the event, so any combination of the email, objectId, and utk parameters may be included. If multiple parameters are included, the objectId (vid) will have the highest priority when determining which contact to associate with the event, followed by utk, with email being the lowest priority. This means that you can update the email address of an existing object by including a new email address in the email parameter with the vid of a known record in objectId. This example uses the email address and usertoken together:
objectId to associate the event with the company or deal. For companies, deals, and tickets, the objectId must be set to the id of the company, deal, or ticket you want to associate with the event.
In the example below, assuming the event template was set to the COMPANY objectType, this event would be associated with the company record with companyId 528253914:
Timeline extensions
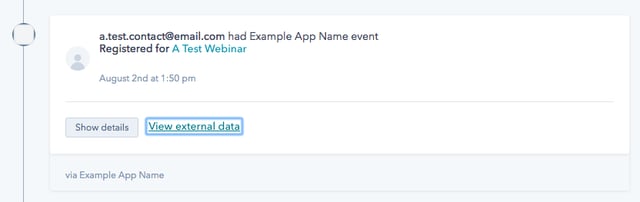
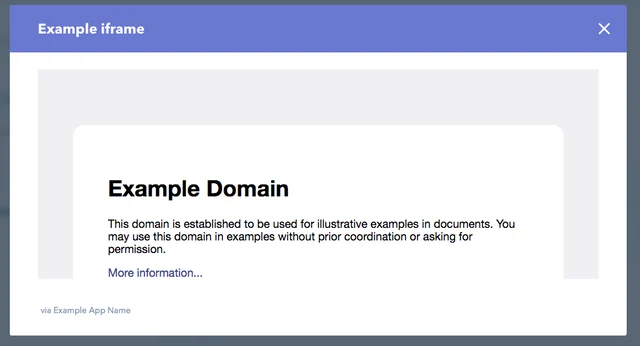
The timeline extensions feature can be used to display data from an external system using an iFrame. When included, the event will display a link that will open a modal window displaying the iFrame contents when clicked. The details for the iFrame are set in the timelineIFrame field, which is an object containing the following fields:linkLabel- The text used to display the link that will display the IFrame.headerLabel- The label of the modal window that displays the IFrame contents.url- The URI of the IFrame contents.width- The width of the modal window.height- The height of the modal window.
url:
Stamp event data onto CRM object properties
In many cases, you’ll want to modify the properties for the contacts, companies, deals, or tickets to which you’re adding events. This often happens in cases where adding the event will actually create a contact—you’ll likely want to update the first and last name properties on the contact so that you don’t just create a contact with only an email address and an event. You can stamp data onto the associated record from an event by mapping your custom event tokens to contact, company, deal, or ticket properties. Consider thisPUT command for updating a custom event template, note the objectPropertyName field:
objectPropertyName to map this custom event token to the contact Object zz_webinar_name property. This means that when we create a new event that specifies a webinarName token, the zz_webinar_name property of the associated contact will also be set. You can set these to custom or predefined HubSpot properties.
For example, let’s say we already created a companyName token referencing a zz_company_name custom property on the contact. Then creating an event like this causes the zz_company_name and zz_webinar_name properties to be set on the contact with the email address a.test.contact@email.com:
Understand extraData
You may need to add detailed data to an event that doesn’t fit the simple token-value structure used by the event template tokens. You may need to add a list or some hierarchical breakdown to an integration event. This is where extraData comes in.
You can add an extraData attribute to an event’s JSON body. The value of this extraData can be any valid JSON. For example:
extraData in a details template:
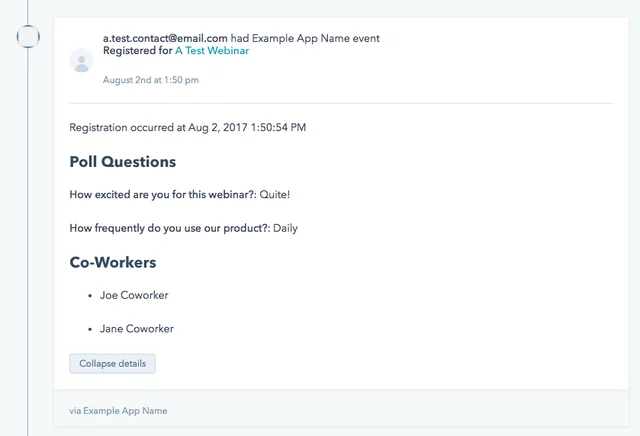
extraData attribute can only be referenced in the details template for an event. It can’t be used in either the header template or in list segmentation.
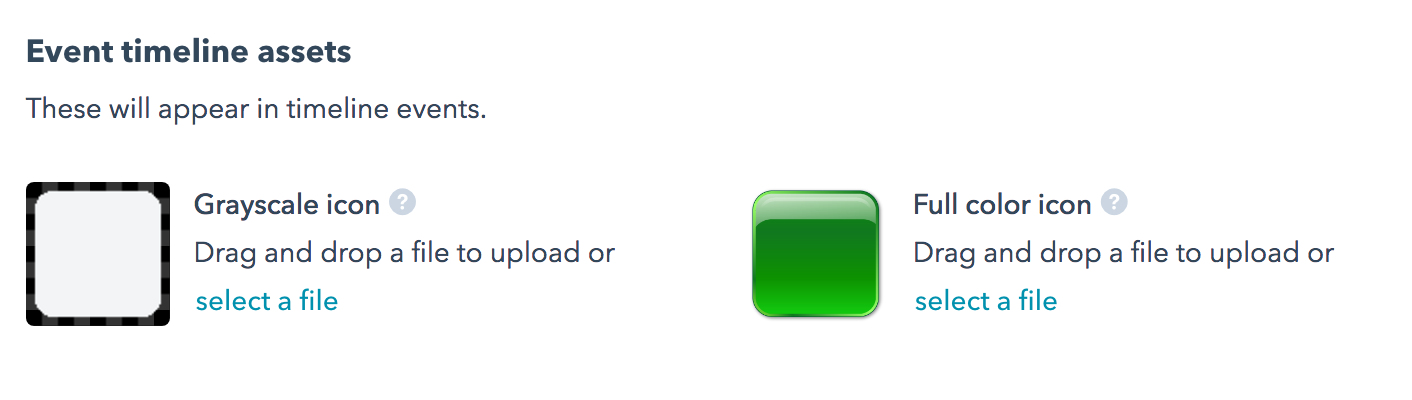
Set up a custom icon
To add visual appeal to your timeline items, you’ll want to add a custom icon. This image file for this icon should:- Have roughly square dimensions
- Have a transparent background
- Have the content in the center of the icon
- Be able to size down to 30x30 pixels
- Have a file size of 5MB or less
Limits
The following limits apply for the timeline events API.Event instance limits
When creating an event, each serialized event instance is subject to the following size limits of:- 500 bytes for the event instance ID
- 510 KB per property/token
- 1 MB in total size for the event instance
Limits for events in legacy public apps
Timeline events in a legacy public app are subject to the following limits:- You can create up to 750 timeline event types per public app.
- You can create up to 500 properties per timeline event type.
- Event instance size limits are the same as described in the Event instance limits section above.