Project-built vs. creating in HubSpot
Project-built vs. creating in HubSpot
There are two different ways you can create a private app in your account:
- Start with projects: you can create a project using the HubSpot CLI, which allows you to locally develop and configure the functionality of your app. Projects also enable a build and deploy process on HubSpot’s platform with the
hs projectCLI commands, which you’ll use for version control as you build. Once deployed to an account, you can view and manage the project, app, and any included UI extensions in HubSpot. This includes viewing build history and monitoring API calls. - Start within your HubSpot account: if you prefer to create an app directly in your HubSpot account, configuring any auth, webhook, or other settings in a guided setup flow, you can create private apps in the developer overview in your HubSpot account.
Feature limitations
- Webhooks are supported in private apps, but subscriptions cannot be edited programmatically via an API, and must instead be edited in your private app settings.
- Private apps do not support custom timeline events, if you plan on building an app using custom timeline events, you should create a public app instead. Learn more about the differences between private and public apps.
Create a private app
- In your HubSpot account, navigate to Development.
- In the left sidebar menu, navigate to Legacy apps.

- In the top right, click Create legacy app. Then, in the dialog box, select Private.
-
On the Basic Info tab, configure the details of your app:
- Enter your app’s name.
- Hover over the placeholder logo and click the upload icon to upload a square image that will serve as the logo for your app.
- Enter a description for your app.
- Click the Scopes tab.
- At the top of the page, click Add new scope.
-
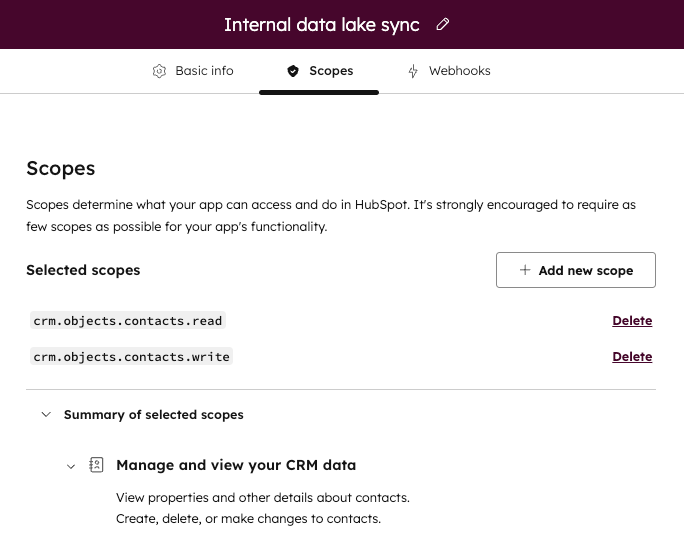
In the right panel, select the checkbox for each scope you want your private app to be able to access.
- You can also search for a specific scope using the Find a scope search bar. You can review a full list of available scopes in this reference article.
- Click Update when you’re done adding scopes. If you later decide that your app requires additional scopes, you can also configure them after your app is created.
- Review the scopes you’ve selected for your app. If you decide your app does not require a specific scope, you can click Delete next to that scope to remove it. You can also click Summary of selected scopes to view a breakdown of your app’s scopes and the associated access granted for each one.
- To subscribe to events triggered by changes to CRM objects in your account, you can set up webhook subscriptions for your private app. Note that you can also configure subscriptions after you’ve created the app:
- At the top of the page, Click the Webhooks tab.
- Under Target URL, enter the URL that HubSpot will make a
POSTrequest to when events trigger. - Click Create subscription.
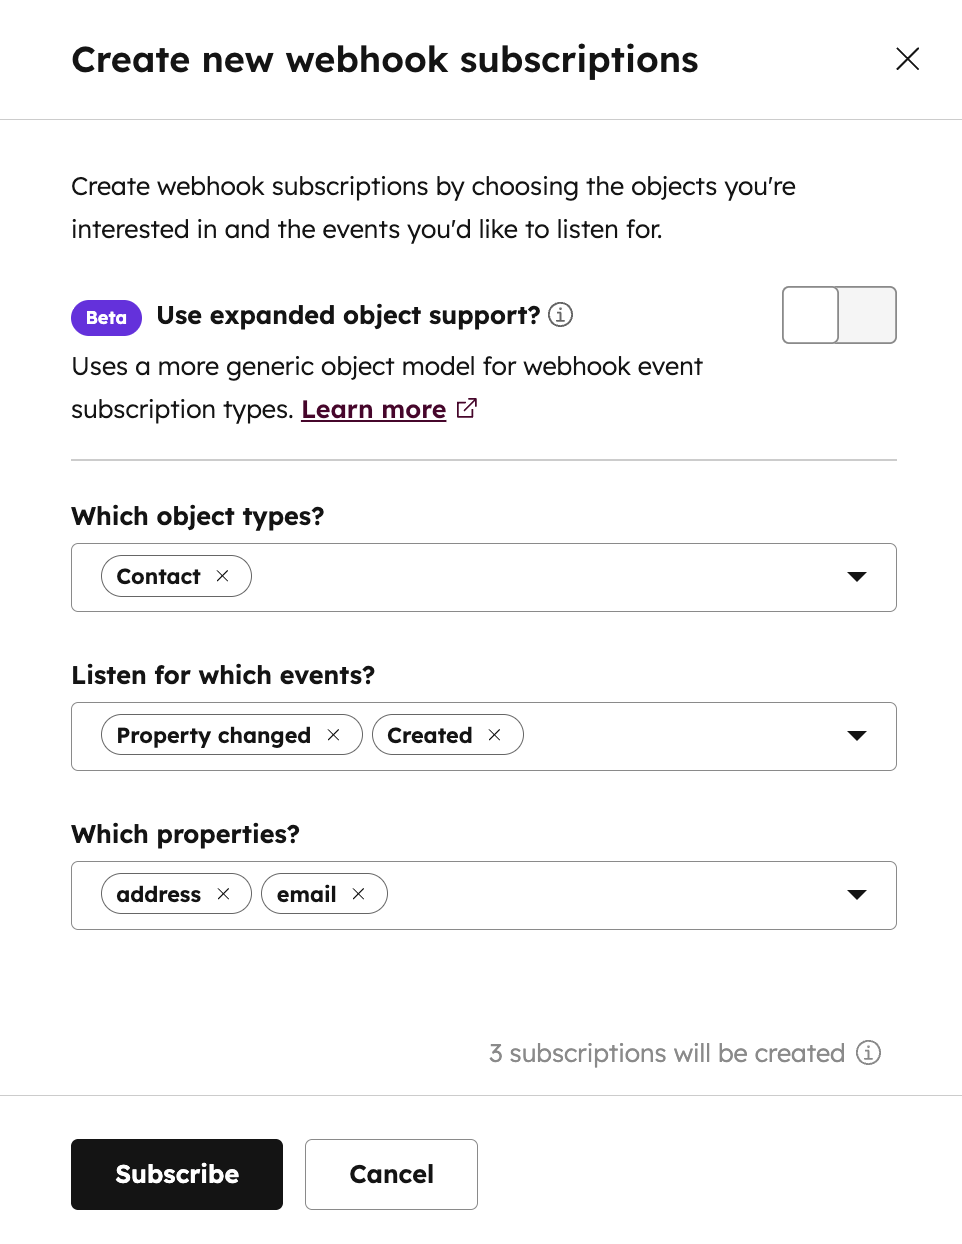
- In the right panel, select the object types that you want to subscribe to, then select the events associated with those objects (e.g., created, merged, deleted, etc.) that will trigger HubSpot to send a request to the endpoint you configured.
- If you select an object type that requires additional scopes you haven’t authorized, you’ll be prompted to add those scopes to your app.
- If you select Property changed for the event type, you can then select any of the associated object properties that you want to subscribe to changes for.
- Click Subscribe.
- After you’re done configuring your app, click Create app in the top right.
- In the dialog box, review the info about your app’s access token, then click Continue creating.
Make API calls with your app’s access token
To start making API calls, navigate to the details page of your app.- In your HubSpot account, navigate to Development.
- In the left sidebar menu, navigate to Legacy apps.
- Click the name of your app.
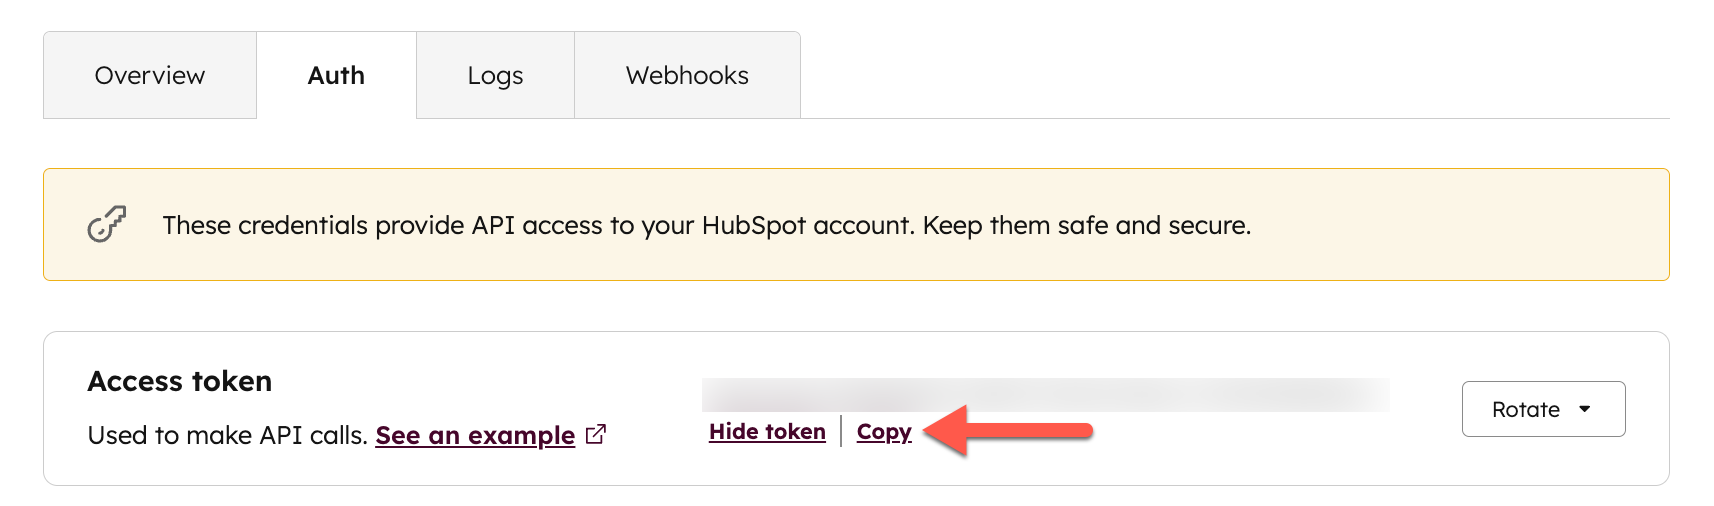
- Click the Auth tab, click Show token to reveal your access token. Click Copy to copy the token to your clipboard.
- You can then paste the access token to provide it to your developers, or use it yourself as you develop your app. When making a call to one of the HubSpot API endpoints, set the value of the Authorization field to Bearer [YOUR_TOKEN]. For example, if you’re making a call to the Contacts API using Node.js and axios, the request would look like the following:
- Private app access tokens are implemented on top of OAuth, so you can also make authenticated calls with your access token using one of HubSpot’s client libraries. For example, if you’re using the Node.js client library, you can instantiate an OAuth client by passing in your app’s access token:
- Private apps will lose access to scopes when your HubSpot account is downgraded and loses access to functionality.
- For example, if your account does not have access to HubDB, your private app will not have access to the HubDB scope.
- Private app access tokens will be updated to reflect available scopes in your HubSpot account and what you configured for the private app, but the token string itself will not change.
- If you remove the user who originally created a private app, some API calls that previously used the app’s access token will fail with a
resultof"USER_DOES_NOT_HAVE_PERMISSIONS".- If this issue occurs, it’s recommended that you follow the instructions in the section below to rotate your access token.
- If you mistakenly removed the user from your account, adding them back will also fix the issue.
View private app access token information
To view information about a private app’s access token, such as the Hub ID and scopes associated with the token, make aPOST request to /oauth/v2/private-apps/get/access-token-info. In the request body, include your access token:
Rotate your access token
If your access token is lost or otherwise compromised, you can rotate the token. A new access token will be created and the original access token will expire.- In your HubSpot account, navigate to Development.
- In the left sidebar menu, navigate to Legacy apps.
- Click the name of your private app.
- Next to your access token, click Rotate:
- If your token is compromised and you want to immediately revoke access, click Rotate and expire now.
- If there’s no imminent threat to your token, it’s still recommended that you rotate your token every six months. If you’re ready to initiate a regular rotation of your token, click Rotate and expire later, which will trigger an expiration of the token in 7 days.
- If your app is ready to transition earlier, you can click Expire now.
- If you decide you need more time, you can click Cancel rotation, which will cancel the expiration of the original token and revoke the new access token.

- A super admin initiated a rotation (either immediately or scheduled for 7 days from now).
- A super admin canceled a pending rotation.
- A super admin opted to expire an access token immediately by clicking Expire now instead of waiting 7 days for the token to expire.
- The app’s access token is about to expire in 24 hours.
- The app’s access token has been rotated and expired after 7 days.
- If you haven’t rotated your access token in over 180 days, super admins will also receive a reminder email to rotate your app’s access token.
View API call logs
To review the API calls your app has made in the past 30 days:- On the details page of your app, click the Logs tab.
- Review and filter your private app API calls:
- Click the Method and Response dropdown menus to filter your historical API calls by request method or response code.
- Click the start date or end date dropdown menus to narrow your call logs to a specific time range.
- You can also search for specific calls by URL in the Search by request URL search box.
- To export the API call logs, click Export logs (CSV). Then, specify a date range (up to the past 30 days) and click Export.
- In the pop-up box, select the date range of API calls you want to export and click Export. You will receive an email with a download link when the export is ready.
Private app limits
You can create up to 20 private apps in your HubSpot account. Each private app is subject to HubSpot’s API usage guidelines. The number of calls your private app can make is based on your account subscription and whether you’ve purchased the API add-on:| Product Tier | Per 10 Seconds | Per Day | |
|---|---|---|---|
| Private Apps | (Any Hub)Free and Starter | 100 / private app | 250,000 / account |
| (Any Hub)Professional | 190 / private app | 625,000 / account | |
| (Any Hub)Enterprise | 190 / private app | 1,000,000 / account | |
| Private Apps with API Limit Increase | (Any Hub)Free, Starter, Professional, and Enterprise | 200 / private app | 1,000,000 / account on top of your base subscription, for each limit increase. You can purchase a maximum of two API limit increase. |
GET request to /account-info/v3/api-usage/daily/private-apps to review the daily API usage for all private apps in your HubSpot account. Learn more about using the account information API.
Delete a private app
When you delete one of your private apps, its access token will be permanently revoked and you’ll no longer be able to use it to make API calls. To delete an app:- In your HubSpot account, navigate to Development.
- In the left sidebar menu, navigate to Legacy apps.
- Click the name of your private app.
- At the top of the page, click the Auth tab.
- At the bottom of the page, click Delete [name of your app].
- In the dialog box, type the name of your app to confirm its deletion, then click Delete.