> ## Documentation Index
> Fetch the complete documentation index at: https://developers.hubspot.com/docs/llms.txt
> Use this file to discover all available pages before exploring further.
---
id: 12c7c043-d907-4c54-8145-ca8a82d288fe
---
# Get started with app objects
> Learn how to build a new proof-of-concept app with support for app objects.
export const MinimumCliVersion = () =>
The latest version of the HubSpot CLI, which is recommended, is 8.8.0. You can check which version of the CLI you have installed by running hs --version.
;
This feature requires approval from HubSpot to use. If you're interested in applying to get access to app objects, or if you want to learn more about the functionality, please submit [this in-app form](https://app.hubspot.com/l/developer-overview/appObjectsEventsRequest).
Learn how to build a proof-of-concept app where you'll configure an app object that you can test and use in a developer test account.
You'll need the latest version of the [HubSpot CLI](/developer-tooling/local-development/hubspot-cli/install-the-cli) to create an app. In a terminal window, run the following command to update your version of the CLI:
```shell theme={null}
npm install -g @hubspot/cli@latest
```
You'll then need to authenticate your developer account by running the following command:
```shell theme={null}
hs account auth
```
* Follow the prompts to generate a Personal Access Key in your account, then copy and paste it into the terminal to save your configuration.
* It's recommended that you make this account your default by running the `hs account use` [command](/developer-tooling/local-development/hubspot-cli/reference#set-default-account).
Run the command below in your terminal to create a new project and marketplace app with either the currently compatible features or an app object reference schema. You'll be prompted to provide a **name** and **folder** for the project.
```shell theme={null}
hs project create --project-base app --features app-object --distribution marketplace
```
Apps created using version 2025.2 of the developer platform use source code files, typically defined as `-hsmeta.json` configuration files, to configure the various features of your project.
App features are then created using a combination of subfolders from the main `/src/app` directory and other configuration files as needed. A full reference for your project structure can be found in the \[app configuration] guide.
To configure your project:
* Add one or more valid redirect URLs to the `src/app/app-hsmeta.json` file based on your local (or another non-production) OAuth server configuration.
To get started, you can use the [sample OAuth Node.js example](http://github.com/hubspot/oauth-quickstart-nodejs) and run it locally. It's already set up to work with `https://localhost:3000/oauth-callback` as the redirect URL configured in the boilerplate example code from the `hs project create` command you ran in the previous step.
* Change the `uid` property of the app in the `src/app/app-hsmeta.json` file and the other `*-hsmeta.json` configuration files in your project.
UIDs are used as a unique identifier for all your project's components and features. Once a feature and UID are created, changing or modifying the UID in subsequent deployments will force the platform to recognize it as different from previous features, which may not be intended.
When using app objects for your app, only the authorized "name" property definitions will be allowed based on your object request. As part of app object approval process, you should have separately received confirmation of your app's approved "name". For reference, the fully-qualified name (FQN) for your app object will be `a_`. For example, if your `appId` is `16858319` and your `name` property was `CARS`, then your FQN would be `a16858319_cars`.
Next you'll configure your app object schema:
* The configuration for your app object is defined within the `/src/app/app-objects` directory of your project. This directory is automatically included within the boilerplate project created by running the `hs project create` command above.
```shell theme={null}
project-folder/
└──src/
└── app/
├── app-hsmeta.json
└── app-objects/
└── app-object-hsmeta.json
```
* Within the `/src/app/app-objects` directory, an example `app-object-hsmeta.json` is defined as a starting point for configuring your actual app object schema. Open this file in your preferred editor, then update the schema accordingly:
* Consult the [app object component definition](/apps/developer-platform/add-features/app-objects/reference#app-schema) reference file and customize the fields to the corresponding values for your app object.
* You should use the object name granted to your app during the preview process as the prefix for the file name, followed by `-object-hsmeta.json`. For example, if your app object name is "CAR", the resulting configuration file should be named `car-object-hsmeta.json`.
* Within the `config` object of your definition, the `name` field must match the name that was granted to your app during the review process, formatted in `UPPER_SNAKE_CASE` format.
* Note that once the properties and fields have been added to your app object schema and uploaded to your project in the next step, they cannot be removed.
For convenience during testing, the same app object name can be used across multiple apps to support your development lifecycle. Start with this proof-of-concept app, then as migrations become available, you can use the same name and schema definitions across your development, staging, and production apps. UIDs for each of these instances will need to be unique.
* When you're done editing your app object schema definition, and you're ready to commit these changes, run the following commands to save your changes:
```shell theme={null}
hs project upload
hs project deploy
```
* In a browser window, navigate to `https://app.hubspot.com/developer_projects/` to visit the projects UI and confirm the app and project have been created, built, and deployed correctly.
Now that your app object schema has been uploaded, you'll need to update the scopes defined in your `app-hsmeta.json` file to reflect the scopes created from the previous step. These scopes should be visible in the CLI logs after you ran `hs project upload`.
* Edit the `app-hsmeta.json` file and add the new scopes to the array of `requiredScopes` within the `auth` definition. For example, if your `appId` was `a12345`, then you'd edit the `auth` definition to the following:
```json theme={null}
"auth": {
"type" : "oauth",
"redirectUrls": ["http://localhost:3000/oauth-callback"],
"requiredScopes": [
"crm.objects.contacts.read",
"crm.objects.contacts.write",
"crm.app.objects.a12345_my_app_object.view",
"crm.app.objects.a12345_my_app_object.create",
"crm.app.objects.a12345_my_app_object.edit",
"crm.app.schemas.a12345_my_app_object.read",
"crm.app.objects.a12345_my_app_object.merge",
"crm.app.objects.a12345_my_app_object.delete",
"crm.app.schemas.a12345_my_app_object.properties.write"
],
"optionalScopes": [],
"conditionallyRequiredScopes": []
},
```
**Please note:**
-
Customers will only be able to see your app object if the `schemas.read`
scope is included in your app settings, and is requested during the
installation/reauthorization OAuth flow. It's highly recommended including
all app object scopes in your settings, but `schemas.read` is mandatory for
customers to be able to access it. For example, for an `appId` of `12345`,
you'd include `crm.app.schemas.a12345_MY_APP_OBJECT.read` as a required
scope.
-
Depending on the app you're testing with (prototype, development, staging,
production), you'll need to be mindful of where you add your scope
definitions. It's generally safest to include these
scopes as `conditionallyRequiredScopes` when you're ready for production.
Learn more about these [app scope types](/apps/developer-platform/build-apps/authentication/scopes#scope-types).
* When you're done adding these scopes and you've saved your changes, run the following commands to commit your changes to the platform:
```shell theme={null}
hs project upload
hs project deploy
```
After uploading your project, you'll need to get the auth details for your app to copy over to your OAuth configuration:
* Click **Projects** in the *Development* navigation menu.
* Click the **name** of your new project.
* Click the **UID** of your app, then click the **Auth** tab.
* Copy the *Client ID* and *Client secret* from your new app and paste them into the corresponding locations in your local OAuth server's configuration, then restart your OAuth server.
Your app and the corresponding app object are now ready to test with an installed account.
If don't already have a [test account](/getting-started/account-types#developer-test-accounts), you can create one in HubSpot:
* Navigate to **Test accounts** in the *Development* navigation menu, then click **Create developer test account**. Follow the prompts to create your new test account.
* In the left sidebar menu, navigate to **Projects**, click the **name** of your new project, then click the **UID** of your app in the component list.
* On the *Auth* tab, copy your app's install link.
* Use this link to install the app in your developer test account.
* Open the test account and navigate to the *Connected Apps* page, where you should see your installed app listed.
* In your test account, navigate to **CRM** > **Contacts**, then click the CRM object dropdown menu and confirm that your app object is available.
* You can then confirm that your schema definition conforms to your configuration file by creating a new record of your app object.
 Now that you've successfully created your app object and you've tested it in a developer test account, you can use the OAuth access token associated with the installed test account to make requests to update data in the account directly via the objects API.
Read through the [objects API](/guides/crm/using-object-apis) for more information on the API, but any requests specific to your app object will follow the same conventions as other standard objects in HubSpot. You'll need to use your app object's `objectTypeId` or `fullyQualifiedName` as the `objectType` path parameter in your request.
For example, the following code block demonstrates how to make cURL request to create a new record of your app object:
```shell theme={null}
curl --request POST \
--url https://api.hubapi.com/crm/v3/objects/ \
--header 'authorization: Bearer YOUR_ACCESS_TOKEN' \
--header 'content-type: application/json' \
--data '{
"properties": {
"additionalProp1": "string",
"additionalProp2": "string",
"additionalProp3": "string"
}
}'
```
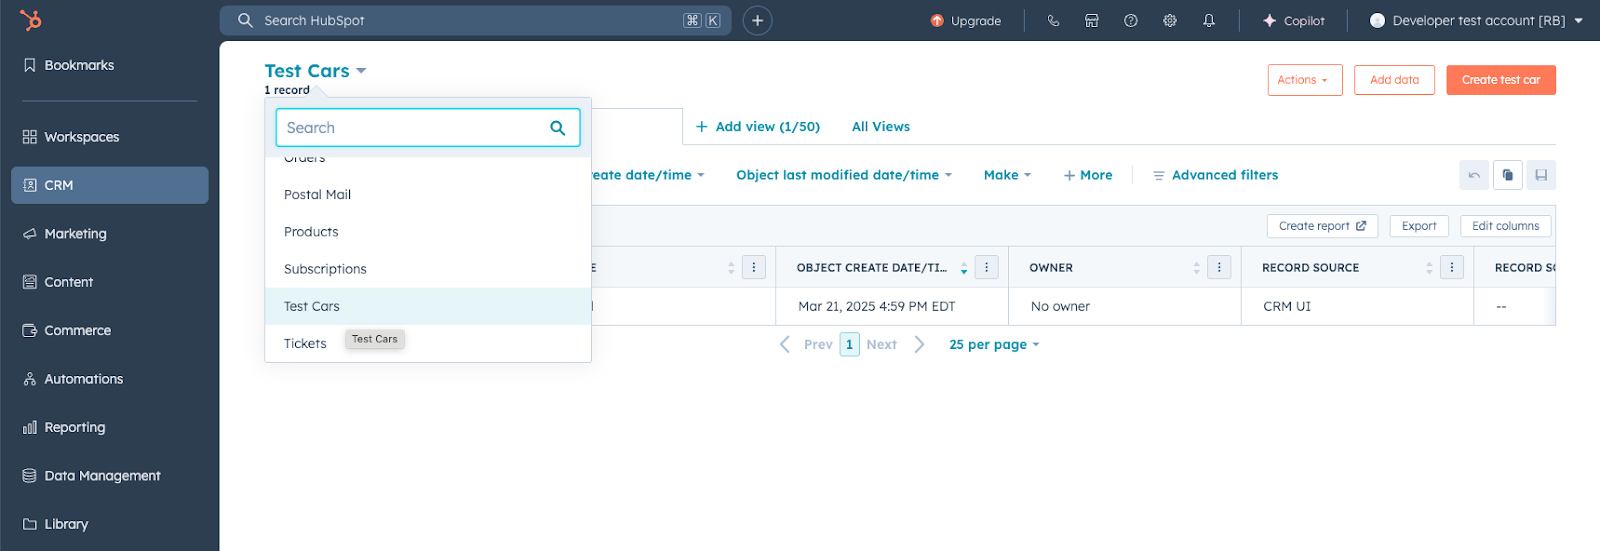
You can find the `objectTypeId` for your app object by navigating to the records index page:
* Navigate to **CRM** > **Contacts** in the developer test account that you installed your app.
* Click the **dropdown** menu at the top of the page and select your **app object**.
* The `objectTypeId` will appear in the URL between the `/objects//views` portion.
## Next steps
Check out the [reference documentation](/apps/developer-platform/add-features/app-objects/reference) for next steps on how to use app objects with different developer platform features:
* [Configure an app card](/apps/developer-platform/add-features/app-objects/reference#app-card-schema)
* [Configure webhook subscriptions](/apps/developer-platform/add-features/app-objects/reference#webhooks-component-definition)
* [Enable associations with other CRM object types](/apps/developer-platform/add-features/app-objects/reference#app-object-associations)
Now that you've successfully created your app object and you've tested it in a developer test account, you can use the OAuth access token associated with the installed test account to make requests to update data in the account directly via the objects API.
Read through the [objects API](/guides/crm/using-object-apis) for more information on the API, but any requests specific to your app object will follow the same conventions as other standard objects in HubSpot. You'll need to use your app object's `objectTypeId` or `fullyQualifiedName` as the `objectType` path parameter in your request.
For example, the following code block demonstrates how to make cURL request to create a new record of your app object:
```shell theme={null}
curl --request POST \
--url https://api.hubapi.com/crm/v3/objects/ \
--header 'authorization: Bearer YOUR_ACCESS_TOKEN' \
--header 'content-type: application/json' \
--data '{
"properties": {
"additionalProp1": "string",
"additionalProp2": "string",
"additionalProp3": "string"
}
}'
```
You can find the `objectTypeId` for your app object by navigating to the records index page:
* Navigate to **CRM** > **Contacts** in the developer test account that you installed your app.
* Click the **dropdown** menu at the top of the page and select your **app object**.
* The `objectTypeId` will appear in the URL between the `/objects//views` portion.
## Next steps
Check out the [reference documentation](/apps/developer-platform/add-features/app-objects/reference) for next steps on how to use app objects with different developer platform features:
* [Configure an app card](/apps/developer-platform/add-features/app-objects/reference#app-card-schema)
* [Configure webhook subscriptions](/apps/developer-platform/add-features/app-objects/reference#webhooks-component-definition)
* [Enable associations with other CRM object types](/apps/developer-platform/add-features/app-objects/reference#app-object-associations)