> ## Documentation Index
> Fetch the complete documentation index at: https://developers.hubspot.com/docs/llms.txt
> Use this file to discover all available pages before exploring further.
---
id: 68775ade-1178-4c96-900b-3f25b2fae836
---
# Create an app card
> Learn how to create an app card on the latest version of the developer platform.
export const MinimumCliVersion = () =>
The latest version of the HubSpot CLI, which is recommended, is 8.8.0. You can check which version of the CLI you have installed by running hs --version.
;
You can create a React-based app card for projects on the latest versions (`2025.2` and `2026.03`) of the developer platform. App cards work similarly to existing cards you may have [built for legacy apps](/apps/developer-platform/add-features/ui-extensions/extension-points/app-cards/reference), with some minor modifications to your configuration files.
This guide walks you through how to create a boilerplate app card in an existing app, along with how to upload and preview your card in HubSpot. You'll then upload all these files to your project, where you can preview the card in a developer test account where you've installed your app.
## Prerequisites
* If you haven't done so yet, [create an app](/getting-started/quickstart).
* It's recommended to [create a configurable test account](/developer-tooling/local-development/configurable-test-accounts) so that you can build and test in an isolated environment.
* Ensure you've installed the latest version of the [HubSpot CLI](/developer-tooling/local-development/hubspot-cli/install-the-cli).
## Create an app card
To add a new app card component to your project, use the terminal to navigate into your local project directory, then run the following command:
```shell theme={null}
hs project add
```
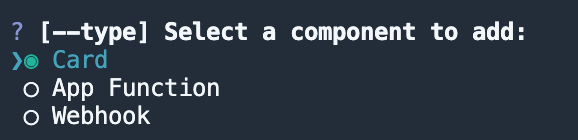
Then, when prompted to select a component to add, select **Card**.
If your project doesn't contain any app cards yet, a `cards/` directory will be created for you in the `app/` directory. The `cards/` directory will contain:
* A JSON card configuration file (`*-hsmeta.json`)
* A React component file (`.jsx`)
* A `package.json` file
If your project already includes app cards, the above files will be added to the existing `cards/` directory (excluding `package.json` if it already exists).
```shell theme={null}
myProject
└── src/
└── app/
└── cards/
├── NewCard-hsmeta.json
├── NewCard.jsx
└── package.json
```
Learn more about these files in the [app cards reference documentation](/apps/developer-platform/add-features/ui-extensions/extension-points/app-cards/reference).
To upload the new card to your HubSpot account:
* Run `hs project install-deps` to install the dependencies needed for the app card. This will update the `cards/` directory with the necessary Node modules and a `package-lock.json` file, which will speed up the build of the uploaded app card extension and ensure that any dependencies in your local development environment and production match.
* Then, run `hs project upload` to upload the project to your default account.
* To specify a different account (such as a separate test account), include the `--account` flag and specify the HubID of the account. For example `hs project upload --account 123456`.
* If the project hasn't been uploaded before, you'll be prompted to confirm that you want to create the project in your account. Otherwise, the terminal will display the build and deploy status, then confirm once the project has been successfully uploaded.
## View the card in HubSpot
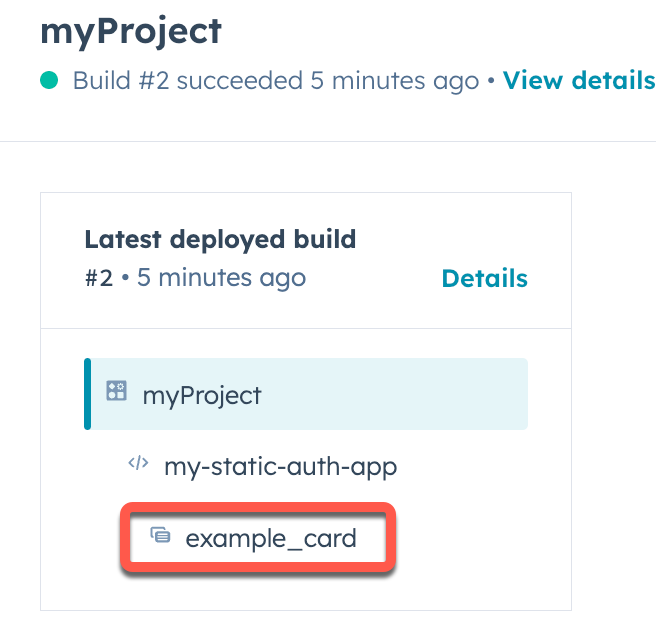
After uploading the project, you can view it in HubSpot by running `hs project open`. A browser tab will open to the project details page, where you can view your project, app, and its new card component.
 If you haven't yet installed the app in the account, you'll need to do so before you can view the card. To install the app:
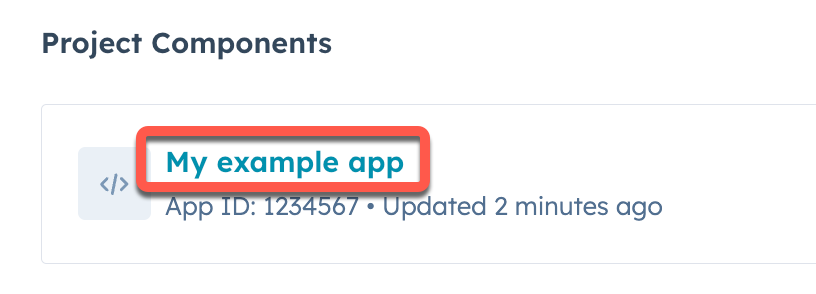
* Click the **name** of the app in the project summary on the left, or under *Project components*.
If you haven't yet installed the app in the account, you'll need to do so before you can view the card. To install the app:
* Click the **name** of the app in the project summary on the left, or under *Project components*.
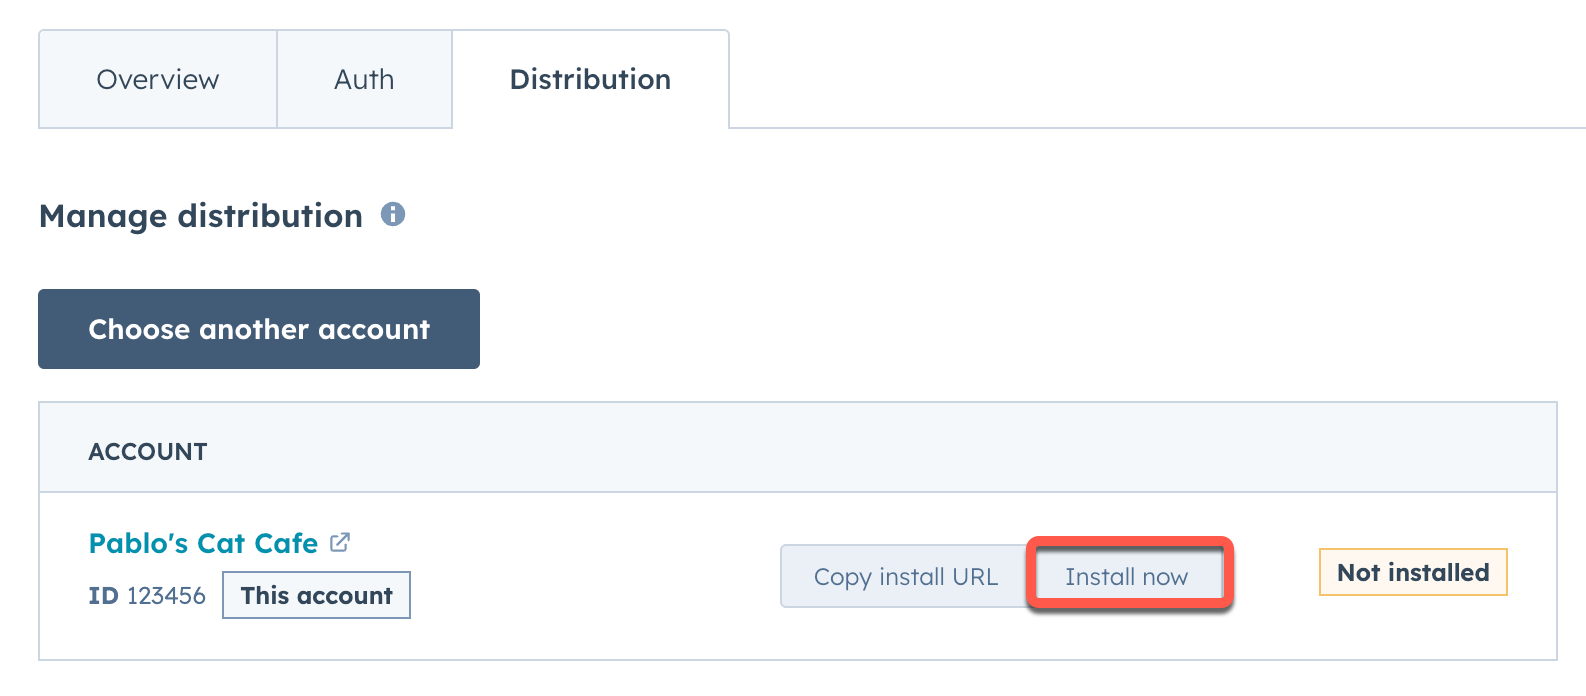
 * Click the **Distribution** tab.
* Click **Install now**.
* Click the **Distribution** tab.
* Click **Install now**.
 The boilerplate app card created by `hs project add` is configured to appear in the middle column of contact records. To display the card, you'll first need to add it to the contact record view:
* In your HubSpot account, navigate to **CRM** > **Contacts**.
* Click the **name** of a contact.
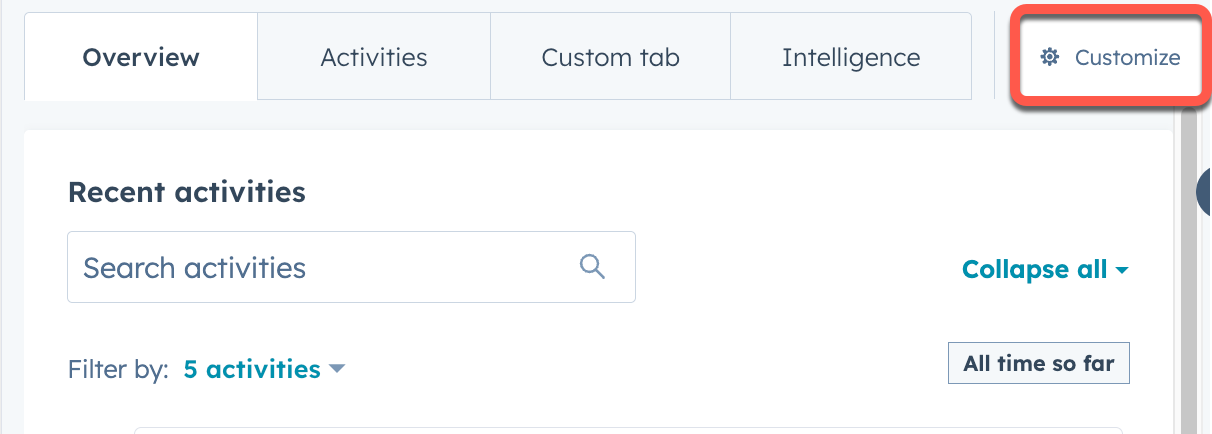
* At the top of the middle column of the contact record, click **Customize**.
The boilerplate app card created by `hs project add` is configured to appear in the middle column of contact records. To display the card, you'll first need to add it to the contact record view:
* In your HubSpot account, navigate to **CRM** > **Contacts**.
* Click the **name** of a contact.
* At the top of the middle column of the contact record, click **Customize**.
 * Click **Default view**.
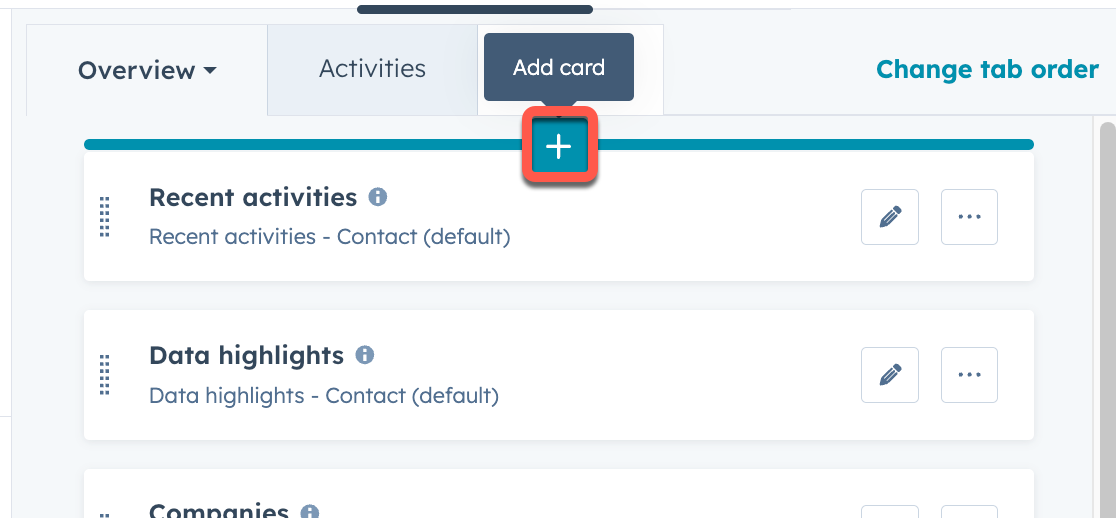
* Select the **tab** that you want to add the card to. You can then hover over the location where you want to place the card and click the **plus button**. This can be adjusted at any time after initial setup.
* Click **Default view**.
* Select the **tab** that you want to add the card to. You can then hover over the location where you want to place the card and click the **plus button**. This can be adjusted at any time after initial setup.
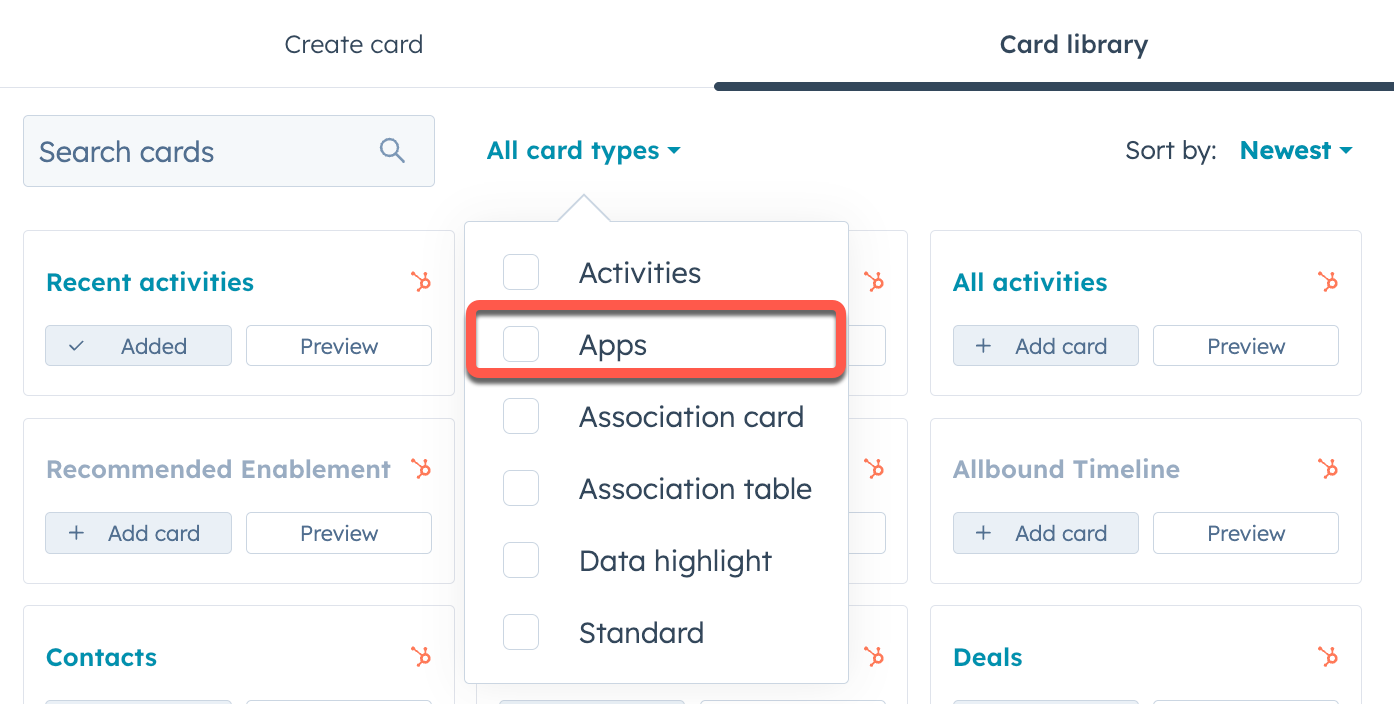
 * In the right sidebar, click the **Card library** tab. Then, click the **Card types** dropdown menu and select **App** to filter for app cards.
 * Click **Add card** under the app card you created, then click the **close** button in the top right of the sidebar.
* In the top right, click **Save and exit**.
You'll then be redirected back to the contact record where your card will now appear. Keep the contact record page open in your browser for the next step, when you'll start the local development server.
## Start local development
With your app card added to all contact records, you can now continue to build the app card. The easiest way to quickly iterate is to start the local development server with the `hs project dev` command:
* In the terminal, run `hs project dev`.
* Follow the terminal prompts to select the **account** you want to use for local development.
* The terminal will start the local development server, then confirm once it's running.
* With the server running, navigate back to the browser tab with the contact record and reload the page.
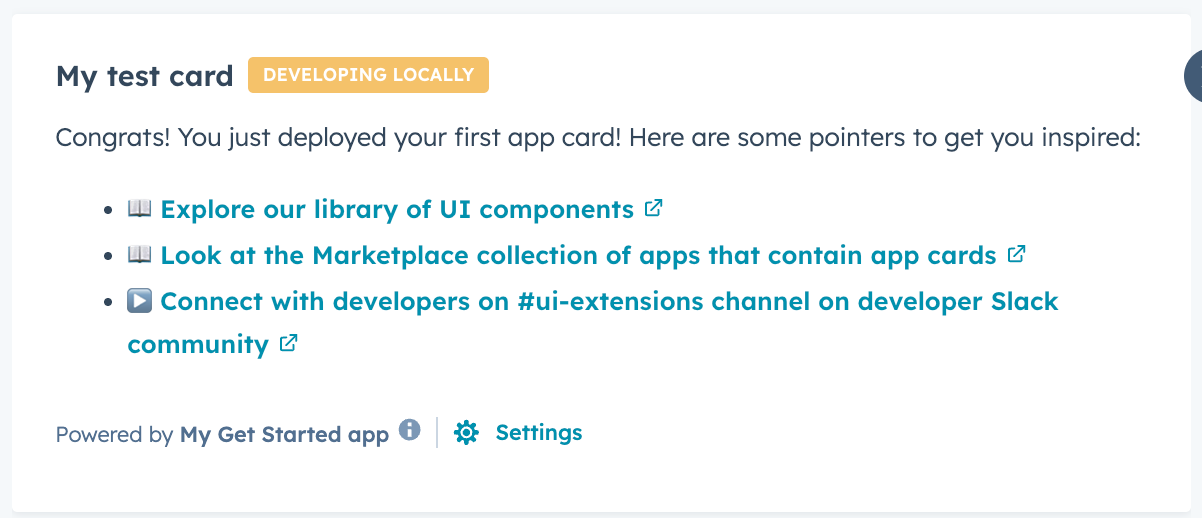
The app card will display with a `Developing locally` tag, indicating that the local development server is ready.
* Click **Add card** under the app card you created, then click the **close** button in the top right of the sidebar.
* In the top right, click **Save and exit**.
You'll then be redirected back to the contact record where your card will now appear. Keep the contact record page open in your browser for the next step, when you'll start the local development server.
## Start local development
With your app card added to all contact records, you can now continue to build the app card. The easiest way to quickly iterate is to start the local development server with the `hs project dev` command:
* In the terminal, run `hs project dev`.
* Follow the terminal prompts to select the **account** you want to use for local development.
* The terminal will start the local development server, then confirm once it's running.
* With the server running, navigate back to the browser tab with the contact record and reload the page.
The app card will display with a `Developing locally` tag, indicating that the local development server is ready.
 The local development server will automatically detect any changes saved to the app card's front-end React files (i.e., any `.jsx` or `.tsx` files). If you need to make changes to other file types, such as a `.json` configuration file, you'll need to reupload the project and restart the local development server.
## Next steps
Check out the following resources to build out the card's appearance and functionality.
* Consult the [UI extension component reference documentation](/apps/developer-platform/add-features/ui-extensions/ui-components/overview) to add more UI components to the card.
* See all app card configuration options and more in the [app card reference documentation](/apps/developer-platform/add-features/ui-extensions/extension-points/app-cards/reference).
* View all available utilities and methods available for UI extensions in the [UI extension SDK reference](/apps/developer-platform/add-features/ui-extensions/ui-extensions-sdk).
* Learn how to [fetch data for your app card](/apps/developer-platform/add-features/ui-extensions/fetching-data) with `hubspot.fetch()`.
* To list an app with app cards on the HubSpot marketplace, follow the [app card review process steps below](#submitting-app-cards-to-the-hubspot-marketplace).
### Migrating a previously created app card
If you need to migrate an existing project with app cards to the developer platform, check out the following guides:
* [Migration overview](/apps/developer-platform/build-apps/migrate-an-app/overview)
* [Migrate an app to 2026.03](/apps/developer-platform/build-apps/migrate-an-app/migrate-to-the-latest-platform-version)
If your existing project had a card with custom objects connected, confirm that you have the `crm.objects.custom.read` scope on your app before migration. For projects built before version `2025.2`, custom object cards could be built with only the `crm.schemas.custom.read` scope required. In the latest versions (`2025.2` and `2026.03`) of the developer platform, `crm.objects.custom.read` is required. If you don't include this scope, the build during the migration will fail with the following error:
**\[ERROR] Build failed or timed out. Inspect the failure to update your build and retry the migration.**
Your customer-facing app will be unaffected, despite the status in the project details page. To fix the issue, add the `crm.objects.custom.read` scope to your legacy app's scopes, re-build the app on version `2023.2`, then re-try the migration.
### Submitting app cards to the HubSpot Marketplace
To submit your app cards for HubSpot Marketplace approval, fill out [this form](https://96it.share.hsforms.com/2a_JwN0iMSDuqoDikVh255Q) with the required information below:
* **Production app ID:** the ID of the app you intend to update or list on the HubSpot Marketplace.
* **Build ID:** the build ID of the app installed in the test account.
* **Testing video URL:** a short video with detailed instructions of how users will interact with the card. For guidance on recording a sufficient video, refer to the [app certification demo video requirements](/apps/developer-platform/list-apps/apply-for-certification/applying-for-app-certification#requirements-for-the-app-demo-video).
* **App status:** indicate if this is a new app or an app already on the marketplace.
After receiving the above information, the HubSpot Ecosystem Quality team will review your app cards and share initial feedback within 10 business days. Please action this feedback as soon as you receive it, as multiple reviews may be necessary for final approval.
Once the review is successfully completed and your app card is approved, you will receive confirmation with the CTA to resubmit your draft listing. Please do not resubmit your listing before receiving confirmation of approval from [app-card-review@hubspot.com](mailto:app-card-review@hubspot.com). Any resubmissions of your listing before the app card review is completed will be rejected.
The local development server will automatically detect any changes saved to the app card's front-end React files (i.e., any `.jsx` or `.tsx` files). If you need to make changes to other file types, such as a `.json` configuration file, you'll need to reupload the project and restart the local development server.
## Next steps
Check out the following resources to build out the card's appearance and functionality.
* Consult the [UI extension component reference documentation](/apps/developer-platform/add-features/ui-extensions/ui-components/overview) to add more UI components to the card.
* See all app card configuration options and more in the [app card reference documentation](/apps/developer-platform/add-features/ui-extensions/extension-points/app-cards/reference).
* View all available utilities and methods available for UI extensions in the [UI extension SDK reference](/apps/developer-platform/add-features/ui-extensions/ui-extensions-sdk).
* Learn how to [fetch data for your app card](/apps/developer-platform/add-features/ui-extensions/fetching-data) with `hubspot.fetch()`.
* To list an app with app cards on the HubSpot marketplace, follow the [app card review process steps below](#submitting-app-cards-to-the-hubspot-marketplace).
### Migrating a previously created app card
If you need to migrate an existing project with app cards to the developer platform, check out the following guides:
* [Migration overview](/apps/developer-platform/build-apps/migrate-an-app/overview)
* [Migrate an app to 2026.03](/apps/developer-platform/build-apps/migrate-an-app/migrate-to-the-latest-platform-version)
If your existing project had a card with custom objects connected, confirm that you have the `crm.objects.custom.read` scope on your app before migration. For projects built before version `2025.2`, custom object cards could be built with only the `crm.schemas.custom.read` scope required. In the latest versions (`2025.2` and `2026.03`) of the developer platform, `crm.objects.custom.read` is required. If you don't include this scope, the build during the migration will fail with the following error:
**\[ERROR] Build failed or timed out. Inspect the failure to update your build and retry the migration.**
Your customer-facing app will be unaffected, despite the status in the project details page. To fix the issue, add the `crm.objects.custom.read` scope to your legacy app's scopes, re-build the app on version `2023.2`, then re-try the migration.
### Submitting app cards to the HubSpot Marketplace
To submit your app cards for HubSpot Marketplace approval, fill out [this form](https://96it.share.hsforms.com/2a_JwN0iMSDuqoDikVh255Q) with the required information below:
* **Production app ID:** the ID of the app you intend to update or list on the HubSpot Marketplace.
* **Build ID:** the build ID of the app installed in the test account.
* **Testing video URL:** a short video with detailed instructions of how users will interact with the card. For guidance on recording a sufficient video, refer to the [app certification demo video requirements](/apps/developer-platform/list-apps/apply-for-certification/applying-for-app-certification#requirements-for-the-app-demo-video).
* **App status:** indicate if this is a new app or an app already on the marketplace.
After receiving the above information, the HubSpot Ecosystem Quality team will review your app cards and share initial feedback within 10 business days. Please action this feedback as soon as you receive it, as multiple reviews may be necessary for final approval.
Once the review is successfully completed and your app card is approved, you will receive confirmation with the CTA to resubmit your draft listing. Please do not resubmit your listing before receiving confirmation of approval from [app-card-review@hubspot.com](mailto:app-card-review@hubspot.com). Any resubmissions of your listing before the app card review is completed will be rejected.