> ## Documentation Index
> Fetch the complete documentation index at: https://developers.hubspot.com/docs/llms.txt
> Use this file to discover all available pages before exploring further.
---
id: 4eda248a-97fb-4d3b-9c8a-27391a4cb3b1
---
# Create a bulk action (BETA)
> Create bulk actions that let users operate on selected CRM records.
export const RequiredIndicator = () => {
return
required
;
};
export const MinimumCliVersion = () =>
The latest version of the HubSpot CLI, which is recommended, is 8.15.0. You can check which version of the CLI you have installed by running hs --version.
;
You can create a React-based bulk action extension for your app on the `2026.09` version of the developer platform. Bulk actions let users perform operations on selected records directly from CRM object index pages. When a user selects records and triggers your action, HubSpot renders your custom React component as a modal or panel, with the selected record IDs and object type available in the extension context.
This guide walks you through how to build a bulk action component using React and how to upload and preview it in HubSpot.
Before you begin, follow the [quickstart guide](/docs/getting-started/quickstart) to create your first app on the latest version of the developer platform.
## Prerequisites
* Ensure you've installed the latest beta version of the [HubSpot CLI](/docs/developer-tooling/local-development/hubspot-cli/install-the-cli).
* If you haven't done so yet, [create a new app](/docs/getting-started/quickstart).
* In your project's `hsproject.json` file, set `platformVersion` to `2026.09`.
## Create a bulk action
To add a new bulk action component to an existing project:
1. Use the terminal to navigate into your local project directory, then run the following command:
```shell theme={null}
hs project add
```
2. When prompted to select a component to add, select **Bulk action**.
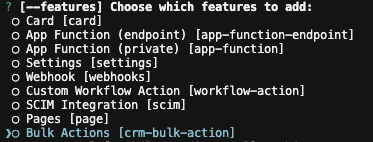
A new `actions/` directory will be created in the project's `src/app/` directory. The `actions/` directory will contain:
* A JSON configuration file (`*-hsmeta.json`)
* A React component file (`.tsx`)
* A `package.json` file
```shell theme={null}
myProject
└── src/
└── app/
└── actions/
├── NewAction-hsmeta.json
├── NewAction.tsx
└── package.json
```
```json theme={null}
{
"uid": "action_extension",
"type": "crm-bulk-action",
"config": {
"label": "New Bulk Action",
"entrypoint": "/app/actions/NewAction.tsx",
"objectTypes": [
"contacts"
],
"displayMode": "PANEL",
"icon": "forward"
}
}
```
```tsx theme={null}
import React from "react";
import { Text, hubspot } from "@hubspot/ui-extensions";
hubspot.extend(({ context }) => );
const BulkAction = ({ context }) => {
return (
Build your bulk action here!
);
};
```
```json theme={null}
{
"name": "hubspot-example-extension",
"version": "0.1.0",
"license": "MIT",
"dependencies": {
"@hubspot/ui-extensions": "latest",
"react": "^18.2.0"
},
"devDependencies": {
"typescript": "^5.3.3"
}
}
```
To upload your bulk action to HubSpot:
1. Run `hs project install-deps` from within your local project directory to install necessary dependencies. This will create a `package-lock.json` file, which speeds up the build of the uploaded bulk action extension and ensures that any dependencies in your local development environment and production match.
2. Run `hs project upload`.
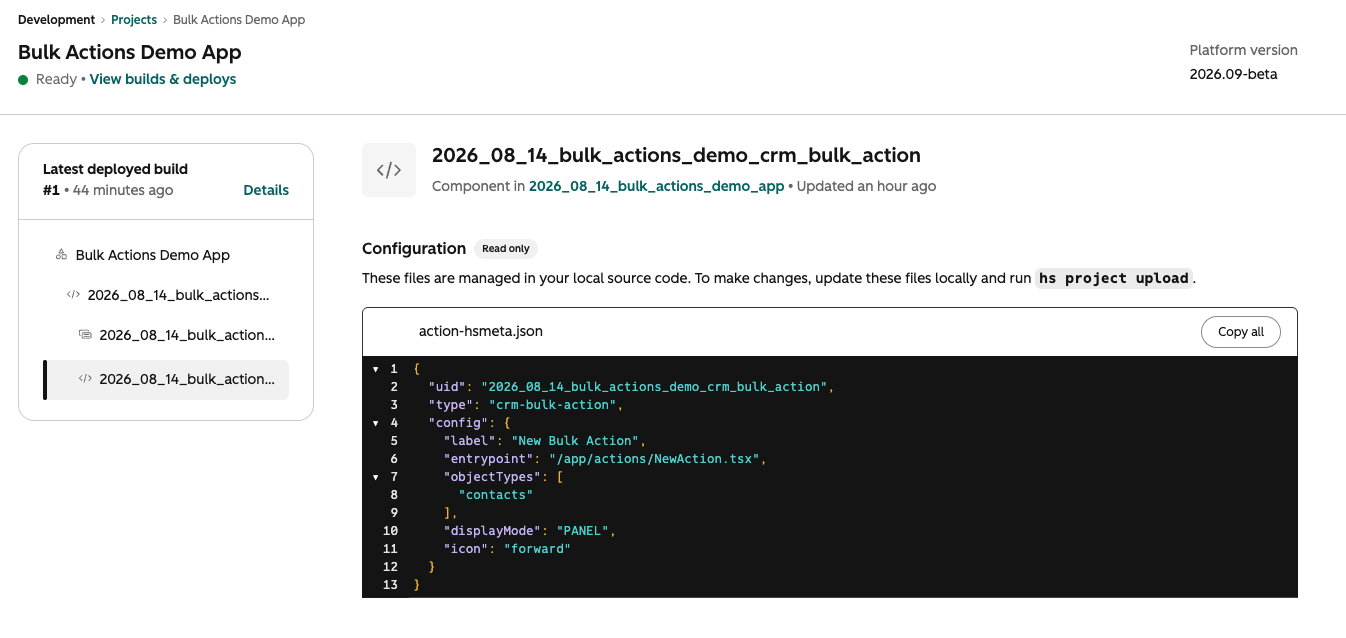
3. After the project finishes deploying, open the project in HubSpot by running `hs project open`. Alternatively, in HubSpot you can navigate to **Development** > **Projects**, then click the **name** of your project.
4. Your bulk action component should now be listed on the details page.
## View the bulk action in HubSpot
To verify the bulk action is working correctly:
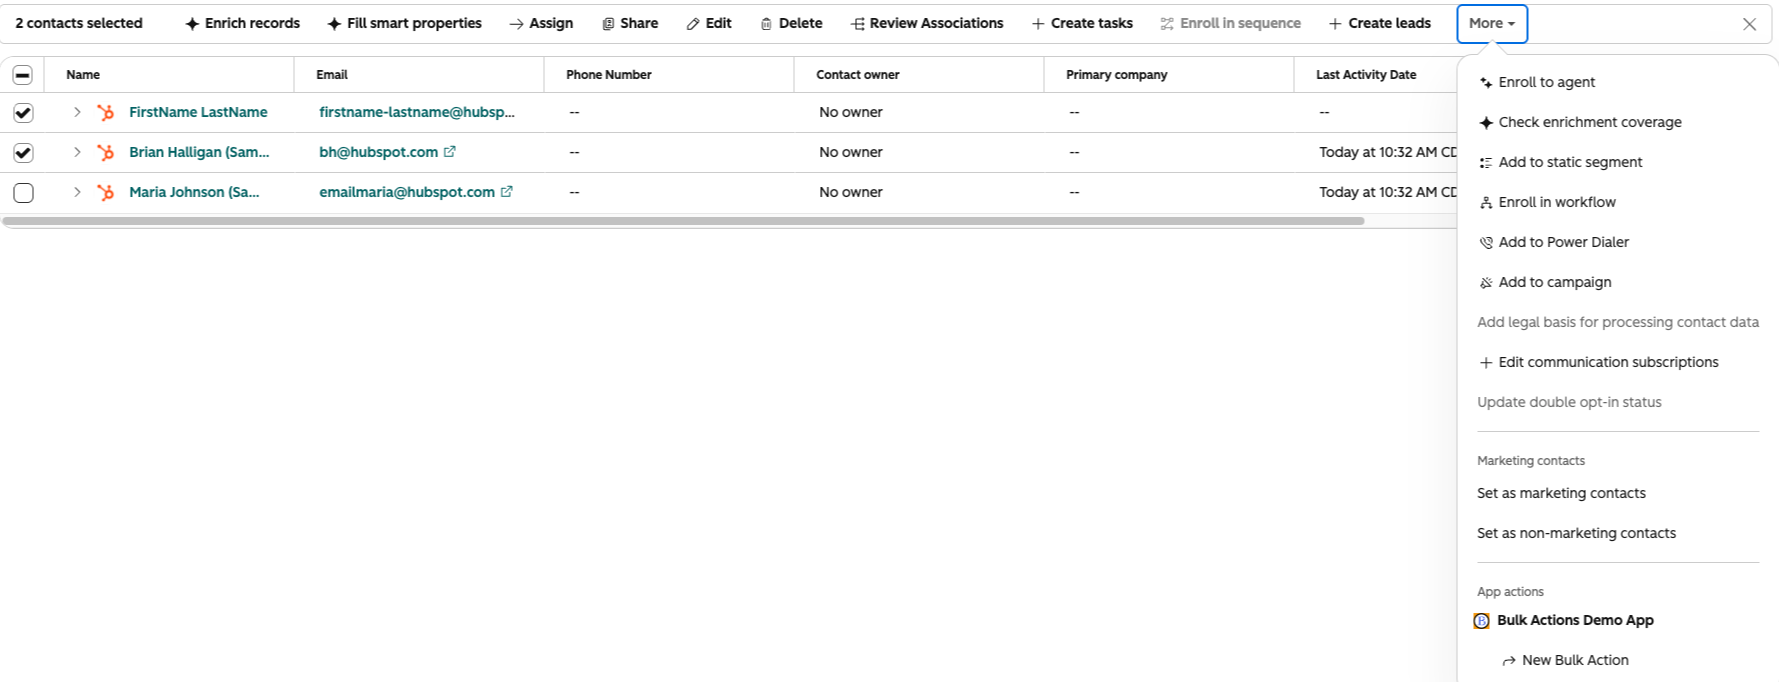
1. In your HubSpot account, navigate to a CRM object index page. For example, navigate to **CRM** > **Contacts**.
2. Select the **checkboxes** of records for which to test bulk actions.
3. At the top of the table, click **More**.
4. Your bulk actions will be listed under your app's name at the bottom of the menu.
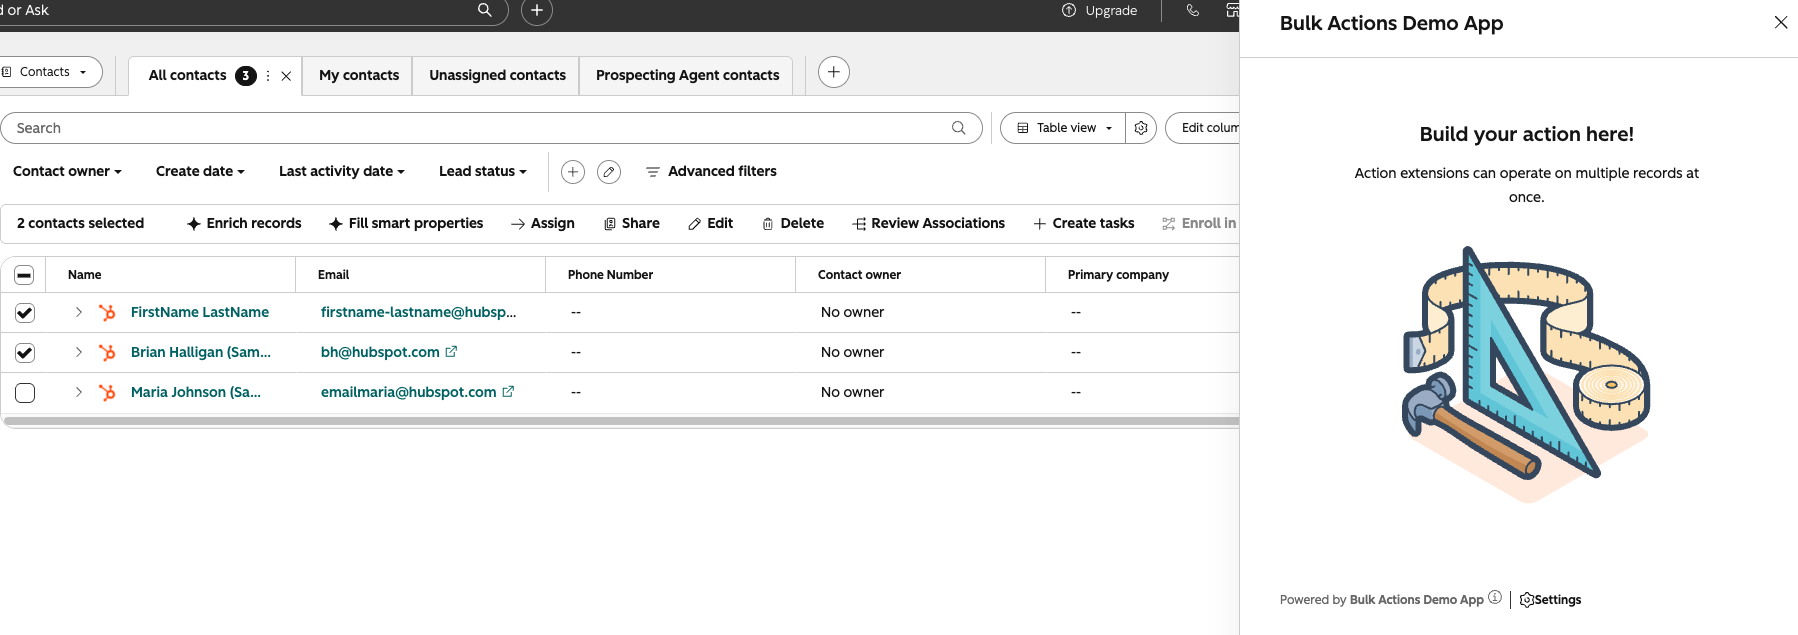
5. After clicking on your action's name, it will open as either a modal or panel (depending on how you configured it in the `hsmeta.json` file).
You can now continue to build out your bulk action as needed. You'll use the [UI extensions SDK](/docs/apps/developer-platform/add-features/ui-extensions/ui-extensions-sdk/overview) to add functionality and visual elements to your component. Note that all the existing limitations around building UI extensions apply to building a bulk action.
* Use `hubspot.fetch()` to leverage your backend to retrieve and act on data. Learn more about [fetching data](/docs/apps/developer-platform/add-features/ui-extensions/fetching-data) in UI extensions.
* Check out the reference documentation on [standard components](/docs/apps/developer-platform/add-features/ui-extensions/ui-components/overview) for how to use React components when building your extension, or use the component in the [Figma Design Kit](/docs/apps/developer-platform/add-features/ui-extensions/ui-components/figma-design-kit).
* Use the `hs project dev` command to iteratively build out your bulk action and preview your changes locally.
**Please note:** the local development server will only pick up changes saved to the front-end React file. If you update the `*-hsmeta.json` or `package.json` files, you'll need to stop the server, upload your changes, then start the server again.
## Bulk action configuration
Each bulk action requires a `*-hsmeta.json` configuration file. Include the following properties:
```json theme={null}
{
"uid": "action_extension",
"type": "crm-bulk-action",
"config": {
"label": "New Bulk Action",
"entrypoint": "/app/actions/NewAction.tsx",
"objectTypes": [
"contacts"
],
"displayMode": "PANEL",
"icon": "forward"
}
}
```
| Field | Type | Description |
| - | - | - |
| `uid` | String | A unique identifier for the bulk action component. |
| `type` | String | The type of component. Must be `crm-bulk-action`. |
| `config` | Object | An object containing the bulk action's configuration details. |
| `label` | String | The display name shown to users in the bulk action toolbar. |
| `entrypoint` | String | The file path of the bulk action's React component. |
| `objectTypes` | Array | The CRM object type(s) the bulk action appears for. For example, `["contacts"]` or `["contacts", "companies"]`. |
| `displayMode` | `PANEL` \| `MODAL` | How the bulk action's UI is rendered. Use `PANEL` for a slide-in side panel, or `MODAL` for a centered dialog. |
| `icon` | String | The icon shown alongside the action label in the toolbar. Must be a valid icon name from the UI extensions [Icon component](/docs/apps/developer-platform/add-features/ui-extensions/ui-components/standard-components/icon). |