- Using the default form module
- Adding a form field to a custom module
- Embedding using the form embed code
The default form module
If your template has drag and drop areas, content creators can add the default form module to a page from the page editor, then configure the form options in the left sidebar. To code a form module directly into a template with drag and drop areas, reference it as adnd_module.
module.
Cloning the default module
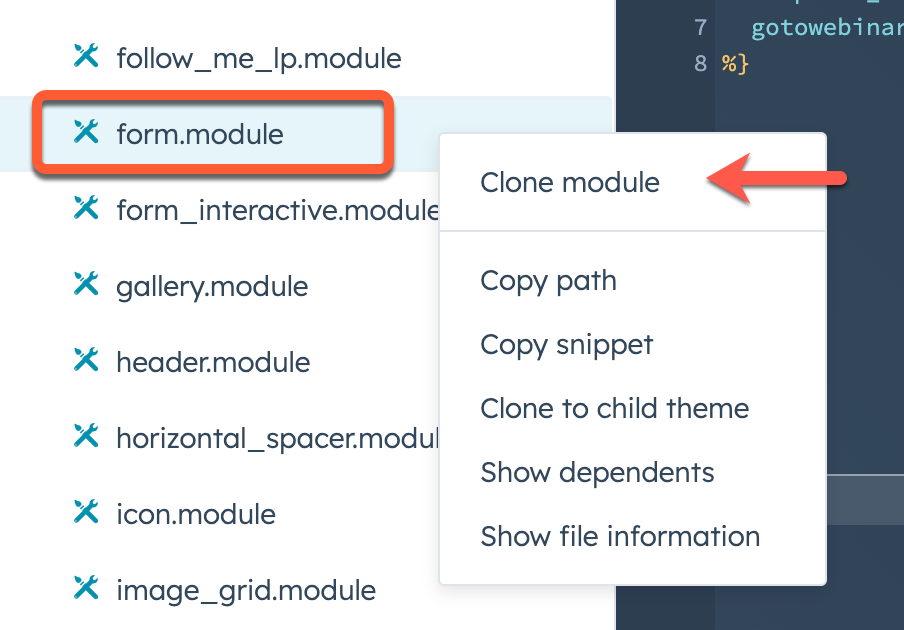
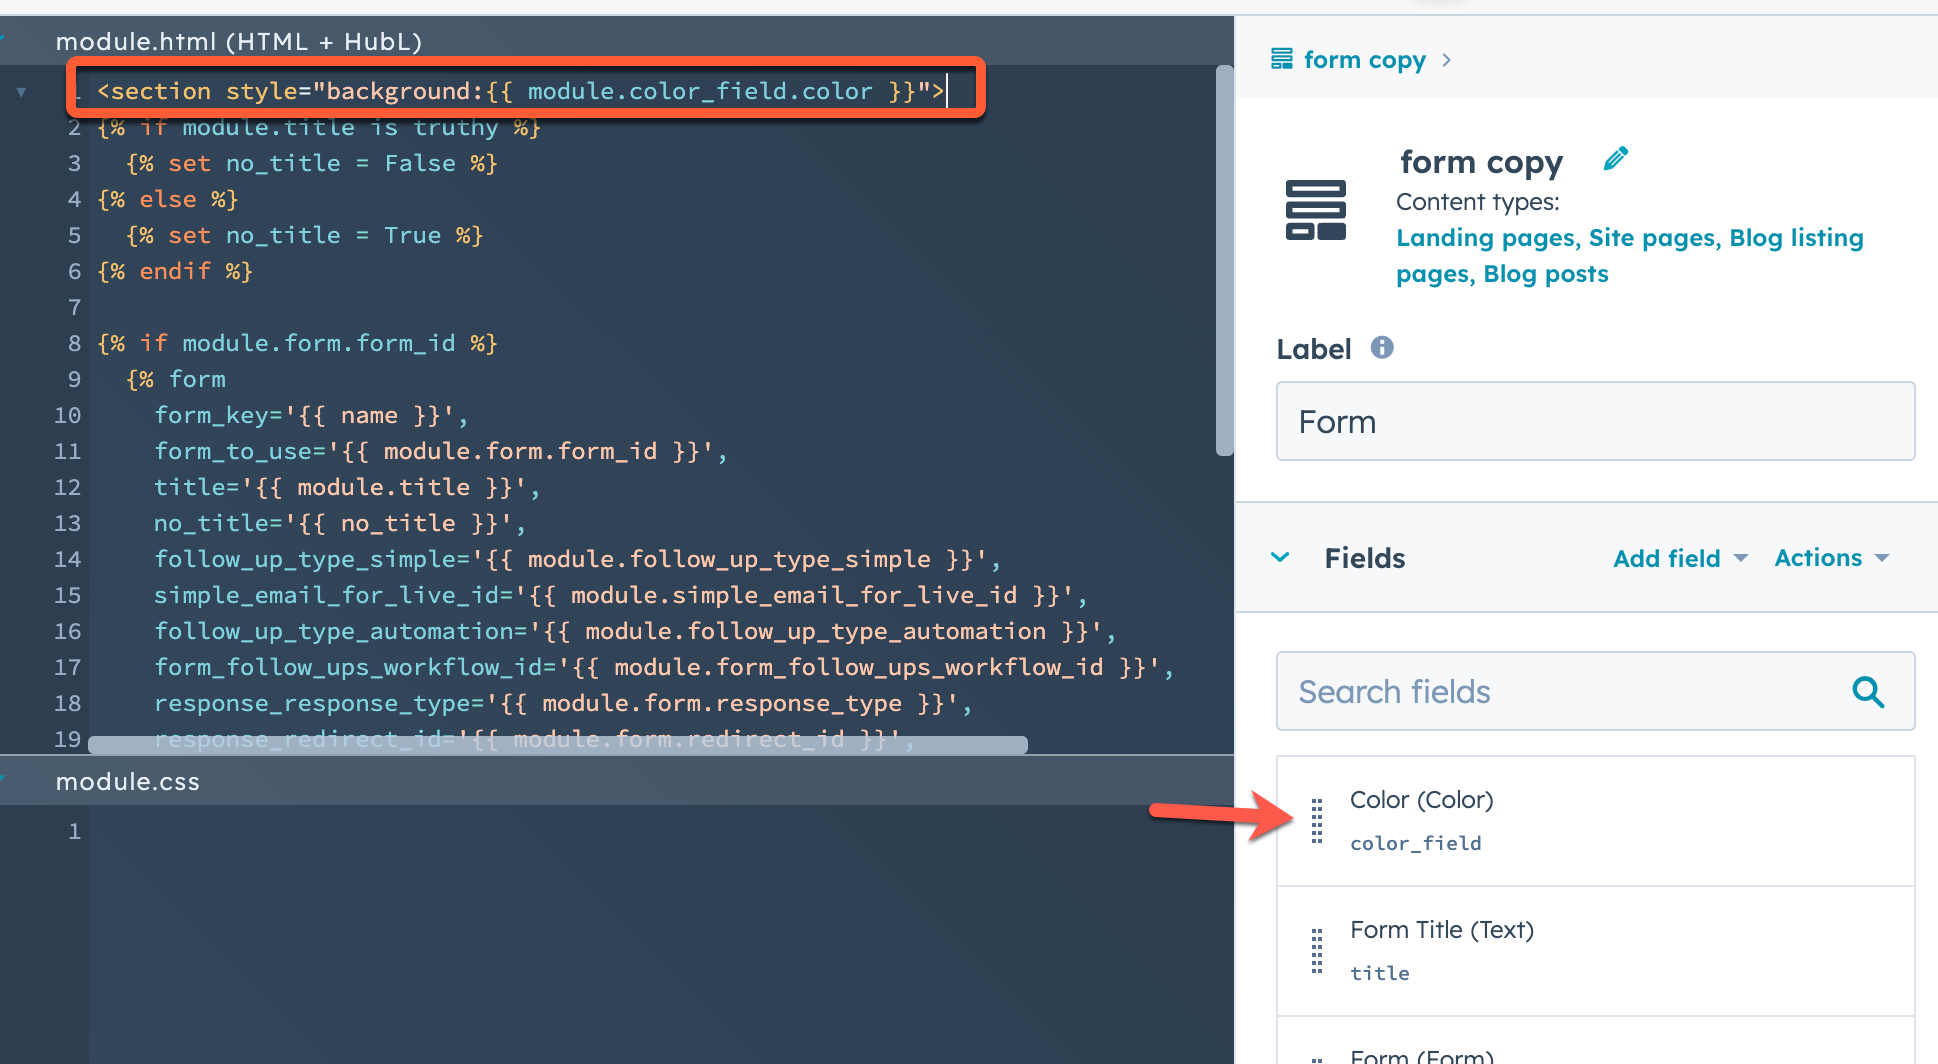
In addition to using the default module as-is, you can clone it to make it editable, enabling you to customize it as needed. For example, you could clone the default form module, add a color field, then wrap the module’s HTML in a<section> tag with styling to add the color as a background:
- In the left sidebar design manager, navigate to the @hubspot folder, then right click form.module and select Clone module.
- In the right sidebar, click Add field, then select Color.
- Add a
<section>tag around the HTML content, then include styling to reference the color field, such as:
<section style="background:{{ module.color_field.color }}">
Form fields in custom modules
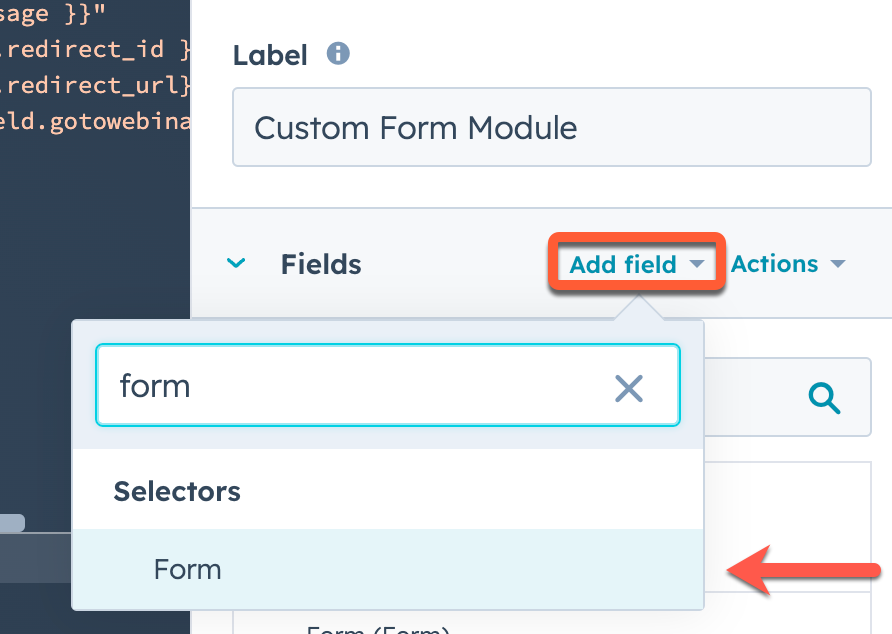
When creating a custom module, you can include a form in it by adding a form field, along with adding the field’s code snippet to the module HTML. For example, you may want to add a consultation request form to a module that contains an image of a product and a descriptive value proposition. To add a form field to a custom module from the design manager:- In the right sidebar of the module editor, click Add field, then select Form.
- After adding the field, hover over the field in the right sidebar, then click Actions and select Copy snippet.
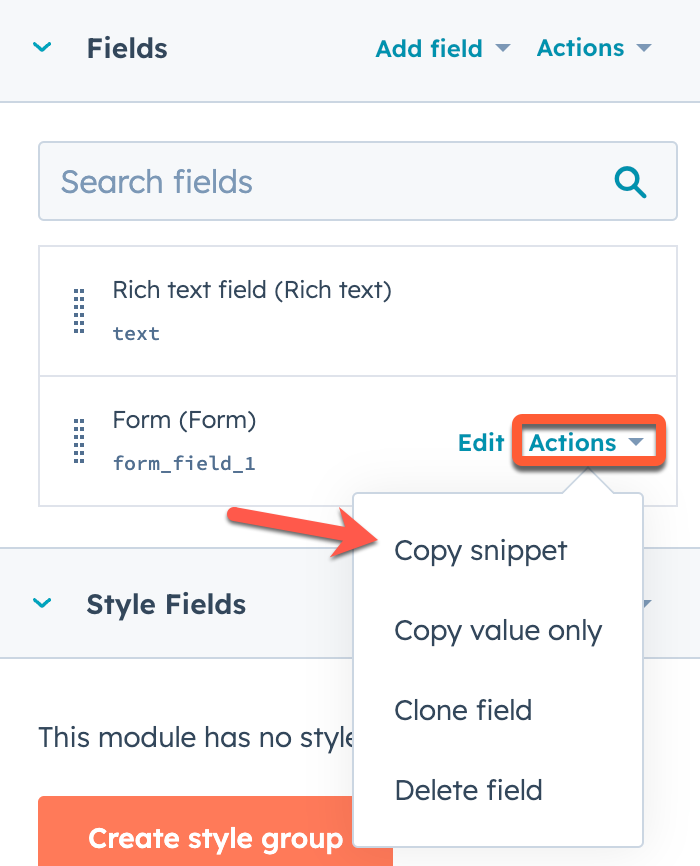
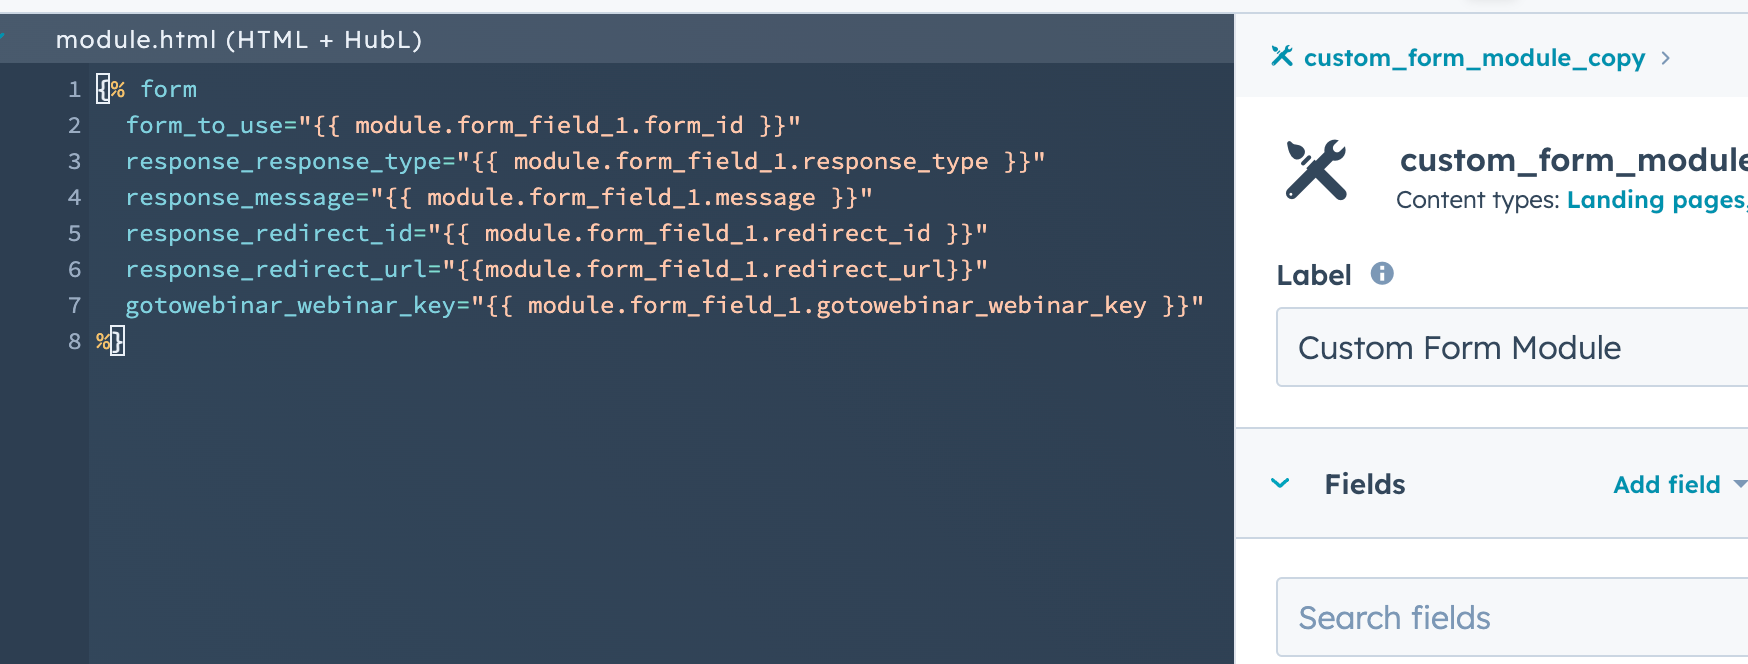
- Paste the snippet into the module’s HTML field.
Limit form options in the editor
Once added to a page, content creators typically have control over many aspects of the form, including which form to use and the form fields themselves. However, you can limit the amount of control given in the page editor by modifying the form module’sfields.json file locally to include the following fields:
For example, if you’ve built out a module that should only be used for forms that enable visitors to contact your company’s various services departments, you could allow content creators to only be able to select forms that use ticket properties.
Using the form embed code
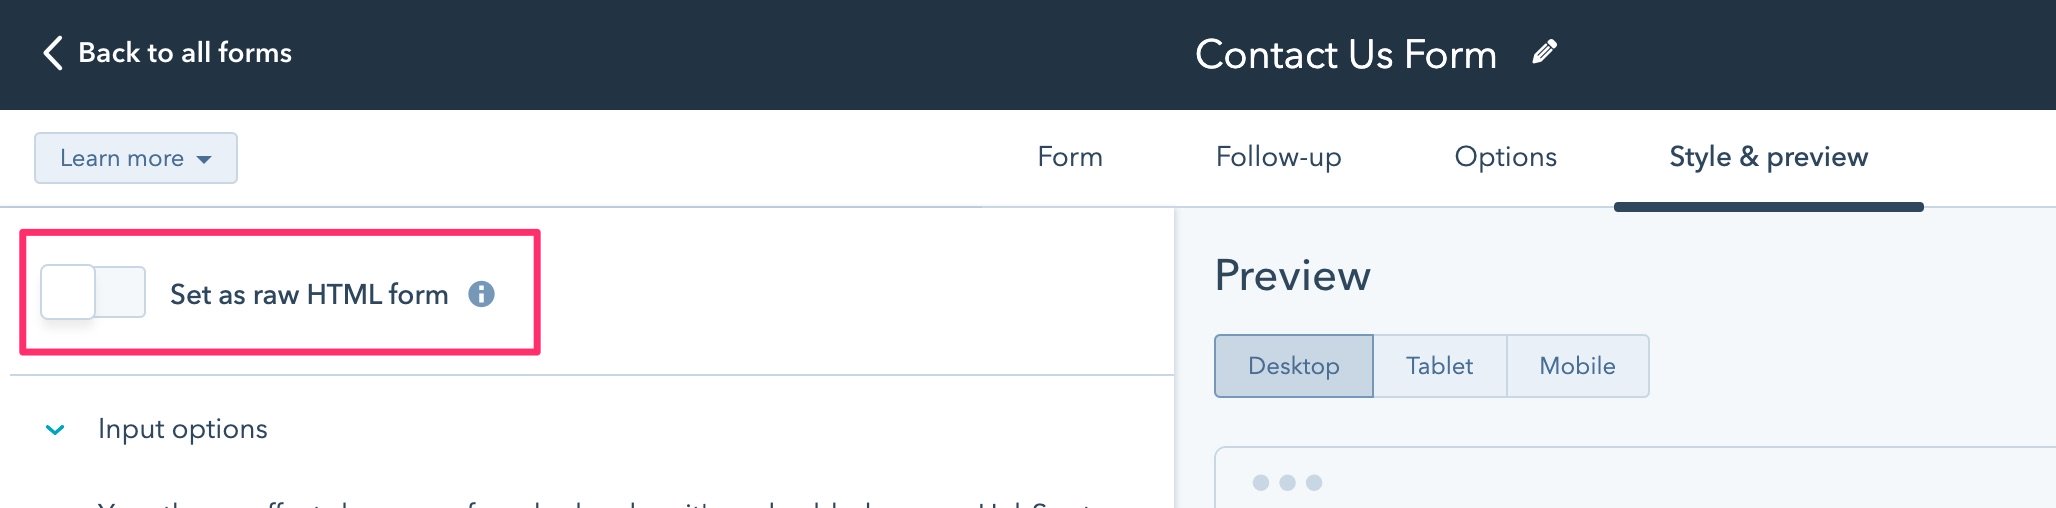
When a module or HubL tag isn’t ideal, or if you want to add a form to an external page, you can instead embed it using the form embed code. You can also customize the form embed code to extend the form’s functionality. View all form embed code customization options and more in the forms reference guide. Below is a sample of a form embed code without any customization.Add internationalization
By default, HubSpot provides a number of validation messages in many different languages, which you can access using thelocale parameter. You can also add custom languages or override the error messages and date picker months/days displayed on the form using the translation parameter.
Learn more about internationalization and form validation error messages in the forms reference documentation.
Form events
Forms allow two ways to bind functionality onto events: callbacks in the HubSpot form embed code and global form events. Learn more about the available form embed code callbacks and global form events in the forms reference documentation.Form styling
While HubSpot offers form styling from a global setting and form specific setting level, you can also style a form depending on how it’s added to your CMS pages.Styling forms via the default form module or HubL tag
HubSpot forms added to HubSpot pages can be styled using your website’s CSS. HubSpot includes a number of different classes and attributes on forms that are generated where you can apply styling. As a starting point, refer to the HubSpot Boilerplate’s form CSS, which represents the best practices for how to style forms.Styling forms via a custom module
Forms inside custom modules can be styled by CSS in the module’s CSS pane within the design manager. By keeping CSS scoped to the module, you can ensure that whenever the module is added to a page, the styling comes with it. It’s recommended to add a wrapper to the form, then using that wrapper as the top-level selector for the CSS. This will prevent your custom module’s form styling from being overwritten by additional styles in your websites main stylesheet. Below is a screenshot of the custom module from above with form styling added to the CSS Pane.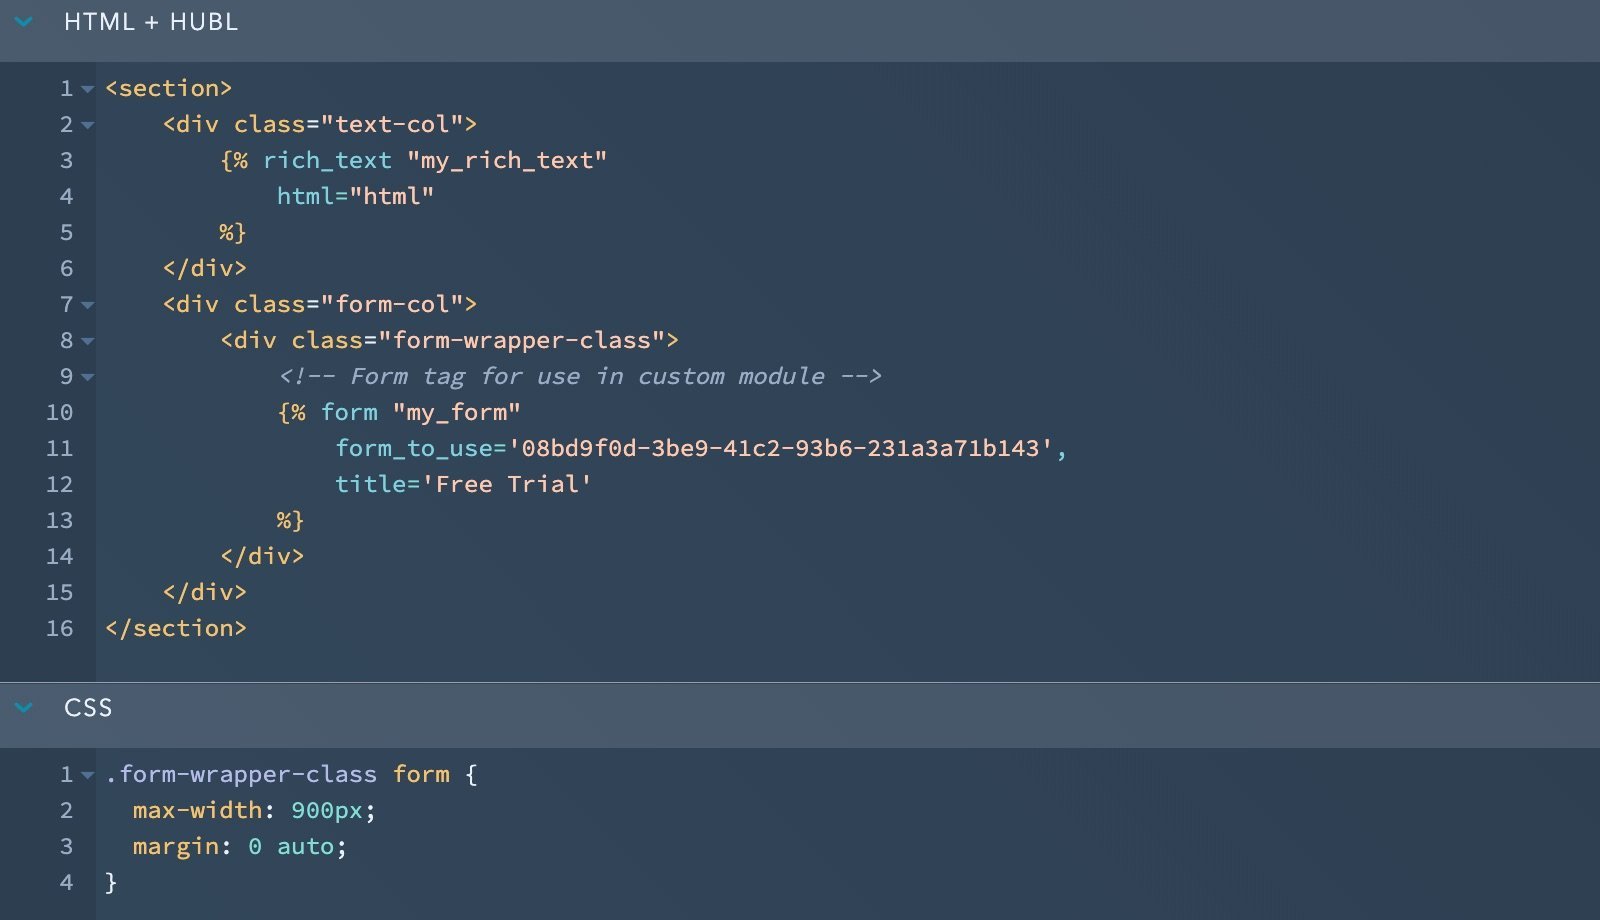
Define custom styling for embedded forms
If you have a Marketing Hub or CMS Hub Professional or Enterprise subscription, you can use CSS variable definitions to define global styles, customize buttons and other inputs, as well as style your multi-step forms and progress bars. Learn more about how apply custom CSS definitions to your embedded form.Styling forms added via the form embed code
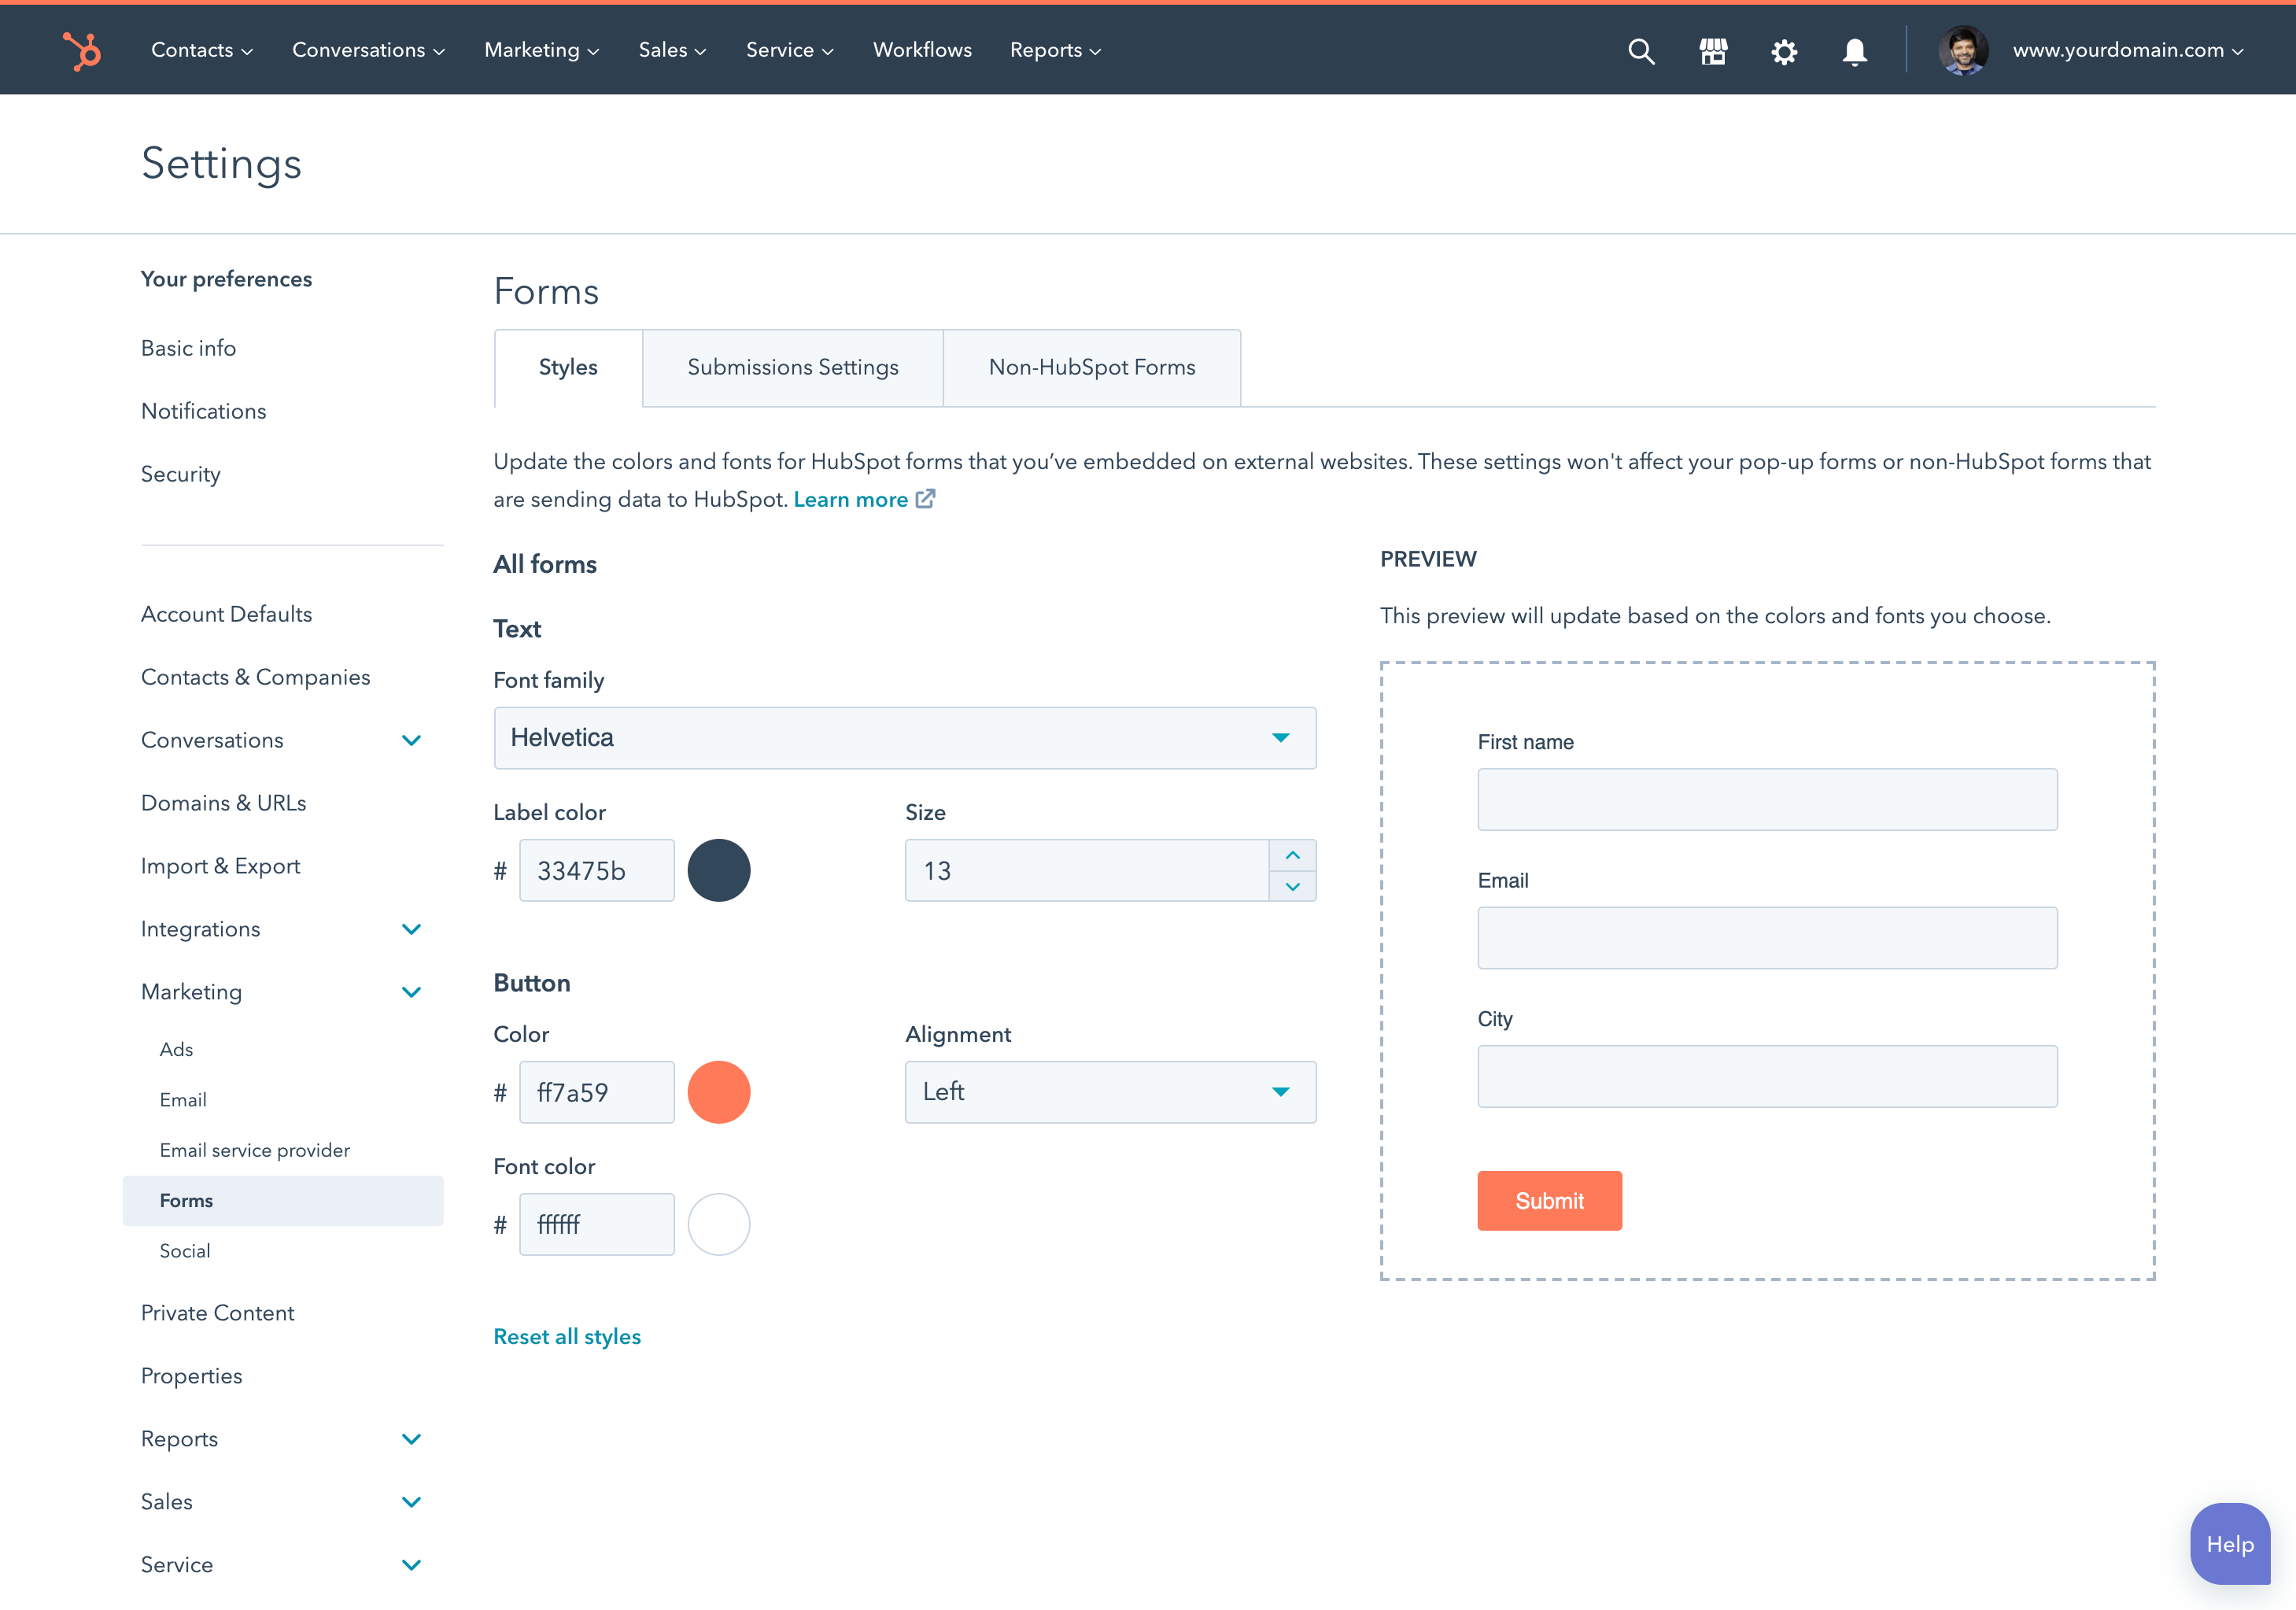
When using the form embed code, you can style the form using the global form styling settings or using your website’s CSS. Using the global form styling settings enables you to configure default settings for every form in the account. You can also override these styles on an individual form within the form editor.