Supported products
Supported products
Requires one of the following products or higher.
Enable child tables in your table
- In your HubSpot account, navigate to Marketing > Files and Templates > HubDB.
- Click the name the table that will act as the parent for any other tables that will be used for your nested child tables.
- In the top right, click the Actions dropdown menu, then select Manage settings.
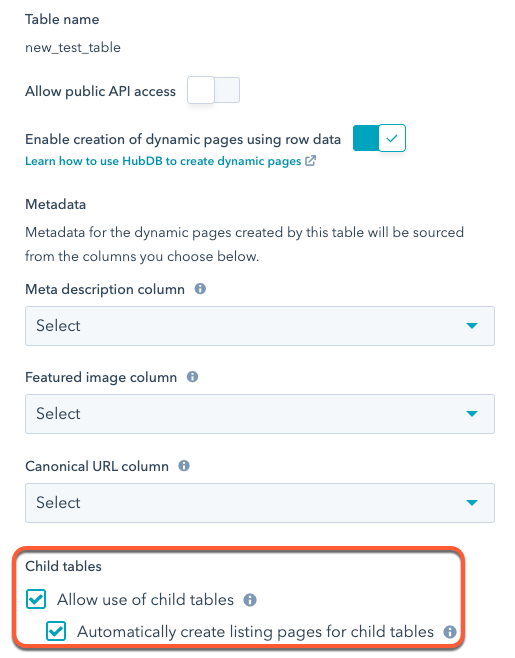
- If you haven’t yet enabled the table for dynamic pages, click to toggle the Enable creation of dynamic pages using row data switch on, then select the columns to populate the page data.
- Click to select the Allow child tables and Automatically create listing pages for child tables checkboxes.

- Click Save.
To streamline this process, keep the child table columns and their internal names the same. If they are not the same, you’ll need to use conditional logic later to render unique content for a given table.
Select child tables for each row
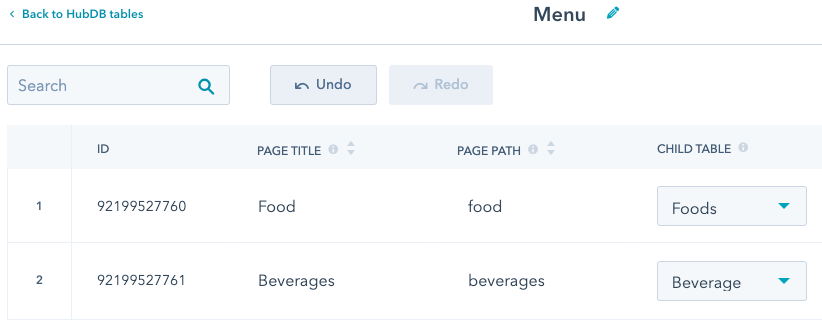
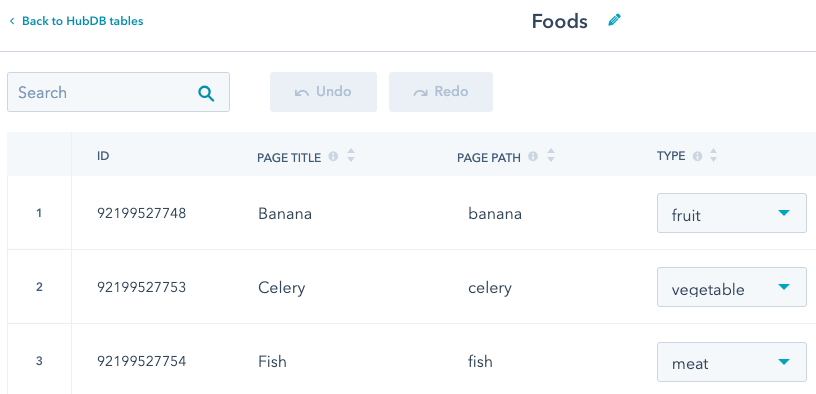
In the parent table, use the Child table column dropdown menus to select tables to pull data from.You can only select tables that are enabled for dynamic page content creation. If you’ve enabled a table for dynamic page creation but aren’t seeing it in the Child table dropdown menu, ensure that you’ve clicked Publish in the child table. In the above example, the first row will be pulling its food data from the Foods child table, which contains data about available foods, as shown below.
 When setting multilevel dynamic pages, the page paths for each row in the child table will be


parent_path/child_path. For example, the page path for the banana row will be page_path/foods/banana.By turning on the Automatically create listing pages for child tables setting, HubSpot will also automatically create intermediate listing pages for the child table rows (page_path/foods and page_path/beverages).If you would rather have those intermediate routes not resolve and return a 404 page, deselect the Automatically create listing pages child child tables checkbox in the table’s settings.Create the multilevel template
Through child tables, you can create up to five levels of pages with one dynamic template. You can configure each level by using the
dynamic_page_route_level HubL variable. The top-level template starts at a value of 0 and increments for each table layer.Populate the top-level template
For this tutorial, the goal is to list the child rows and group them by parent category. The example code below does the following:
- First, it retrieves the category rows using
dynamic_page_hubdb_table_id. - Then, the
hs_child_table_idproperty of each category row retrieves the table IDs of the child tables. - Last, it uses those table IDs to list the child rows under each parent category.
Populate the dynamic-level templates
After populating the top-level template, you’ll then need to define templates for the subsequent levels in a similar fashion.While building out your templates, it can be useful to access parent table data within child templates. For example, when our example page resolves to Continue building out templates for each needed level. Then, you’ll need to l ink the parent table to a page.
foods/banana, the dynamic_page_hubdb_row variable will be set to the banana row. However, you may want to access data from the food row. You can use hs_parent_row value on the dynamic_page_hubdb_row to retrieve the parent row:Link parent table to page
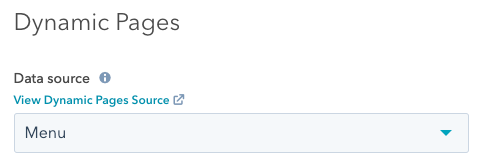
The final step is to create a page from the multilevel template and link the top-level parent table to the page. To do so, you’ll create a page, then access its settings. In the Advanced Options settings of the page editor, click the Data source dropdown menu and select the Parent table.
