Please note: this documentation covers legacy quote themes only. Legacy quotes support custom coded themes built with HubL, while quotes use a standardized template system that cannot be customized via code.Legacy quotes are only available to Sales Hub accounts and certain free accounts. Learn more about which accounts have access to legacy quotes.
Prerequisites
- You should feel confident writing HTML and CSS.
- You should have the latest version of the HubSpot CLI installed and configured for your portal.
Fetch the theme
Open your terminal, navigate to the directory you want to download the files to. This will be your main working directory for the remainder of this tutorial. To download the default legacy quotes theme, run the following in your terminal:my-quotes-theme in your local file system. This folder contains all of the assets needed for the legacy quote theme, including mock data and module defaults within the imports folder.
Upload and watch for changes
With the folder downloaded, upload it to HubSpot. While you can use the hs upload command to perform a single upload, you can instead use thewatch command to trigger automatic uploads on each file save:
my-quotes-theme folder in the design manager. To open the design manager from the terminal, open a new terminal tab or window and run the hs open dm command.
Preview the quote template
- In the design manager, navigate to my-quotes-theme > templates > bold.html.
- In the top right of the code editor, click Preview, then select Live preview with display options.
hs watch running.
Make local changes
- In your local code editor, open
my-quotes-theme>css>bold.css. - Add the code below to
bold.css, then save your changes:
- Refresh the template preview in your browser to view your CSS changes. You should now see that every odd row in the table body has a gray background.
Update the template label
Update the template label so that sales reps can easily find it among HubSpot’s default legacy quote options. To change a quote template’s label:- In your code editor, open my-quotes-theme > templates > bold.html.
- At the top of the file, view the template annotation:
- Update the
labelparameter fromBoldto a name of your choosing, such asMy custom quote template. - Save the file to upload it to HubSpot.
Customize the template in HubSpot
Before a sales rep can use your quote template, it must be customized in HubSpot. This would typically be done by a sales manager so that they can create ready-made quotes for their sales team. However, in this tutorial, you’ll walk through this process yourself so that you can understand what the content creation experience is like. To customize the quote template and make it available for sales reps:- In your HubSpot account, click the settings settings icon in the main navigation bar.
- In the left sidebar menu, navigate to Objects > Quotes.
- Click the Quote templates tab.
- In the upper right, click Customize quote template.
- Hover over your new template, then select Choose.
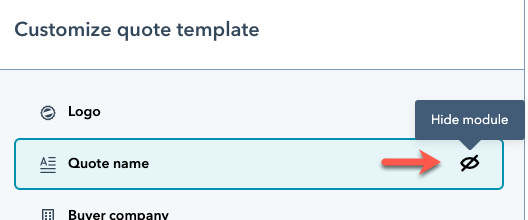
- Using the left panel, you can edit the modules included in the template. For example, you can click a module to edit its properties or toggle visibility.
- In the upper right, click Save when you’re done making changes.
Create a quote in HubSpot
With your changes saved, you can now create a quote with the template, simulating the sales rep experience.- In your HubSpot account, navigate to Sales > Quotes.
- In the upper right, click Create quote. You’ll then be redirected to a quote creation wizard.
- On the first screen, click the Associate with a deal dropdown menu, then either select an existing deal or select Create a new deal if you want to use a test deal instead.
- In the bottom right, click Next.
- On the next screen, click the Quote dropdown menu, then select your custom quote template.
- Proceed through the rest of the quote wizard to create your quote.
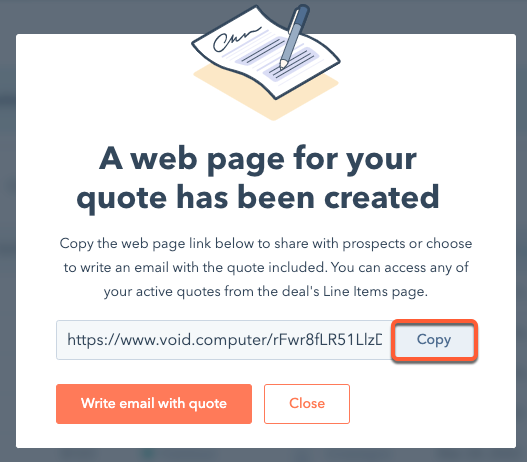
- After publishing the quote, a dialog box will appear with a link to view the quote. Click Copy to copy the URL, then paste it into your browser to view the completed quote.