- A user interface created through a list of fields that users will see when editing a module instance.
- An HTML+HubL template fragment with associated CSS and JS that defines how HTML will be generated
An Example
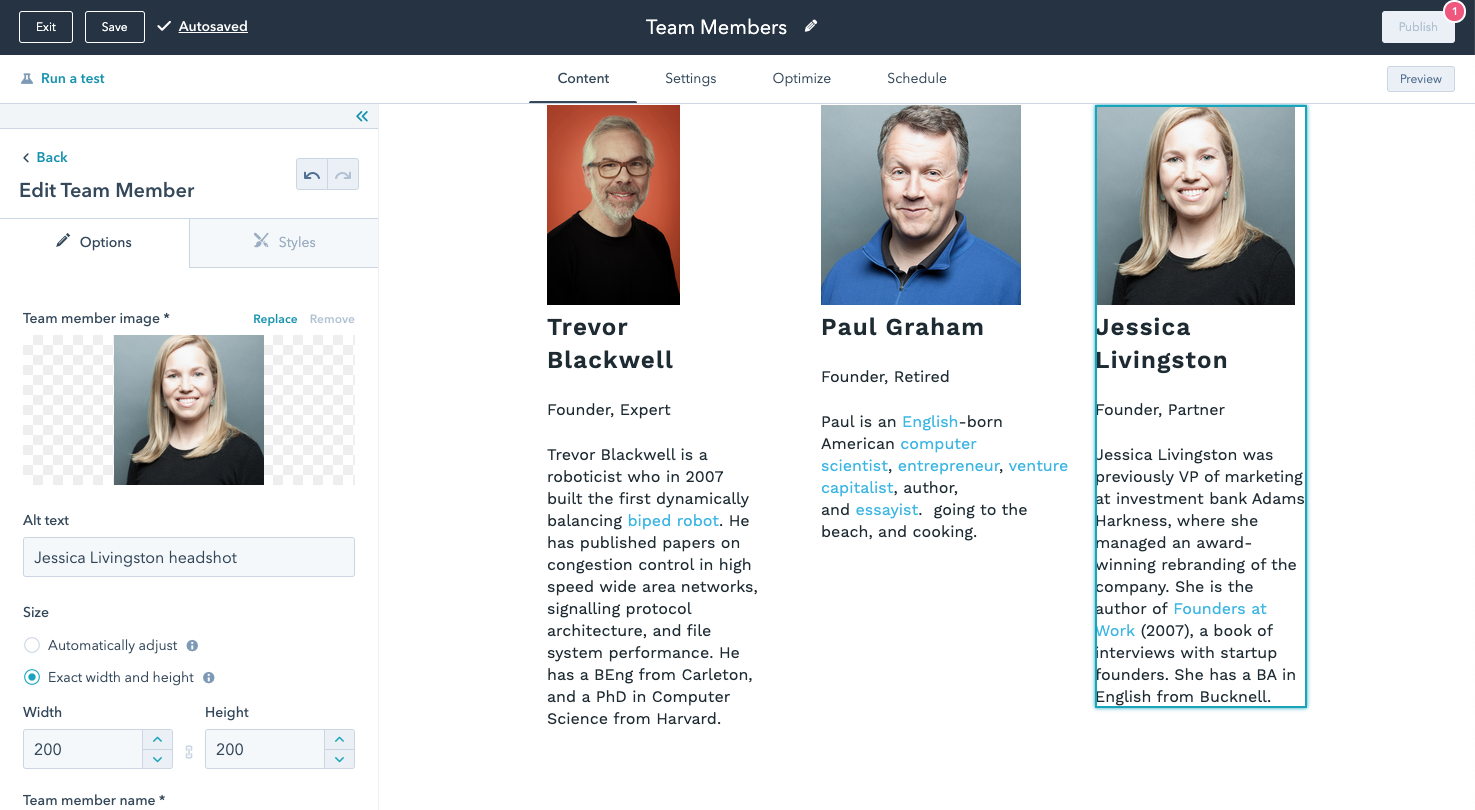
To better understand what a module is, let’s take a look at a simple “Team Member” module. The module consists of a photo, the team member’s name, their title, and a short bio and when part of a CMS web page looks like:
The User Interface for Editing
The developer builds the user interface (UI) for modules using fields. The developer then chooses which fields to use based on the kind of module being built, the data that is needed, and the editing experience. In this case, the module includes:- an image field, for a team member photo
- two text fields, for the team member’s name and position
- and a rich text field, for a short bio.
Module vs module instance
There are two terms frequently used regarding modules. It’s important to understand the difference between them.- Module - reusable building blocks that can be added to templates and pages.
- Module instance - the individual rendered modules on the page. They can have separate field values and as a result look different from other module instances that are for the same module.
Fields.json
The fields for a module are defined in JSON as an array of objects. Each field has a name, type, and default value. Other properties are also available depending on the type of field that controls the editing experience.Using module field data to render HTML
The values for each field are available in the HTML+HubL fragment for a module via amodule variable. The data for each field can be accessed via the properties of the module variable. Using the team member module as an example, the team member name can be accessed via {{ module.team_member_name }}.
Using Modules in Templates
Modules are added to templates using the module, module_block, or dnd_module tag and specifying the path to the module as a parameter. The default values for fields in a module can also be overridden at the template level through adding parameters to the module tag that corresponds to the field name as shown in the second part of the example below.Modules can’t be nested inside of each other. The majority of the time you would want to do this, it is usually for layout reasons. Sections in drag and drop areas, are often the better course of action.