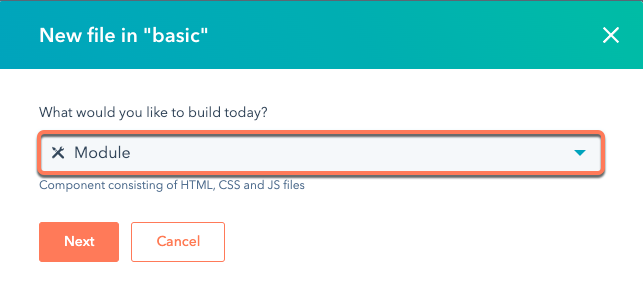
 * Select the **Pages** checkbox to make the module available for website and landing pages.
* Name the module **Testimonial**, then click **Create**.
### Add fields to the module
Next, you'll add three fields to the module:
* A text field to store the name of the customer giving the testimonial.
* An image field that will store the customer's profile picture.
* A rich text field that will store the customer's testimonial.
#### Add the text field for customer name
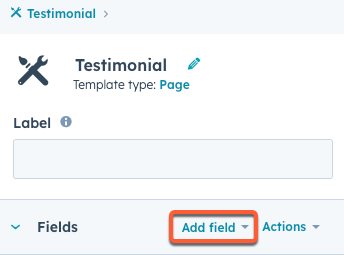
* In the right sidebar of the module editor, click the **Add field** dropdown menu, then select **Text**.
* Select the **Pages** checkbox to make the module available for website and landing pages.
* Name the module **Testimonial**, then click **Create**.
### Add fields to the module
Next, you'll add three fields to the module:
* A text field to store the name of the customer giving the testimonial.
* An image field that will store the customer's profile picture.
* A rich text field that will store the customer's testimonial.
#### Add the text field for customer name
* In the right sidebar of the module editor, click the **Add field** dropdown menu, then select **Text**.
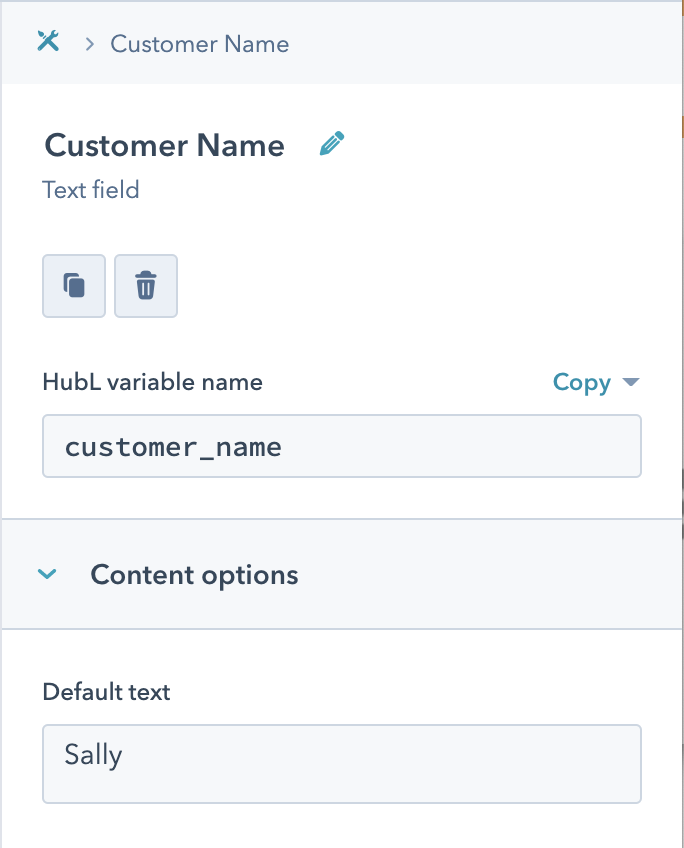
 * In the right sidebar, click the **pencil icon** in the upper right to name the field. For this tutorial, enter the **Customer Name**. You'll then see the HubL variable name change to **customer\_name**.
* Set the **Default text** to **Sally**.
* In the right sidebar, click the **pencil icon** in the upper right to name the field. For this tutorial, enter the **Customer Name**. You'll then see the HubL variable name change to **customer\_name**.
* Set the **Default text** to **Sally**.
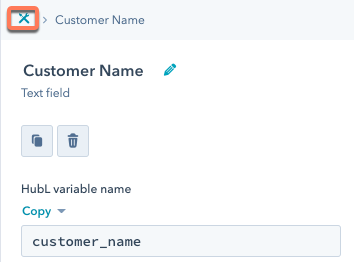
 * In the right sidebar, click the **breadcrumb** icon to return to the main module menu.
 #### Add the image field for customer profile picture
* Add another field using the same method, this time selecting the **Image** field type.
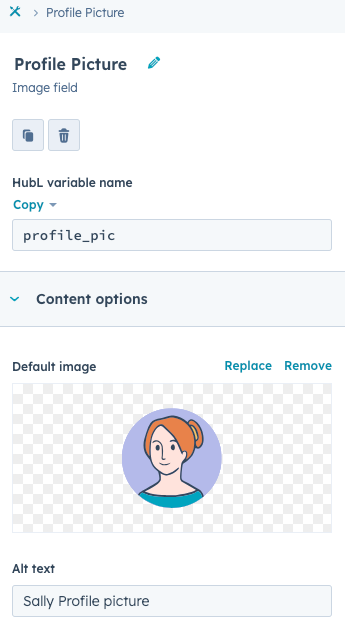
* Label the image field **Profile Picture**, then set the **HubL variable name** to **profile\_pic**.
* Under **Default image**, select the profile picture provided for Sally in the **images** folder of the completed [project files.](https://github.com/HubSpot/cms-modules-getting-started/tree/3b9159334f8c6204c7d2d34d8945d71b6ba402ea/images)
* Set the **Alt text** to **Sally Profile Picture**.
#### Add the image field for customer profile picture
* Add another field using the same method, this time selecting the **Image** field type.
* Label the image field **Profile Picture**, then set the **HubL variable name** to **profile\_pic**.
* Under **Default image**, select the profile picture provided for Sally in the **images** folder of the completed [project files.](https://github.com/HubSpot/cms-modules-getting-started/tree/3b9159334f8c6204c7d2d34d8945d71b6ba402ea/images)
* Set the **Alt text** to **Sally Profile Picture**.
 #### Add the rich text field for Sally's testimony
* Add another field using the same method, this time selecting the **Rich text** field type.
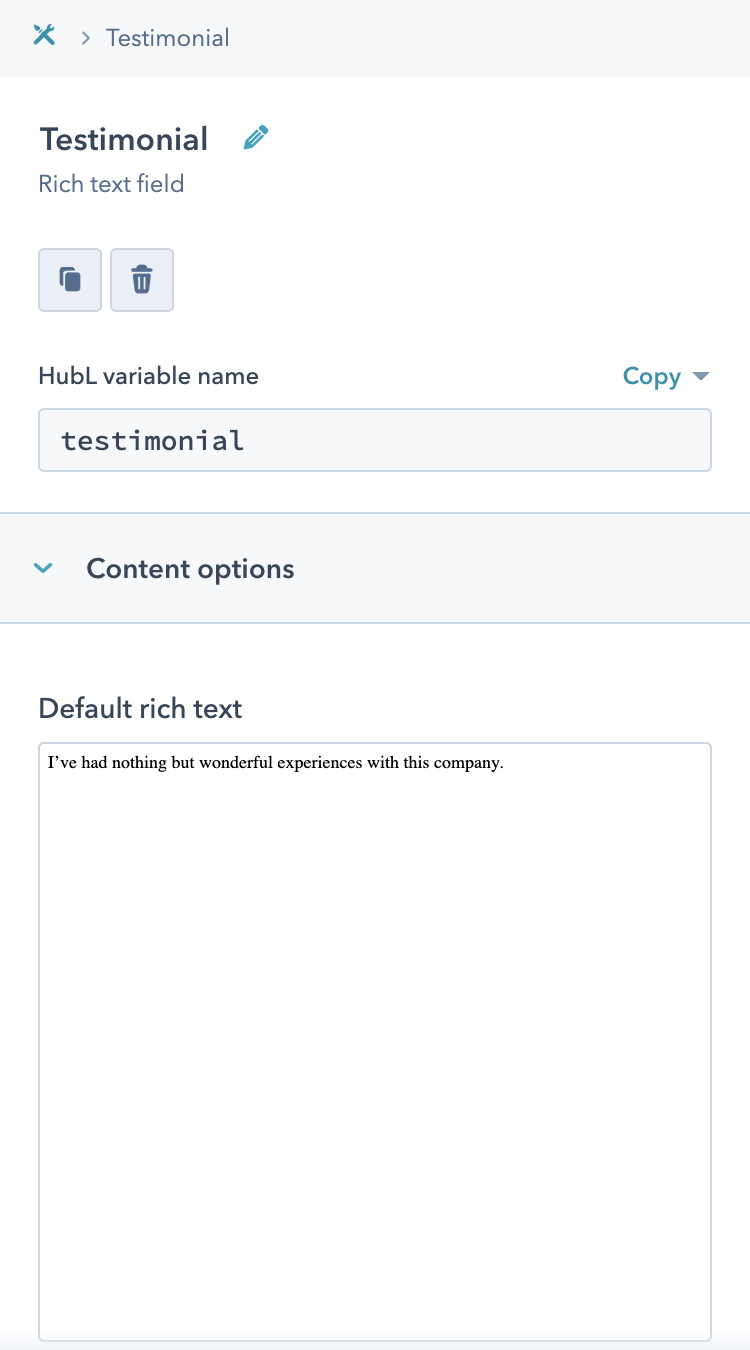
* Label the rich text field **Testimonial**.
* Click the **Default rich text** box, then enter "I've had nothing but wonderful experiences with this company."
#### Add the rich text field for Sally's testimony
* Add another field using the same method, this time selecting the **Rich text** field type.
* Label the rich text field **Testimonial**.
* Click the **Default rich text** box, then enter "I've had nothing but wonderful experiences with this company."
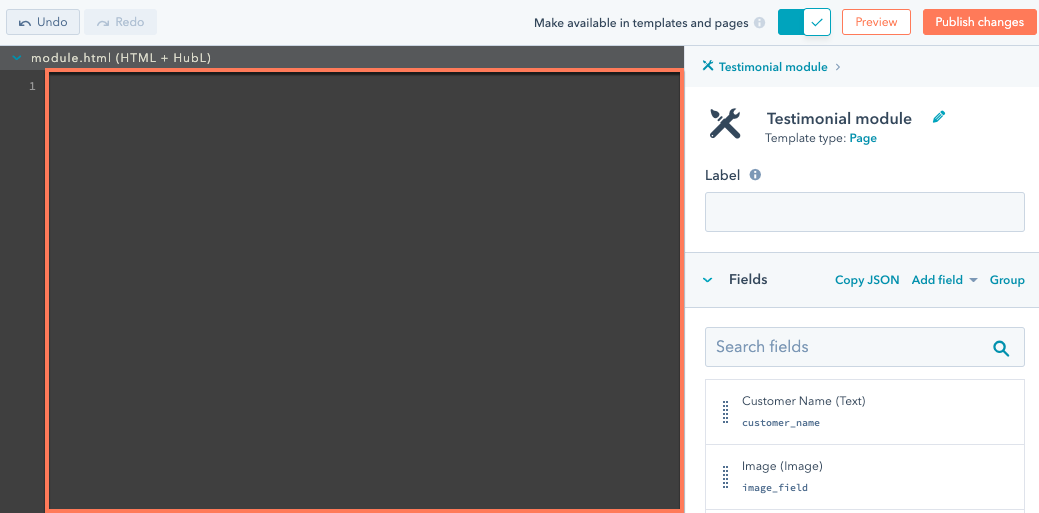
 So far, you've added data into several module fields. At this point, though, the module doesn't contain any HTML to render that data. In the module editor, this is reflected by the empty state of the `module.html` section.
 Next, you'll add HubL to `module.html` to display the field data.
### Add HubL to display field data
To display data from the previously created fields, add the following HubL to the `module.html` pane:
```hubl theme={null}
{{module.customer_name}}
Next, you'll add HubL to `module.html` to display the field data.
### Add HubL to display field data
To display data from the previously created fields, add the following HubL to the `module.html` pane:
```hubl theme={null}
{{module.customer_name}}
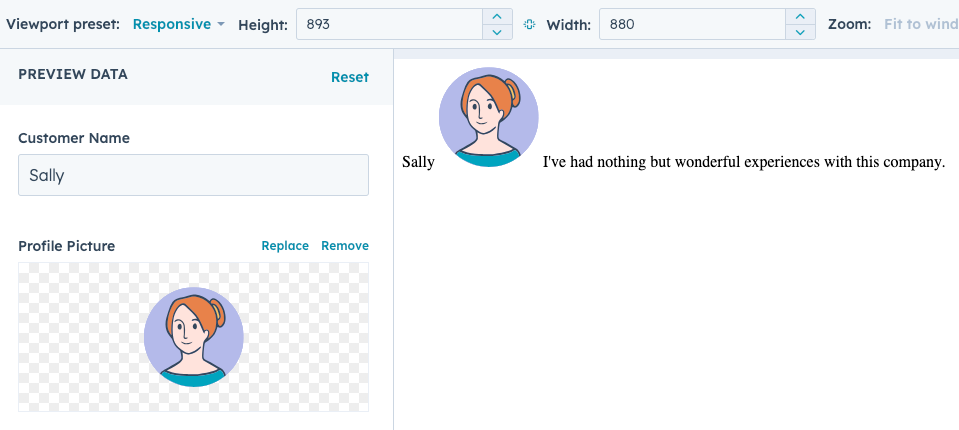 * Then, in the upper right, click **Publish changes**.
Having created and published the module in HubSpot, you'll now use the CLI to pull the module down into your local environment so that you can view its contents and make further changes.
## View and modify the module locally
To view the module locally, you'll first need to pull it down to your local theme:
* In the terminal, run the following command: `hs fetch
* Then, in the upper right, click **Publish changes**.
Having created and published the module in HubSpot, you'll now use the CLI to pull the module down into your local environment so that you can view its contents and make further changes.
## View and modify the module locally
To view the module locally, you'll first need to pull it down to your local theme:
* In the terminal, run the following command: `hs fetch 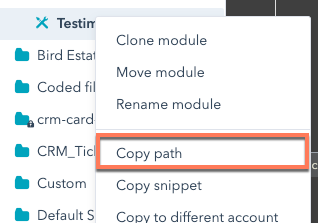 * `
* `I’ve had nothing but wonderful experiences with this company.
" } ] ``` The values for the following fields will match the values you added in step 3: * `name`: the name of the field. * `label`: the field's label. * `default`: the field's default value. ### View the module's module.html file The `module.html` file should contain the HubL and HTML that you wrote in the HubL + HTML module editor previously. To make this code more interesting and ready for CSS styling, copy and paste the following code into the file: ```hubl theme={null}{{ module.customer_name }}
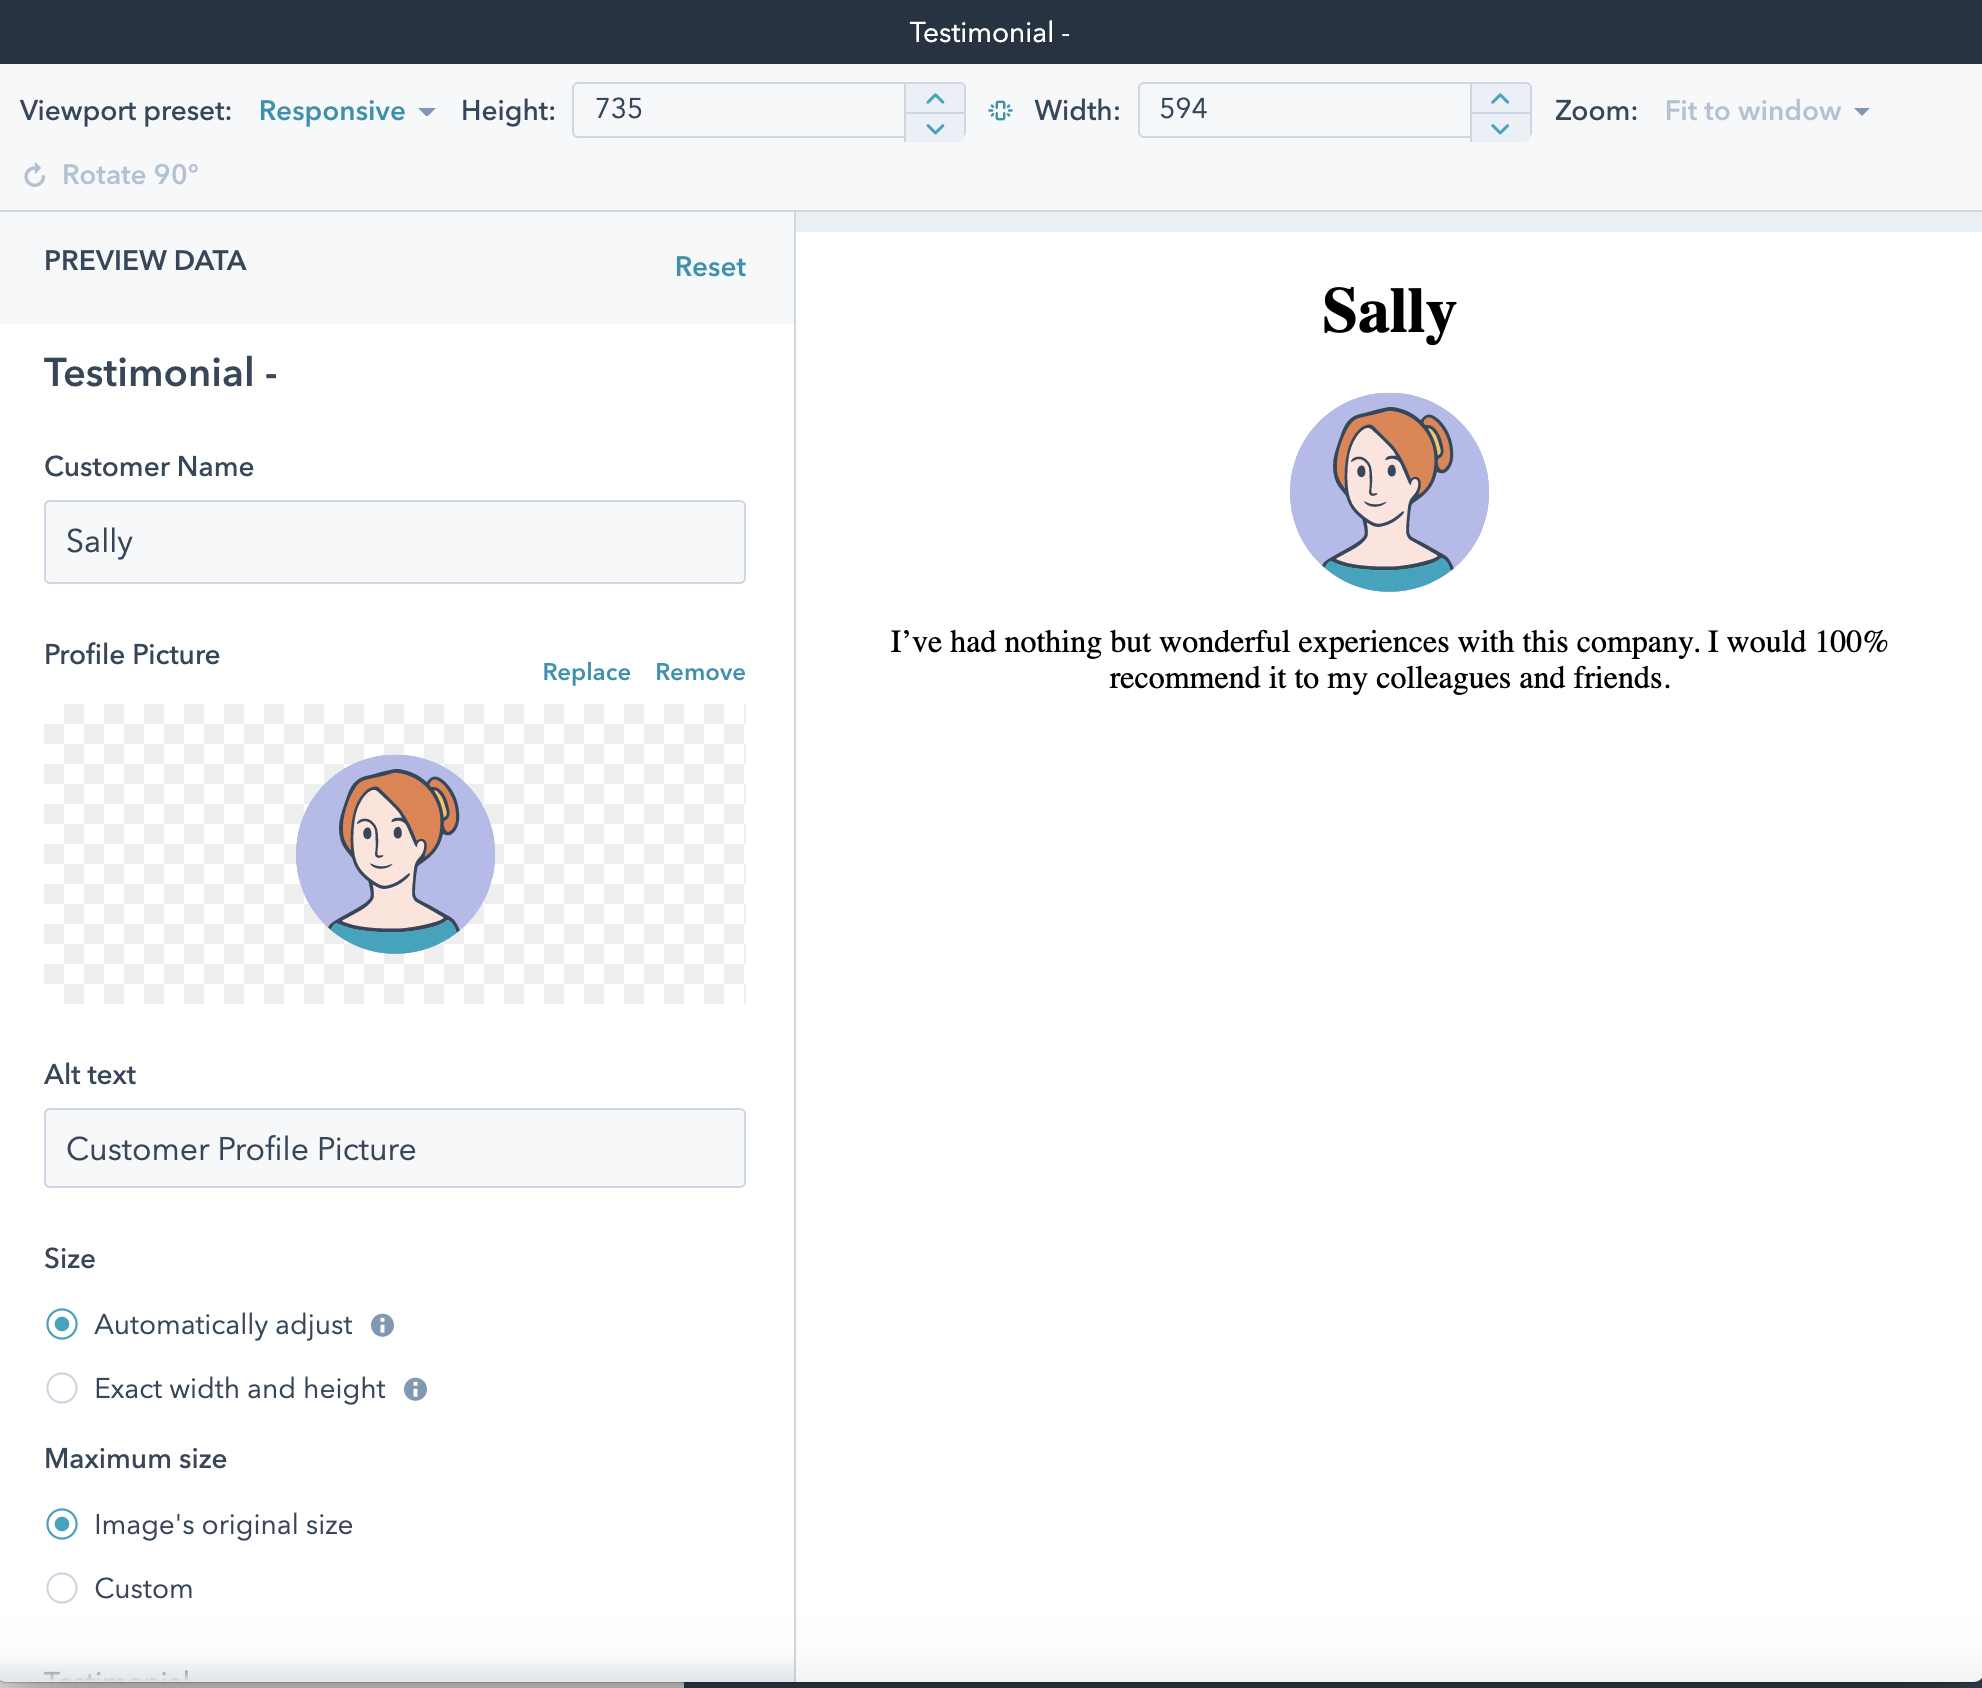 To recap this tutorial so far, you have:
* created a module in HubSpot.
* pulled that module down to your local environment.
* made changes to the HubL + HTML and CSS using your local development tools.
In the next part of this tutorial, learn how to use the module in a template.
## Add the module to a template
For this part of the tutorial, you'll be working mostly within the `modules` and `templates` folders within your local theme files.
To recap this tutorial so far, you have:
* created a module in HubSpot.
* pulled that module down to your local environment.
* made changes to the HubL + HTML and CSS using your local development tools.
In the next part of this tutorial, learn how to use the module in a template.
## Add the module to a template
For this part of the tutorial, you'll be working mostly within the `modules` and `templates` folders within your local theme files.
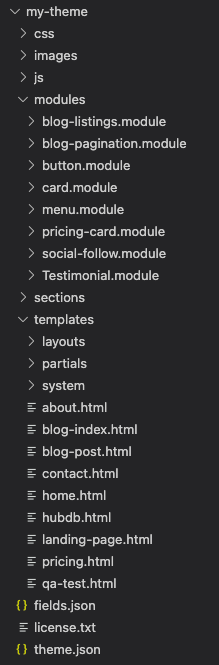 By their most basic definition, modules are editable areas of HubSpot templates and pages. You can insert modules into templates in HubSpot by using the design manager, but here you'll be using HubL to add the module to the template in your local environment.
* In your code editor, open the `templates` folder, then open the `home.html` file.
* In the `home.html` file, navigate to the final `dnd_section`, which starts around line 28. You'll be adding your new module to this section.
By their most basic definition, modules are editable areas of HubSpot templates and pages. You can insert modules into templates in HubSpot by using the design manager, but here you'll be using HubL to add the module to the template in your local environment.
* In your code editor, open the `templates` folder, then open the `home.html` file.
* In the `home.html` file, navigate to the final `dnd_section`, which starts around line 28. You'll be adding your new module to this section.
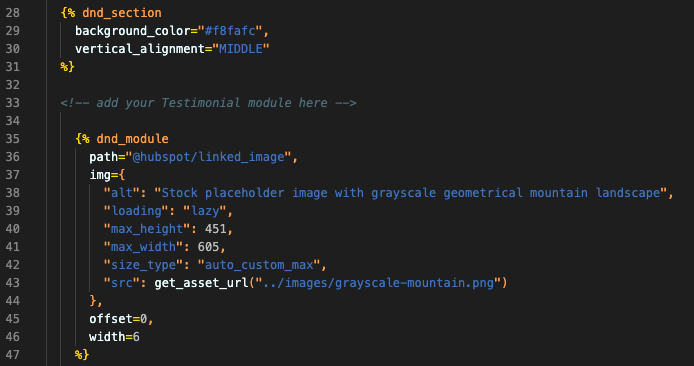 * Within this `dnd_section` and above the other `dnd_modules`, copy and paste the following HubL module tag:
```hubl theme={null}
{% dnd_module
path= “../modules/Testimonial.module”,
offset=0,
width=4
%}
{% end_dnd_module %}
```
This HubL tag references your new module by its relative file path. To get the module to fit evenly with the other two modules in the `dnd_section`, it also assigns a module `width` and `offset`:
* HubSpot's CMS uses a [12-column grid system](/cms/start-building/building-blocks/drag-and-drop/overview#columns), so to space this module evenly with the other two, you'll need to update each module in the `dnd_section` to have a width of `4`.
* Then, the first `dnd_module` in the group (`testimonial`) will have an offset of `0` to position it first.
* The second `dnd_module` (`linked_image`) will have an offset of `4` to position it second.
* The third `dnd_module` (`rich_text`) will have an offset of `8` to position it third.
After setting the `offset` and `width` of each `dnd_module`, your code will look similar to the following:
```hubl theme={null}
{% dnd_section
background_color="#f8fafc",
vertical_alignment="MIDDLE"
%}
{% dnd_module
path= “../modules/Testimonial.module”,
offset=0,
width=4
%}
{% end_dnd_module %}
{% dnd_module
path="@hubspot/linked_image",
img={
"alt": "Stock placeholder image with grayscale geometrical mountain landscape",
"loading": "lazy",
"max_height": 451,
"max_width": 605,
"size_type": "auto_custom_max",
"src": get_asset_url("../images/grayscale-mountain.png")
},
offset=4,
width=4
%}
{% end_dnd_module %}
{% dnd_module
path="@hubspot/rich_text",
html="
* Within this `dnd_section` and above the other `dnd_modules`, copy and paste the following HubL module tag:
```hubl theme={null}
{% dnd_module
path= “../modules/Testimonial.module”,
offset=0,
width=4
%}
{% end_dnd_module %}
```
This HubL tag references your new module by its relative file path. To get the module to fit evenly with the other two modules in the `dnd_section`, it also assigns a module `width` and `offset`:
* HubSpot's CMS uses a [12-column grid system](/cms/start-building/building-blocks/drag-and-drop/overview#columns), so to space this module evenly with the other two, you'll need to update each module in the `dnd_section` to have a width of `4`.
* Then, the first `dnd_module` in the group (`testimonial`) will have an offset of `0` to position it first.
* The second `dnd_module` (`linked_image`) will have an offset of `4` to position it second.
* The third `dnd_module` (`rich_text`) will have an offset of `8` to position it third.
After setting the `offset` and `width` of each `dnd_module`, your code will look similar to the following:
```hubl theme={null}
{% dnd_section
background_color="#f8fafc",
vertical_alignment="MIDDLE"
%}
{% dnd_module
path= “../modules/Testimonial.module”,
offset=0,
width=4
%}
{% end_dnd_module %}
{% dnd_module
path="@hubspot/linked_image",
img={
"alt": "Stock placeholder image with grayscale geometrical mountain landscape",
"loading": "lazy",
"max_height": 451,
"max_width": 605,
"size_type": "auto_custom_max",
"src": get_asset_url("../images/grayscale-mountain.png")
},
offset=4,
width=4
%}
{% end_dnd_module %}
{% dnd_module
path="@hubspot/rich_text",
html="Provide more details here.
Use text and images to tell your company’s story. Explain what makes your product or service extraordinary.
" offset=8, width=4 %} {% end_dnd_module %} {% end_dnd_section %} ```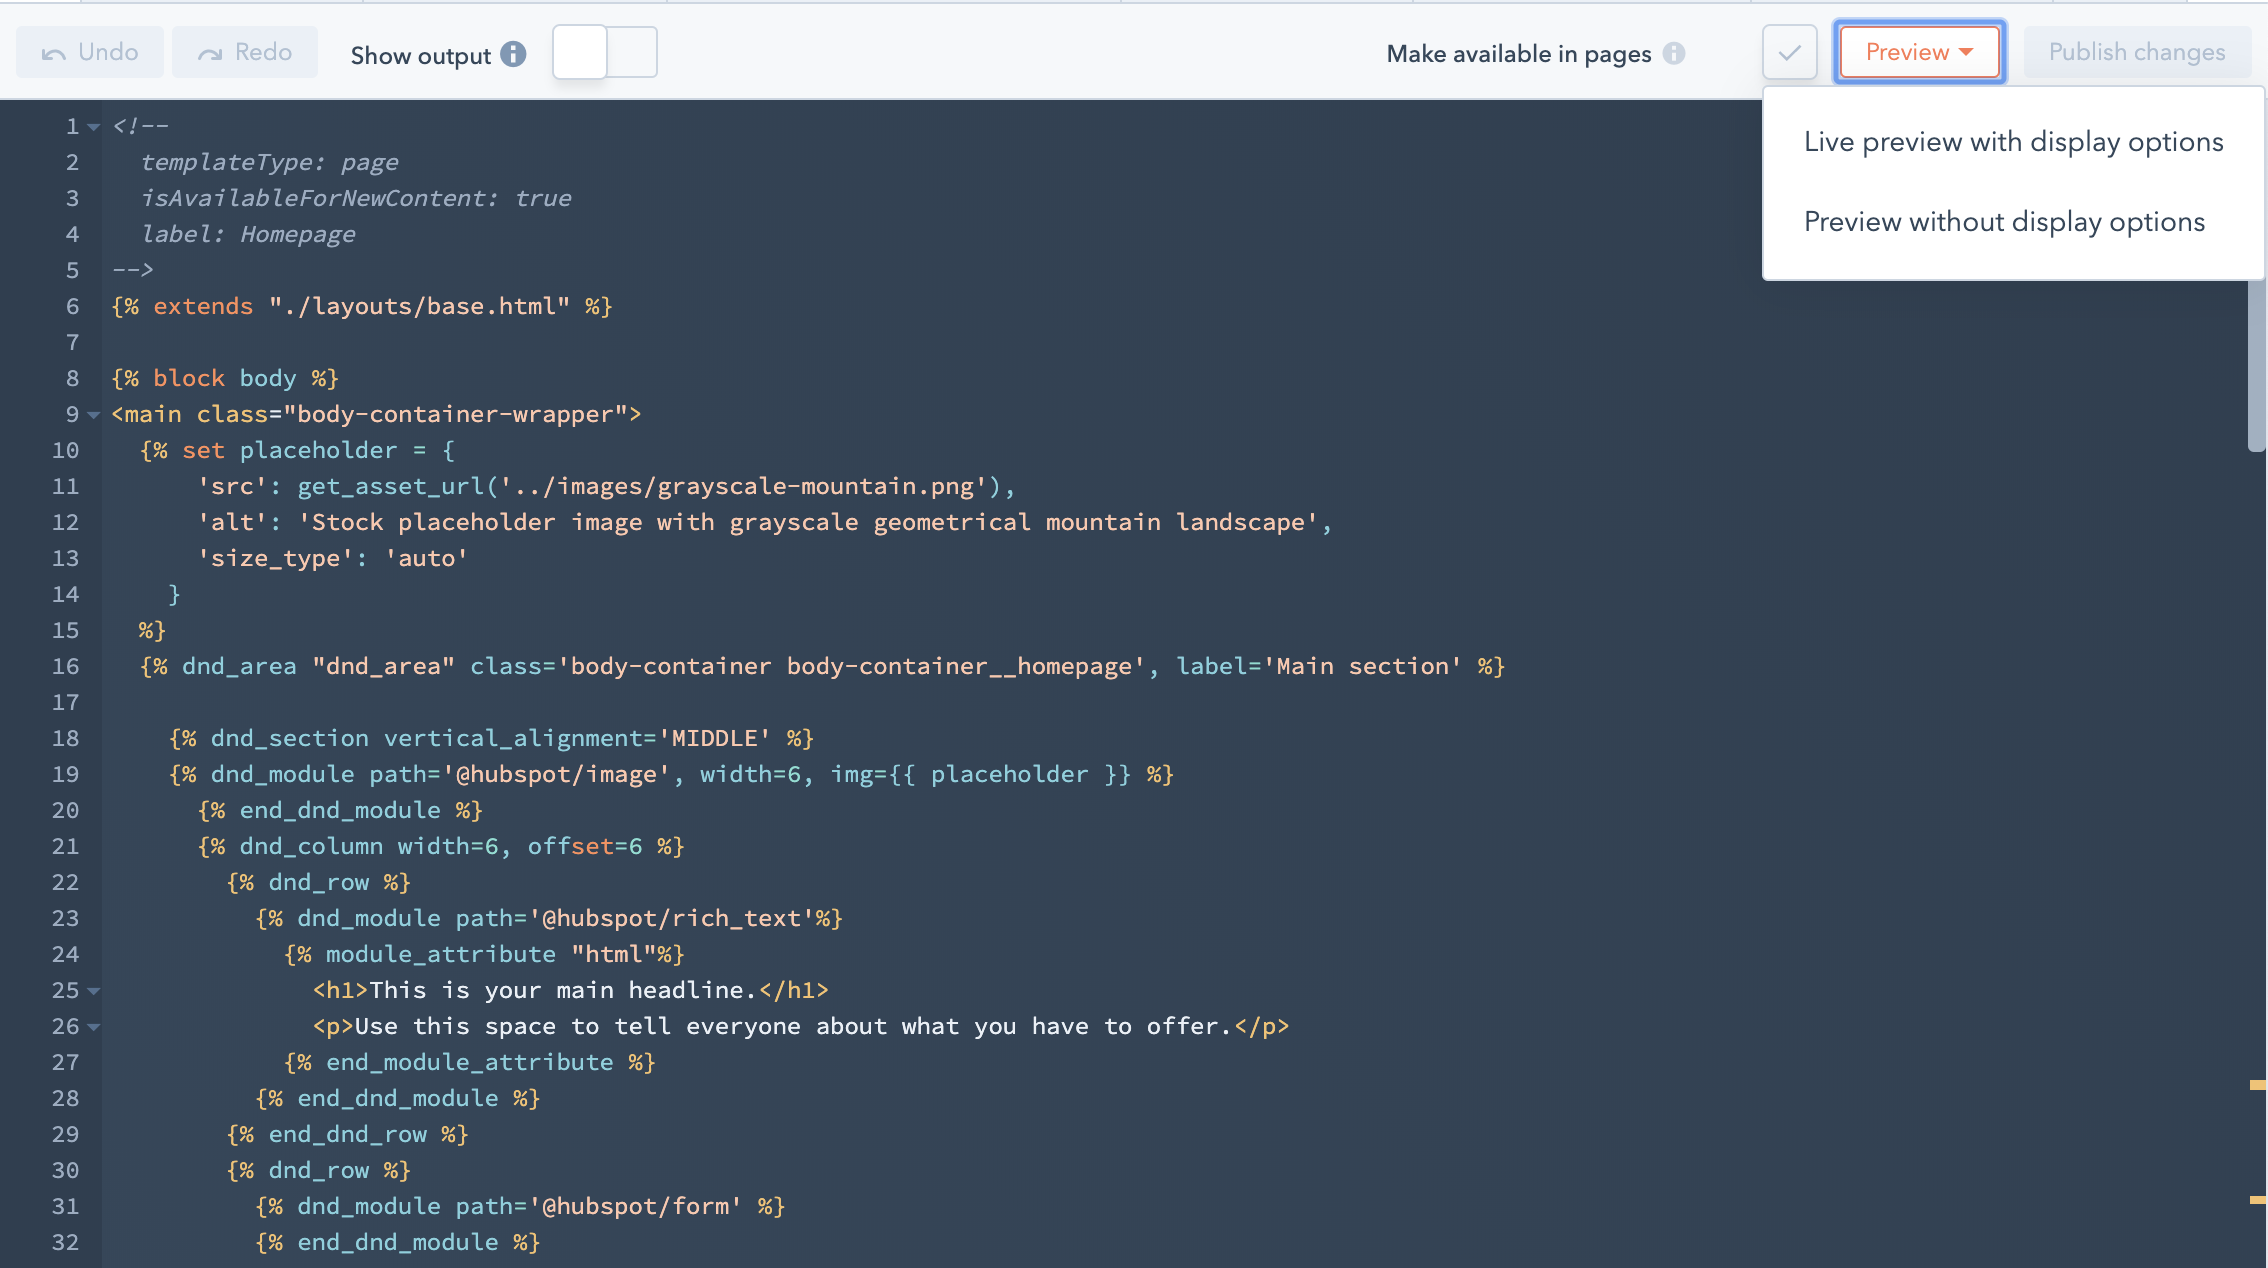 * In the new tab, view the template preview, which should contain your newly added testimonial module.
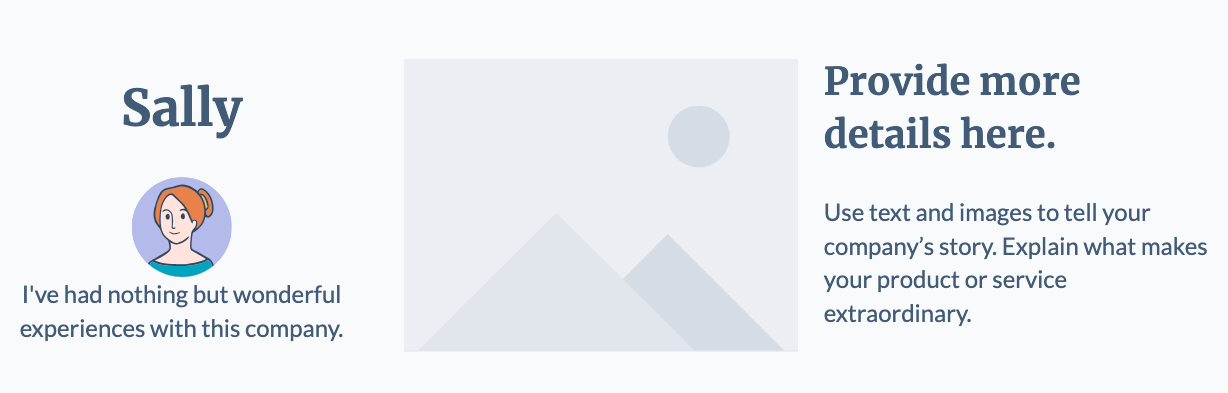 ## Customize the module in the template locally
To make the homepage template more interesting:
* Navigate back to your code editor, then open the `home.html` file.
* Add the following parameters to the testimonial module tag:
```hubl theme={null}
{% dnd_module
path='../modules/Testimonial.module',
customer_name = "Mary",
profile_pic = {
src: "{{
get_asset_url('../images/profile-pic-mary.svg') }}",
alt: "Mary Profile Picture"
},
testimonial = "Wow, what a product! I can't wait to recommend this to all my family and friends!",
offset=0,
width=4
%}
{% end_dnd_module %}
```
The above parameters override the default values that you originally assigned to the three fields. Each parameter uses the HubL variable name that you assigned to each field previously:
* `customer_name`**:** this parameter passes the name `Mary` to the customer name field, overriding the original value of `Sally`.
* `profile_pic`**:** this parameter is an object that contains two properties:
* The `src` property uses the `get_asset_url` HubL function to retrieve the URL for the new profile picture. Note that the image's file path is relative to your working directory. You'll first need to add this image to the `images` folder in your local theme files. You can find the image in the `images` folder of the completed [project files.](https://github.com/HubSpot/cms-modules-getting-started/tree/3b9159334f8c6204c7d2d34d8945d71b6ba402ea/images)
* The `alt` property assigns the image's alt text.
* `testimonial`**:** this parameter passes new text into the testimonial field.
Alternatively, for the rich text field you could use HubL block syntax to write a large block of HTML or text:
```hubl theme={null}
{% dnd_module
path='../modules/Testimonial.module',
customer_name = "Mary",
profile_pic = {
src: "{{
get_asset_url('../images/profile-pic-mary.svg') }}",
alt: "Mary Profile Picture"
},
offset=0,
width=4
%}
{% module_attribute "testimonial" %}
Wow, what a product! I can't wait to recommend this to all my family and friends!
{% end_module_attribute %}
{% end_dnd_module %}
```
Learn more about [module block syntax](/cms/reference/modules/using-modules-in-templates).
If you’ve kept the `watch` command running in your terminal, saving your changes will send them to HubSpot. You can then navigate back to the design manager to preview the template.
## Customize the module in the template locally
To make the homepage template more interesting:
* Navigate back to your code editor, then open the `home.html` file.
* Add the following parameters to the testimonial module tag:
```hubl theme={null}
{% dnd_module
path='../modules/Testimonial.module',
customer_name = "Mary",
profile_pic = {
src: "{{
get_asset_url('../images/profile-pic-mary.svg') }}",
alt: "Mary Profile Picture"
},
testimonial = "Wow, what a product! I can't wait to recommend this to all my family and friends!",
offset=0,
width=4
%}
{% end_dnd_module %}
```
The above parameters override the default values that you originally assigned to the three fields. Each parameter uses the HubL variable name that you assigned to each field previously:
* `customer_name`**:** this parameter passes the name `Mary` to the customer name field, overriding the original value of `Sally`.
* `profile_pic`**:** this parameter is an object that contains two properties:
* The `src` property uses the `get_asset_url` HubL function to retrieve the URL for the new profile picture. Note that the image's file path is relative to your working directory. You'll first need to add this image to the `images` folder in your local theme files. You can find the image in the `images` folder of the completed [project files.](https://github.com/HubSpot/cms-modules-getting-started/tree/3b9159334f8c6204c7d2d34d8945d71b6ba402ea/images)
* The `alt` property assigns the image's alt text.
* `testimonial`**:** this parameter passes new text into the testimonial field.
Alternatively, for the rich text field you could use HubL block syntax to write a large block of HTML or text:
```hubl theme={null}
{% dnd_module
path='../modules/Testimonial.module',
customer_name = "Mary",
profile_pic = {
src: "{{
get_asset_url('../images/profile-pic-mary.svg') }}",
alt: "Mary Profile Picture"
},
offset=0,
width=4
%}
{% module_attribute "testimonial" %}
Wow, what a product! I can't wait to recommend this to all my family and friends!
{% end_module_attribute %}
{% end_dnd_module %}
```
Learn more about [module block syntax](/cms/reference/modules/using-modules-in-templates).
If you’ve kept the `watch` command running in your terminal, saving your changes will send them to HubSpot. You can then navigate back to the design manager to preview the template.
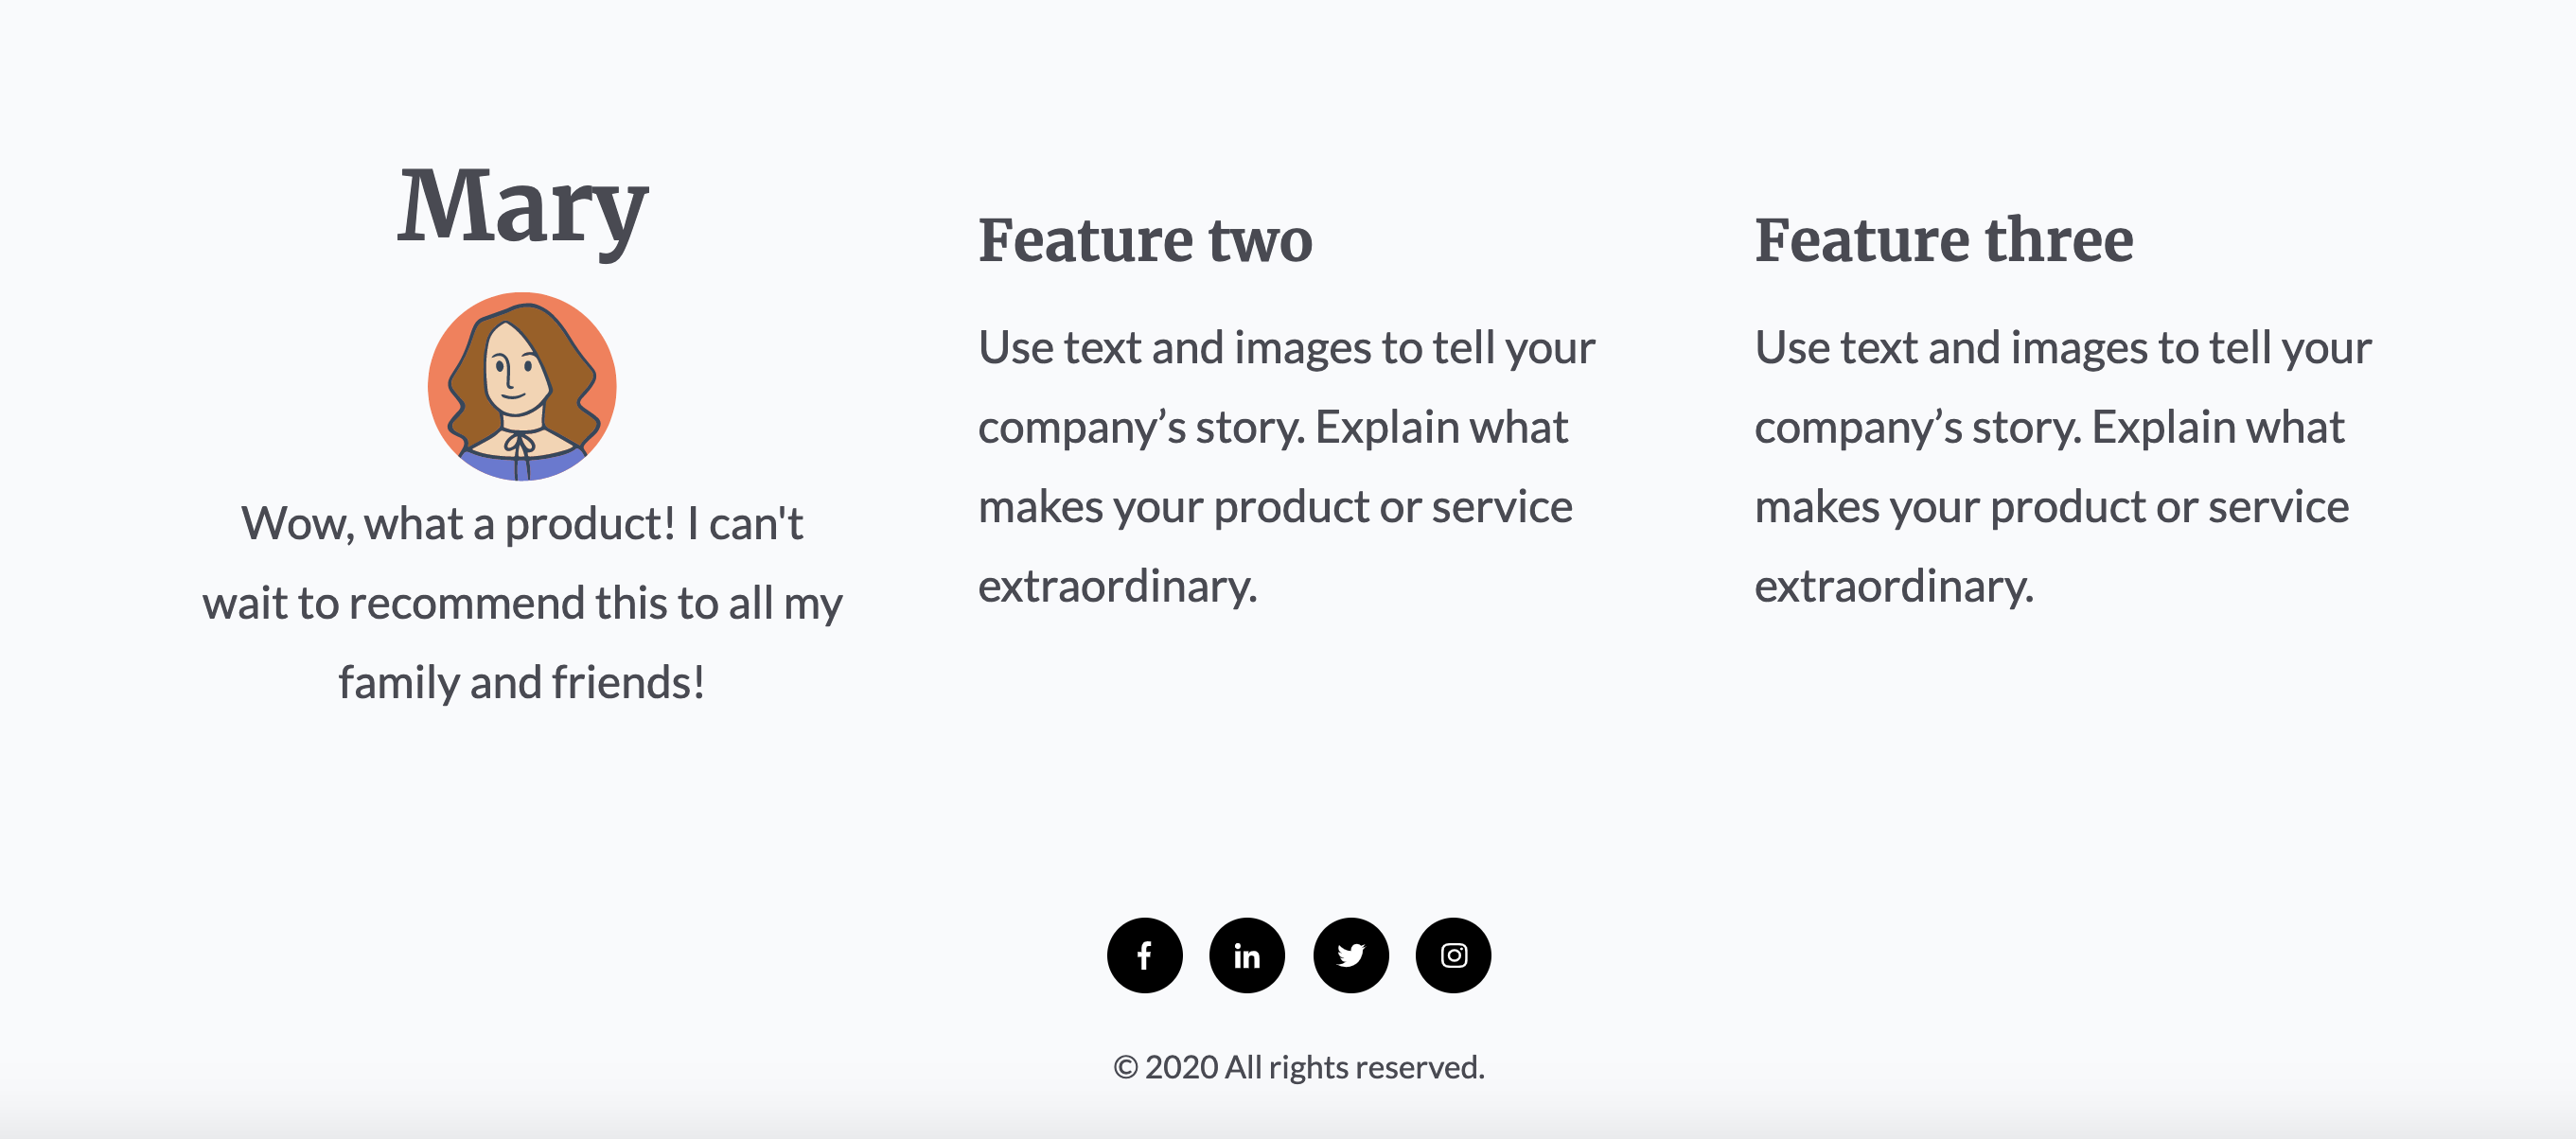 ## Add two more testimonial modules to the template
In this step, you'll add two more testimonial modules to the template using the same steps as before:
* Navigate to your code editor, then open the `home.html` file.
* Under the testimonial module you previous added, add another instance of the module by copying and pasting that module's code. In the new testimonial module, specify the following details using the same steps as above:
* The customer's name is `Ollie`.
* Ollie's testimonial reads: `I can't believe that I ever conducted business without the use of this product!`
* For Ollie's picture, add the relative file path for the file within the `images` folder. You can get the image itself from the finished [project files](https://github.com/HubSpot/cms-modules-getting-started/tree/3b9159334f8c6204c7d2d34d8945d71b6ba402ea). Then give Ollie's image the `alt` attribute of `Ollie Profile Picture`.
* To maintain spacing, set `offset` to `4` and `width` to `4`.
* Underneath the second testimonial module, add a third with the following details:
* The customer's name is `Erin`.
* Erin's testimony reads: `My business has nearly tripled since I began to use this product! Don't wait, start now!`
* For Erin's picture, add the relative file path for the file within the `images` folder. Then give Erin's image the `alt` attribute of `Erin Profile Picture`.
* To maintain spacing, set `offset` to `8` and `width` to `4`.
* Save your changes.
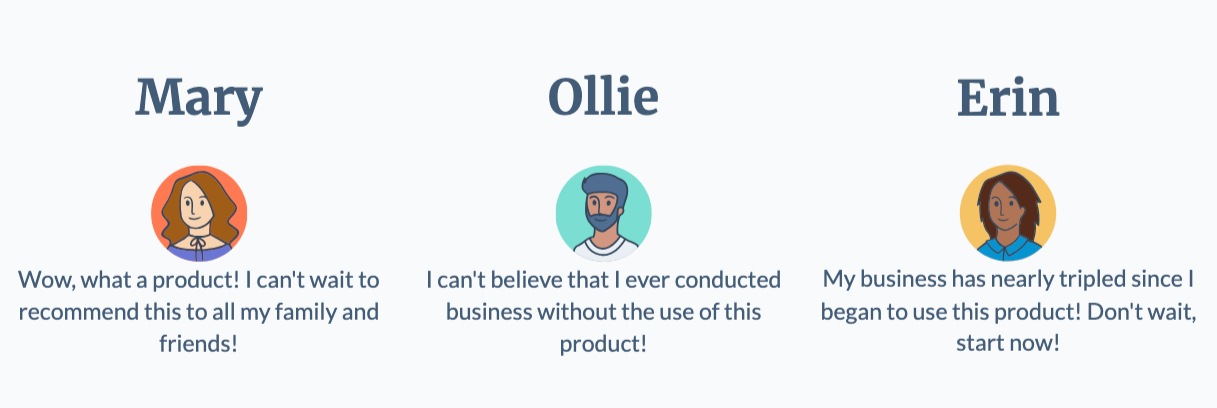
If you’ve kept the `watch` command running in your terminal, you can navigate back to the Design Manager to preview your changes to the template. The template preview should now contain all three testimonial modules.
## Add two more testimonial modules to the template
In this step, you'll add two more testimonial modules to the template using the same steps as before:
* Navigate to your code editor, then open the `home.html` file.
* Under the testimonial module you previous added, add another instance of the module by copying and pasting that module's code. In the new testimonial module, specify the following details using the same steps as above:
* The customer's name is `Ollie`.
* Ollie's testimonial reads: `I can't believe that I ever conducted business without the use of this product!`
* For Ollie's picture, add the relative file path for the file within the `images` folder. You can get the image itself from the finished [project files](https://github.com/HubSpot/cms-modules-getting-started/tree/3b9159334f8c6204c7d2d34d8945d71b6ba402ea). Then give Ollie's image the `alt` attribute of `Ollie Profile Picture`.
* To maintain spacing, set `offset` to `4` and `width` to `4`.
* Underneath the second testimonial module, add a third with the following details:
* The customer's name is `Erin`.
* Erin's testimony reads: `My business has nearly tripled since I began to use this product! Don't wait, start now!`
* For Erin's picture, add the relative file path for the file within the `images` folder. Then give Erin's image the `alt` attribute of `Erin Profile Picture`.
* To maintain spacing, set `offset` to `8` and `width` to `4`.
* Save your changes.
If you’ve kept the `watch` command running in your terminal, you can navigate back to the Design Manager to preview your changes to the template. The template preview should now contain all three testimonial modules.
 As a final step, you'll prepare the theme for use in a live page by modifying the `theme.json` file.
## Modify the theme name
If you'd like to modify the default name of the theme, you can do so by configuring the `name` and `label` fields in the `theme.json` file.
```json theme={null}
// example theme.json
{
"name": "my_first_theme",
"label": "My first theme"
}
```
After adding that code, save your changes so that the `watch` command sends your changes to HubSpot.
## Next steps
Now that you've created a custom module, added it to the `home.html` template, and optionally customized the theme name, you're ready to create a live page from the theme.
If you'd like to follow a similar tutorial that focuses on themes, check out the [Getting started with themes tutorial](/cms/start-building/building-blocks/themes/getting-started) next. Otherwise, you can learn more about [creating and customizing pages](https://knowledge.hubspot.com/website-and-landing-pages/create-and-customize-pages) in HubSpot's Knowledge Base.
Or, if you'd like to learn more about modules, check out the following module guides:
* [Configuring a module](/cms/reference/modules/configuration)
* [Using modules in templates](/cms/reference/modules/using-modules-in-templates)
* [Default modules](/cms/reference/modules/default-modules)
## Other tutorials
* [Getting started with themes](/cms/start-building/building-blocks/themes/getting-started)
* [Getting started with serverless functions](/cms/start-building/features/serverless-functions/getting-started-with-serverless-functions)
* [Creating an efficient developer workflow](/cms/start-building/introduction/developer-environment/creating-an-efficient-development-workflow)
* [Getting started with accessibility](/cms/best-practices/improve-existing-sites/accessibility)
* [How to use JavaScript frameworks on CMS Hub](/cms/start-building/introduction/developer-environment/js-frameworks)
* [How to use web components in custom modules](https://developers.hubspot.com/blog/use-web-components-in-hubspot-cms-development)
* [How to build a code block web component based module](https://developers.hubspot.com/blog/how-to-build-a-code-block-web-component)
As a final step, you'll prepare the theme for use in a live page by modifying the `theme.json` file.
## Modify the theme name
If you'd like to modify the default name of the theme, you can do so by configuring the `name` and `label` fields in the `theme.json` file.
```json theme={null}
// example theme.json
{
"name": "my_first_theme",
"label": "My first theme"
}
```
After adding that code, save your changes so that the `watch` command sends your changes to HubSpot.
## Next steps
Now that you've created a custom module, added it to the `home.html` template, and optionally customized the theme name, you're ready to create a live page from the theme.
If you'd like to follow a similar tutorial that focuses on themes, check out the [Getting started with themes tutorial](/cms/start-building/building-blocks/themes/getting-started) next. Otherwise, you can learn more about [creating and customizing pages](https://knowledge.hubspot.com/website-and-landing-pages/create-and-customize-pages) in HubSpot's Knowledge Base.
Or, if you'd like to learn more about modules, check out the following module guides:
* [Configuring a module](/cms/reference/modules/configuration)
* [Using modules in templates](/cms/reference/modules/using-modules-in-templates)
* [Default modules](/cms/reference/modules/default-modules)
## Other tutorials
* [Getting started with themes](/cms/start-building/building-blocks/themes/getting-started)
* [Getting started with serverless functions](/cms/start-building/features/serverless-functions/getting-started-with-serverless-functions)
* [Creating an efficient developer workflow](/cms/start-building/introduction/developer-environment/creating-an-efficient-development-workflow)
* [Getting started with accessibility](/cms/best-practices/improve-existing-sites/accessibility)
* [How to use JavaScript frameworks on CMS Hub](/cms/start-building/introduction/developer-environment/js-frameworks)
* [How to use web components in custom modules](https://developers.hubspot.com/blog/use-web-components-in-hubspot-cms-development)
* [How to build a code block web component based module](https://developers.hubspot.com/blog/how-to-build-a-code-block-web-component)