> ## Documentation Index
> Fetch the complete documentation index at: https://developers.hubspot.com/docs/llms.txt
> Use this file to discover all available pages before exploring further.
---
id: ef277cea-c9d6-428b-8d1b-d688b072f6df
---
# Getting started with themes
> Getting started with themes on the HubSpot CMS.
A theme is a portable and self-contained package of developer assets designed to work together to enable a flexible content editing experience. These assets might include templates, modules, CSS files, JavaScript files, images, and more. Themes allow developers to create a set of theme fields, similar to module fields, which allow content creators to control global website styles without having to edit CSS.
You can use HubL to access the values of theme fields throughout the theme's CSS. Content creators can then use the theme editor to modify theme fields, preview those changes against existing templates within a theme, and publish their changes.
 This document walks through creating your first theme based on the [HubSpot CMS Boilerplate](/cms/start-building/building-blocks/themes/hubspot-cms-boilerplate). For more on themes, see the [themes reference documentation.](/cms/start-building/building-blocks/overview)
If this is your first experience with CMS Hub development it's recommended you go through:
**Please note:**
Before you begin, you'll need to install the [HubSpot CLI](/developer-tooling/local-development/hubspot-cli/install-the-cli).
Run `hs create website-theme my-website-theme` to create a `my-website-theme` directory populated with files from the [CMS theme boilerplate](https://github.com/HubSpot/cms-theme-boilerplate).
Run `hs upload my-website-theme my-website-theme`. This will upload the boilerplate to your account’s design manager, in a folder titled *my-website-theme*.
To create a page from the uploaded theme:
* In your HubSpot account, navigate to **Marketing** > **Website** > **Website Pages.**
* In the upper right, click **Create**, then select **Website page**.
* In the dialog box, select the **domain** that the page will be published to, then enter a **page name**. Then, click **Create page**.
This document walks through creating your first theme based on the [HubSpot CMS Boilerplate](/cms/start-building/building-blocks/themes/hubspot-cms-boilerplate). For more on themes, see the [themes reference documentation.](/cms/start-building/building-blocks/overview)
If this is your first experience with CMS Hub development it's recommended you go through:
**Please note:**
Before you begin, you'll need to install the [HubSpot CLI](/developer-tooling/local-development/hubspot-cli/install-the-cli).
Run `hs create website-theme my-website-theme` to create a `my-website-theme` directory populated with files from the [CMS theme boilerplate](https://github.com/HubSpot/cms-theme-boilerplate).
Run `hs upload my-website-theme my-website-theme`. This will upload the boilerplate to your account’s design manager, in a folder titled *my-website-theme*.
To create a page from the uploaded theme:
* In your HubSpot account, navigate to **Marketing** > **Website** > **Website Pages.**
* In the upper right, click **Create**, then select **Website page**.
* In the dialog box, select the **domain** that the page will be published to, then enter a **page name**. Then, click **Create page**.
 * On the template selection screen, templates from your [active theme](https://knowledge.hubspot.com/website-and-landing-pages/use-themes#use-an-active-theme) will appear at the top of the page.
* If you haven’t selected an active theme, hover over **CMS theme boilerplate** and click **Set as active theme**.
* If you've already set an active theme, select your new theme by clicking the **theme selector** dropdown menu, then selecting **Change theme**. Then, hover over **CMS theme boilerplate** and click **Set as active theme**. On the next screen, select a **template**.
* On the template selection screen, templates from your [active theme](https://knowledge.hubspot.com/website-and-landing-pages/use-themes#use-an-active-theme) will appear at the top of the page.
* If you haven’t selected an active theme, hover over **CMS theme boilerplate** and click **Set as active theme**.
* If you've already set an active theme, select your new theme by clicking the **theme selector** dropdown menu, then selecting **Change theme**. Then, hover over **CMS theme boilerplate** and click **Set as active theme**. On the next screen, select a **template**.
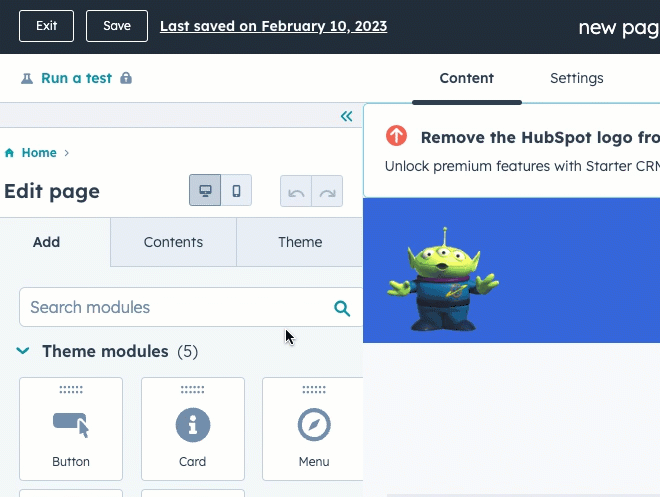
 You'll then be brought to the page editor where you can edit the theme's fields.
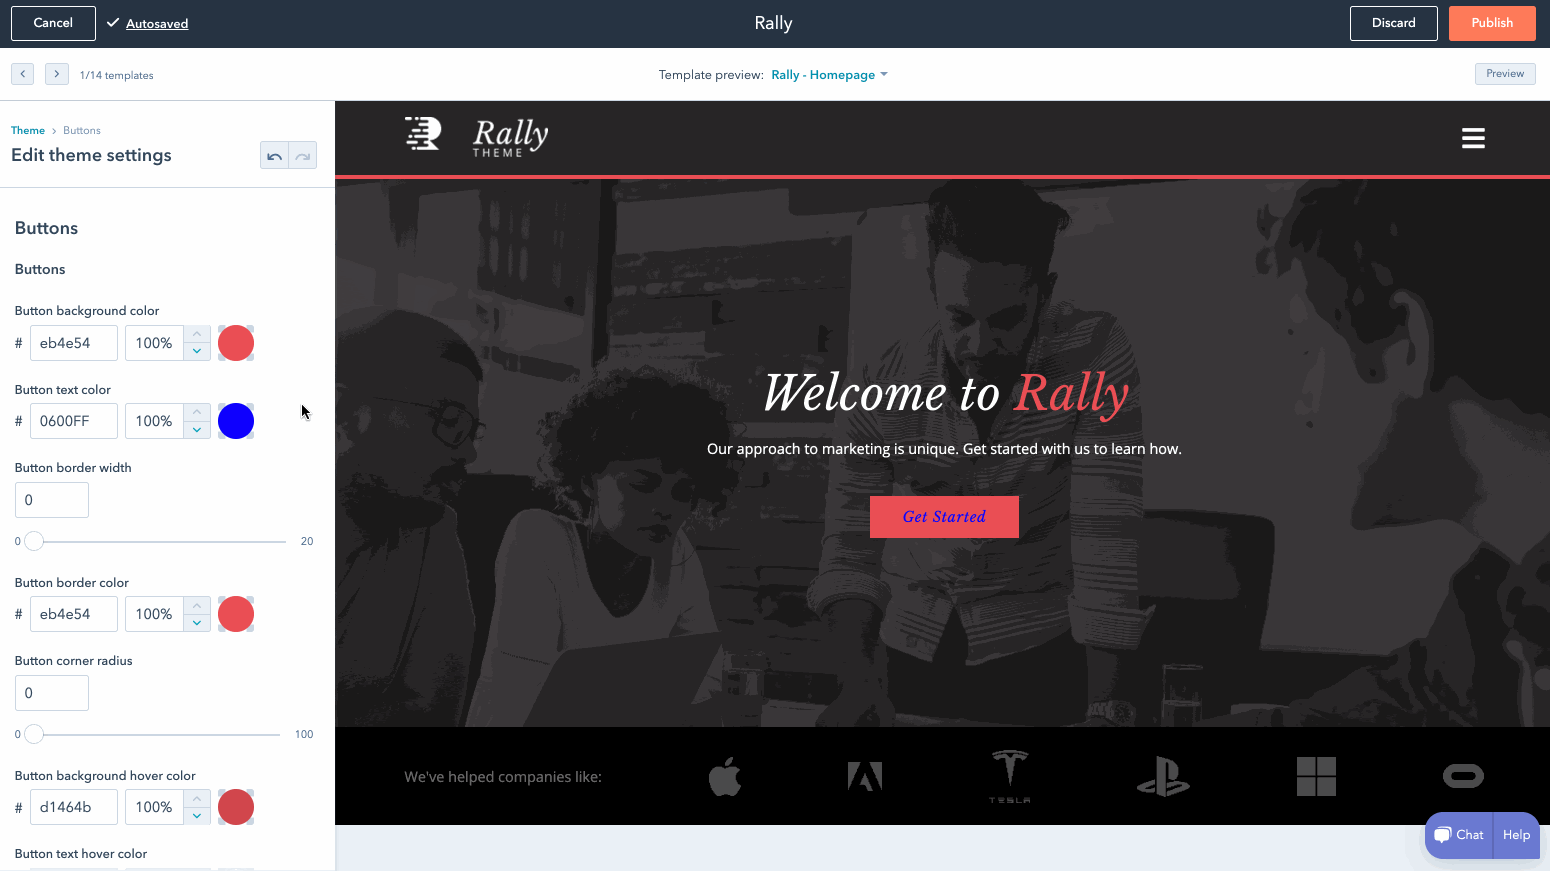
* In the left sidebar of the page editor, click the **Themes** tab.
* On the *Themes* tab, click **Edit theme settings**. This is where you can modify your existing theme settings. Publishing changes to theme settings will update the styles across your pages using this theme that was updated.
You'll then be brought to the page editor where you can edit the theme's fields.
* In the left sidebar of the page editor, click the **Themes** tab.
* On the *Themes* tab, click **Edit theme settings**. This is where you can modify your existing theme settings. Publishing changes to theme settings will update the styles across your pages using this theme that was updated.
 Return to your terminal, then run `hs watch my-website-theme my-website-theme`. This [command](/developer-tooling/local-development/hubspot-cli/install-the-cli) watches your local directory and automatically uploads the following changes to your HubSpot account on file saves.
Now that we're listening for local changes, add a new theme field:
* Open `fields.json` file in your editor. This file controls the available fields in the theme editor sidebar. We’ll be adding a new [field](/cms/start-building/building-blocks/overview#fields-json) to specify the height of the footer.
* Near the bottom of the file, locate the `footer` group.
* Copy the code below and paste the JSON into the file above the first item in the children array for the footer group.
```json theme={null}
// fields.json
{
"id" : "",
"name" : "height",
"label" : "Footer height",
"required" : false,
"locked" : false,
"display" : "text",
"step" : 1,
"type" : "number",
"min" : 10,
"max" : 900,
"help_text":"This footer will expand in height to accommodate any content added to the footer. You are setting the minimum height in px",
"default" : 100
},
```
* Save `fields.json`, and refresh the theme previewer in HubSpot. Your new field should display in the left-hand sidebar.
* In your code editor, open the `theme-overrides.css` file. Then locate the css selector for `.footer`. We're now going to add a `min-height` to this selector.
* To access a value in a theme, use the `theme` object. For example, you would use `{{ theme.footer.height }}` to access the height value set in our height field.
* Replace the `.footer` declaration in theme-overrides.css with the following:
```css theme={null}
.footer {
background-color: {{ footer_bg_color }};
min-height: {{theme.footer.height}}px;
}
```
* Save `theme-overrides.css` to upload it to your HubSpot account.
Return to the theme editor, and refresh the page to see your new field appear under footer. Update the height value to have it reflected immediately in the preview. It might be helpful to set a background color for the footer so you can see the change more easily.
## Next Steps
Now that you've created and updated your theme, you can now create more theme fields and customize them for your projects. For more customization options, check out the [themes overview](/cms/start-building/building-blocks/overview). While building out your theme, it might be helpful to view the best practices for [optimizing websites on the HubSpot CMS](/cms/best-practices/testing-staging-performance/speed).
HubSpot has several [default themes](/cms/start-building/building-blocks/themes/default-themes) that come with CMS Hub. These themes are available for you to view, clone, and update, to learn how you might use a theme in a real-world scenario.
Once you've got a handle on themes, [learn how to build your first custom module](/cms/start-building/building-blocks/modules/quickstart).
Return to your terminal, then run `hs watch my-website-theme my-website-theme`. This [command](/developer-tooling/local-development/hubspot-cli/install-the-cli) watches your local directory and automatically uploads the following changes to your HubSpot account on file saves.
Now that we're listening for local changes, add a new theme field:
* Open `fields.json` file in your editor. This file controls the available fields in the theme editor sidebar. We’ll be adding a new [field](/cms/start-building/building-blocks/overview#fields-json) to specify the height of the footer.
* Near the bottom of the file, locate the `footer` group.
* Copy the code below and paste the JSON into the file above the first item in the children array for the footer group.
```json theme={null}
// fields.json
{
"id" : "",
"name" : "height",
"label" : "Footer height",
"required" : false,
"locked" : false,
"display" : "text",
"step" : 1,
"type" : "number",
"min" : 10,
"max" : 900,
"help_text":"This footer will expand in height to accommodate any content added to the footer. You are setting the minimum height in px",
"default" : 100
},
```
* Save `fields.json`, and refresh the theme previewer in HubSpot. Your new field should display in the left-hand sidebar.
* In your code editor, open the `theme-overrides.css` file. Then locate the css selector for `.footer`. We're now going to add a `min-height` to this selector.
* To access a value in a theme, use the `theme` object. For example, you would use `{{ theme.footer.height }}` to access the height value set in our height field.
* Replace the `.footer` declaration in theme-overrides.css with the following:
```css theme={null}
.footer {
background-color: {{ footer_bg_color }};
min-height: {{theme.footer.height}}px;
}
```
* Save `theme-overrides.css` to upload it to your HubSpot account.
Return to the theme editor, and refresh the page to see your new field appear under footer. Update the height value to have it reflected immediately in the preview. It might be helpful to set a background color for the footer so you can see the change more easily.
## Next Steps
Now that you've created and updated your theme, you can now create more theme fields and customize them for your projects. For more customization options, check out the [themes overview](/cms/start-building/building-blocks/overview). While building out your theme, it might be helpful to view the best practices for [optimizing websites on the HubSpot CMS](/cms/best-practices/testing-staging-performance/speed).
HubSpot has several [default themes](/cms/start-building/building-blocks/themes/default-themes) that come with CMS Hub. These themes are available for you to view, clone, and update, to learn how you might use a theme in a real-world scenario.
Once you've got a handle on themes, [learn how to build your first custom module](/cms/start-building/building-blocks/modules/quickstart).