> ## Documentation Index
> Fetch the complete documentation index at: https://developers.hubspot.com/docs/llms.txt
> Use this file to discover all available pages before exploring further.

---
id: 7c2642bd-6e83-4ca4-8e12-8baadfae118b
---

# How to add videos to dynamic pages in HubDB

> How to add videos to dynamic pages powered by HubDB.

export const SupportedProducts = ({marketing, sales, service, cms, data, commerce, marketingLevel, salesLevel, serviceLevel, cmsLevel, dataLevel, commerceLevel}) => {
  const translations = {
    description: "Requires one of the following products or higher.",
    productNames: {
      marketing: "Marketing Hub",
      sales: "Sales Hub",
      service: "Service Hub",
      cms: "Content Hub",
      data: "Data Hub",
      commerce: "Commerce Hub"
    },
    tiers: {
      free: "Free",
      starter: "Starter",
      professional: "Professional",
      enterprise: "Enterprise"
    }
  };
  const translateTier = tier => {
    if (!tier) return '';
    const lowerTier = tier.toLowerCase();
    return translations.tiers[lowerTier] || tier;
  };
  const products = [{
    name: marketing ? translations.productNames.marketing : '',
    level: translateTier(marketingLevel),
    icon: "https://mintlify-assets.b-cdn.net/Icons/marketing-bolt.svg",
    alt: "Marketing Hub"
  }, {
    name: sales ? translations.productNames.sales : '',
    level: translateTier(salesLevel),
    icon: "https://mintlify-assets.b-cdn.net/Icons/sales-star.svg",
    alt: "Sales Hub"
  }, {
    name: service ? translations.productNames.service : '',
    level: translateTier(serviceLevel),
    icon: "https://mintlify-assets.b-cdn.net/Icons/service-heart.svg",
    alt: "Service Hub"
  }, {
    name: cms ? translations.productNames.cms : '',
    level: translateTier(cmsLevel),
    icon: "https://mintlify-assets.b-cdn.net/Icons/content-play.svg",
    alt: "Content Hub"
  }, {
    name: data ? translations.productNames.data : '',
    level: translateTier(dataLevel),
    icon: "https://developers.hubspot.com/hubfs/Knowledge_Base_2023-24-25/subscription_key_icons/operations_icon.svg",
    alt: "Data Hub"
  }, {
    name: commerce ? translations.productNames.commerce : '',
    level: translateTier(commerceLevel),
    icon: "https://developers.hubspot.com/hubfs/Knowledge_Base/subscription_key_icons/commerce_icon.svg",
    alt: "Commerce Hub"
  }].filter(product => product.name && product.level);
  if (products.length === 0) return null;
  return <div>
      <div className="text-sm mb-2">{translations.description}</div>
      <div className={`grid ${products.length === 1 ? 'grid-cols-1' : 'grid-cols-2'} gap-1.5`}>
        {products.map((product, index) => <div key={index} style={{
    display: 'flex',
    alignItems: 'center'
  }}>
            <img src={product.icon} alt={product.alt} className="w-3.5 h-3.5 mr-1.5 mt-2.5 mb-2.5 flex-shrink-0 align-middle" />
            <span className="font-medium mr-1 text-sm">{product.name} -</span>
            <span className="text-sm">{product.level}</span>
          </div>)}
      </div>
    </div>;
};

<Accordion title="Supported products" defaultOpen="true" icon="cubes">
  <SupportedProducts cms={true} cmsLevel="professional" />
</Accordion>

<ProductTier tiers={['cms-professional', 'cms-enterprise']} />

A [dynamic website page](/cms/start-building/features/data-driven-content/crm-objects) is a CMS page whose content changes based on the path of the URL requested by an end user. [HubDB](/cms/start-building/features/storage/hubdb) already allows you to store, filter, and display data in your HubSpot website pages. Multilevel dynamic pages take this concept further, allowing you to create up to five levels of pages within one dynamic template.

Each dynamic page includes its own unique, SEO-friendly URL, and offers page-specific analytics.

<Warning>
  This tutorial assumes you already have multiple HubDB tables created. Please see the [HubDB documentation](/cms/start-building/features/storage/hubdb) if you are unfamiliar with HubDB or want to create your first HubDB tables.
</Warning>

<Steps>
  <Step title="Add a ">
    Navigate to [HubDB](https://app.hubspot.com/l/hubdb) in your HubSpot portal, and edit the table you would like to be a parent of other tables. Click **"Add new column"** and create a column with type **"Video"**.

    <Frame>
      <img src="https://www.hubspot.com/hubfs/hubdb-add-video.png" alt="HubDB add column modal showing video column type selected" />
    </Frame>
  </Step>

  <Step title="Select videos for each row.">
    You can now add a video to your row by clicking the **"choose"** button in the video column.

    <Frame>
      <img src="https://www.hubspot.com/hubfs/insert%20video%20interface.png" alt="insert video interface screenshot" />
    </Frame>

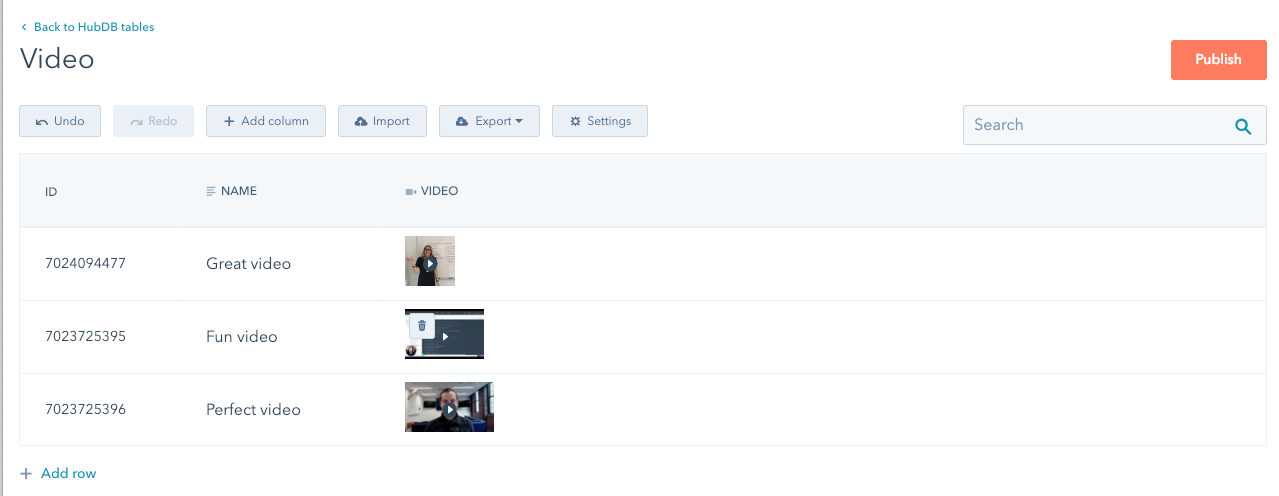
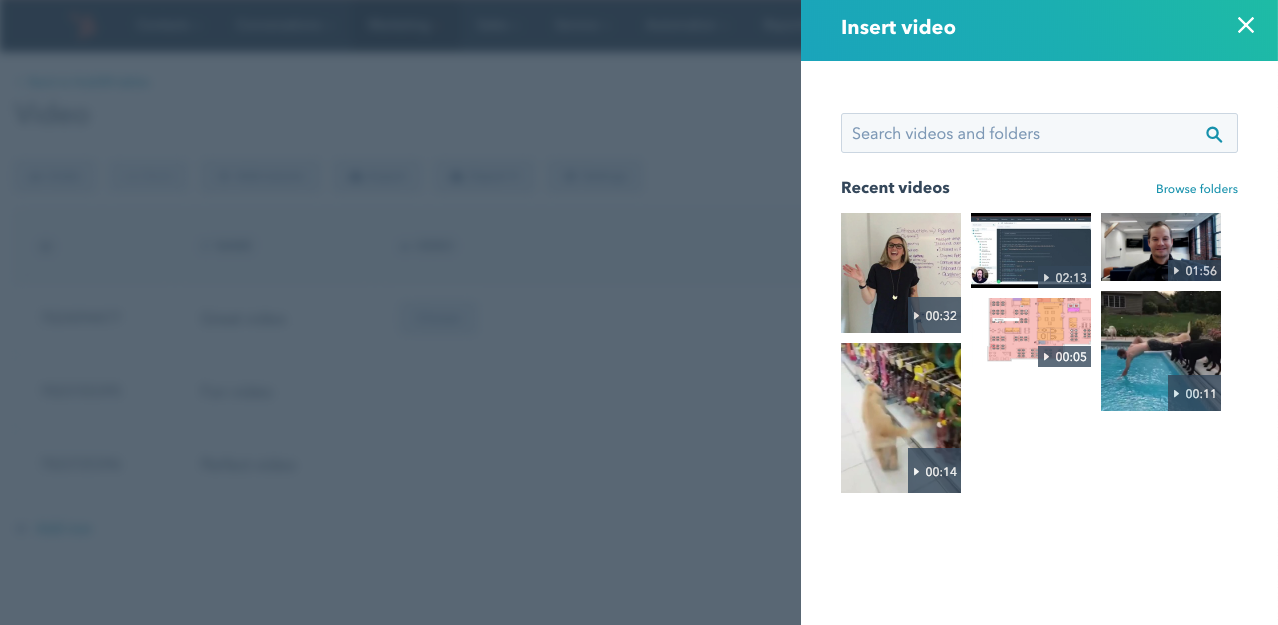
    Selecting a video will store the video `player_id` as the column value in the row. The file thumbnail is used to visually represent the video in the UI.

    <Frame>
      <img src="https://www.hubspot.com/hubfs/HubDB-with-videos-selected.png" alt="HubDB UI with videos selected" />
    </Frame>
  </Step>

  <Step title="Add the video player widget to your dynamic template">
    You can now reference the row data in your dynamic template to build a [`video_player`](/cms/reference/hubl/tags/standard-tags#video-player) tag.

    ```hubl theme={null}
    {% if dynamic_page_hubdb_row %}
      {% video_player "embed_player" player_id="{{dynamic_page_hubdb_row.video}}" %}
    {% endif %}
    ```
  </Step>
</Steps>
