{translations.description}
{products.map((product, index) =>
 {product.name} -
{product.level}
)}
{product.name} -
{product.level}
)}
 * In the *User Type* section, select the **type of user** who will be accessing your private content.
* **Internal**: only employees of your organization will be access your content.
* **External**: other visitors will be accessing your content.
* If you select *External*, you will be prompted to enter an **app name**, **support email** for members to contact you, and **developer contact information** for Google to contact you.
* In the *Scopes* section, select the following scopes:
* .../auth/[userinfo.email](http://userinfo.email/)
* .../auth/userinfo.profile
* openid
* Publish your app.
## Create credentials
Once you've set up your project, you will need to link the project to your HubSpot private content.
* Navigate to [Google Cloud Console](https://console.cloud.google.com/).
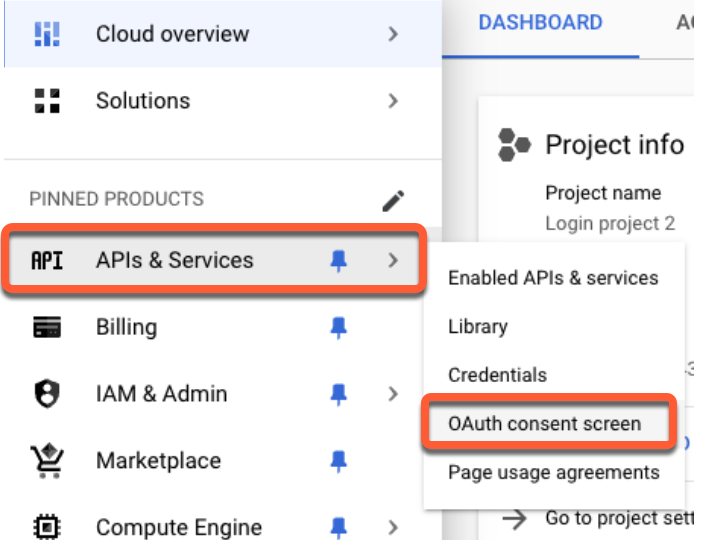
* In the top left, click the **navigation menu**, then select **API & Services > Credentials**.
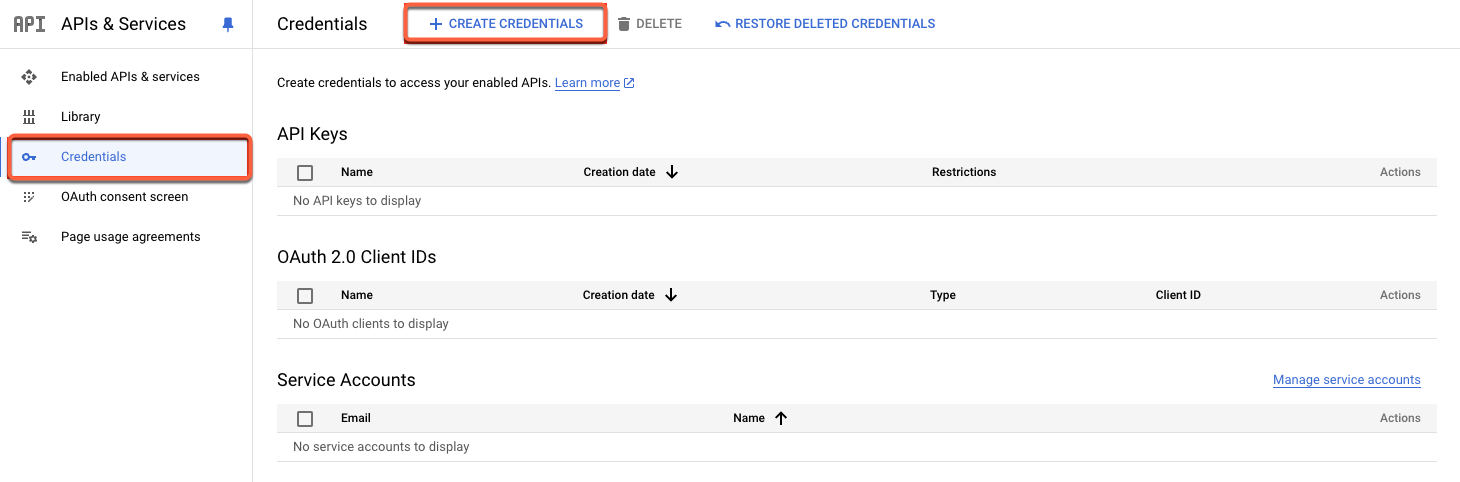
* At the top of the page, click **Create credentials**.
\*\*
* In the *User Type* section, select the **type of user** who will be accessing your private content.
* **Internal**: only employees of your organization will be access your content.
* **External**: other visitors will be accessing your content.
* If you select *External*, you will be prompted to enter an **app name**, **support email** for members to contact you, and **developer contact information** for Google to contact you.
* In the *Scopes* section, select the following scopes:
* .../auth/[userinfo.email](http://userinfo.email/)
* .../auth/userinfo.profile
* openid
* Publish your app.
## Create credentials
Once you've set up your project, you will need to link the project to your HubSpot private content.
* Navigate to [Google Cloud Console](https://console.cloud.google.com/).
* In the top left, click the **navigation menu**, then select **API & Services > Credentials**.
* At the top of the page, click **Create credentials**.
\*\*
 \*\*
* Select **OAuth client ID**.
* Select **web application**, then enter a **name** for your application.
* In a separate tab, locate your credentials in HubSpot:
* In your HubSpot account, click the **settings icon** in the top navigation bar.
* In the left sidebar menu, navigate to **Content > Private Content**.
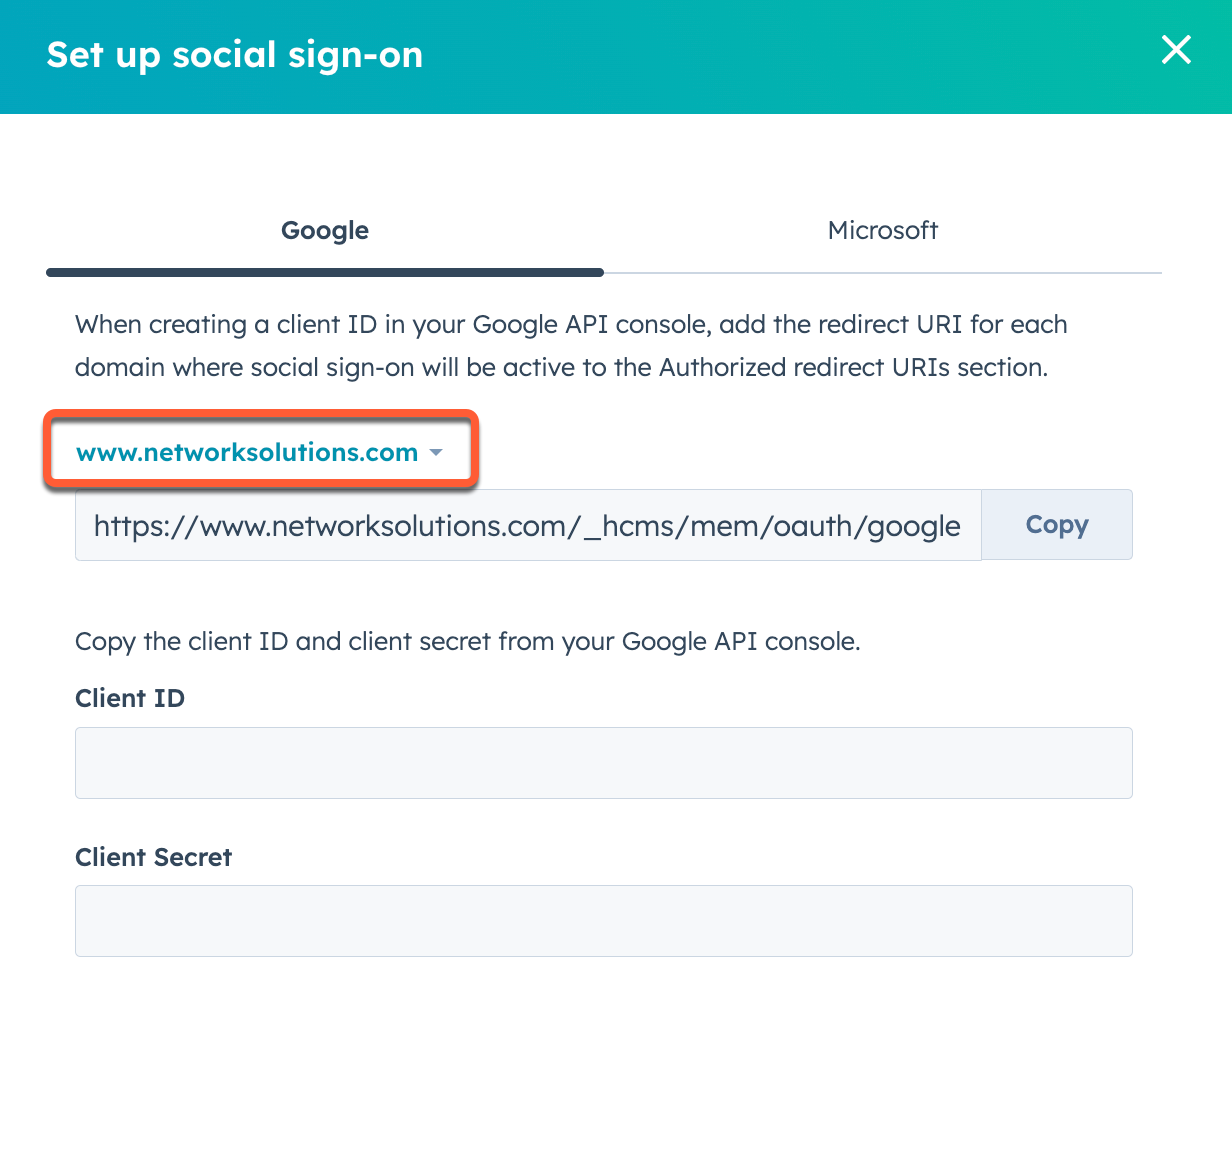
* In the *Sign-in Options* section, click **Set up social sign-on**.
* In the right panel, click **Copy** next to the redirect URI.
* In Google Cloud Console, paste the **redirect URI** into the *Authorized redirect URIs* section.
* Click **Create**.
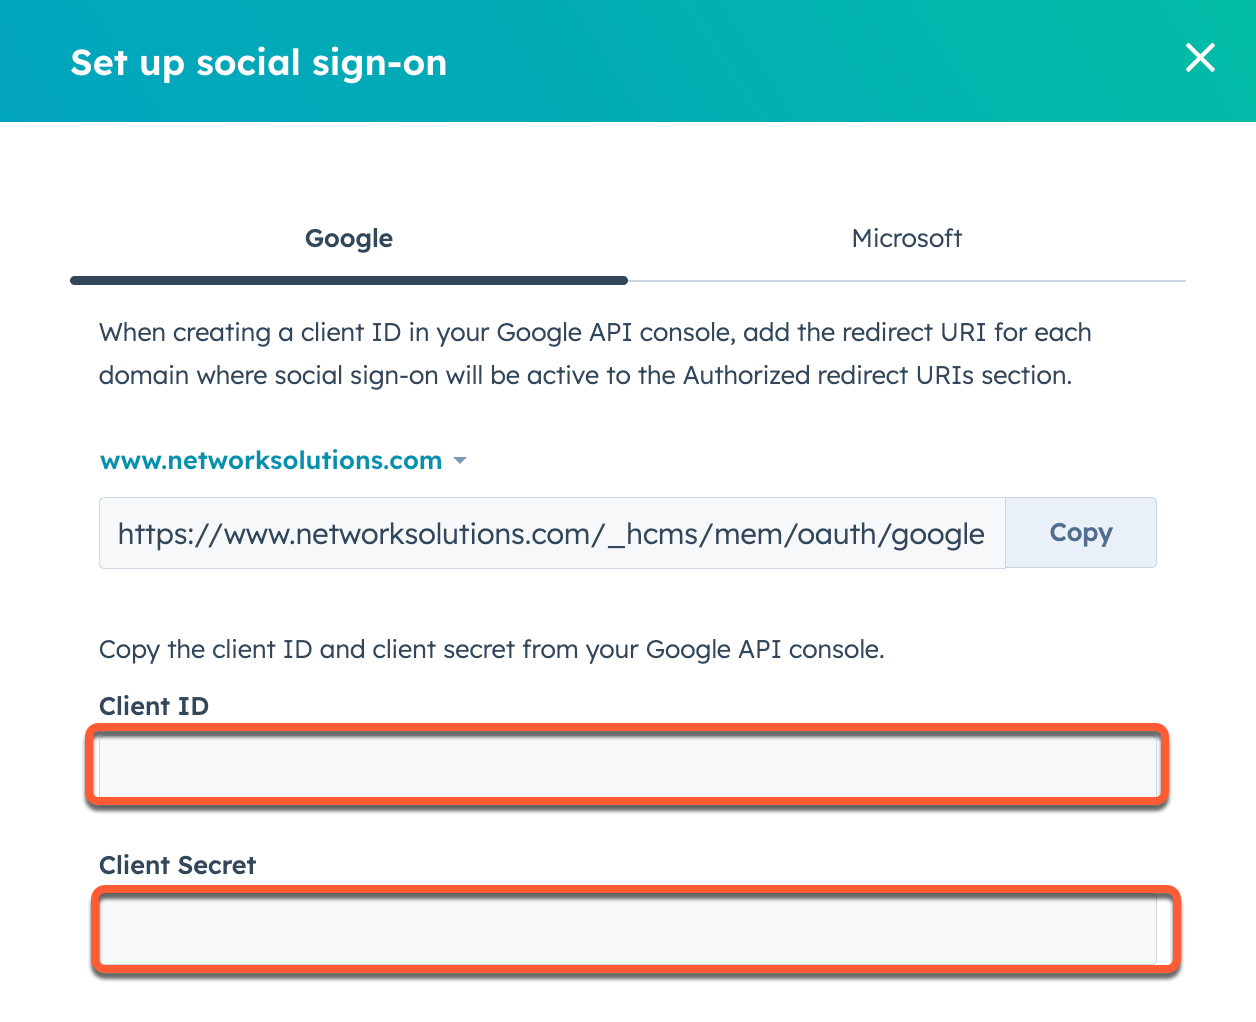
* Copy the **Client ID** and **Client Secret** fields from Google Cloud Console.
* In HubSpot, paste this information into the **Client ID** and **Client Secret** fields in your social sign-on settings.
\*\*
* Select **OAuth client ID**.
* Select **web application**, then enter a **name** for your application.
* In a separate tab, locate your credentials in HubSpot:
* In your HubSpot account, click the **settings icon** in the top navigation bar.
* In the left sidebar menu, navigate to **Content > Private Content**.
* In the *Sign-in Options* section, click **Set up social sign-on**.
* In the right panel, click **Copy** next to the redirect URI.
* In Google Cloud Console, paste the **redirect URI** into the *Authorized redirect URIs* section.
* Click **Create**.
* Copy the **Client ID** and **Client Secret** fields from Google Cloud Console.
* In HubSpot, paste this information into the **Client ID** and **Client Secret** fields in your social sign-on settings.
 * In HubSpot, click **Verify**.
* Repeat this process for each separate domain in your HubSpot account. To access a different domain's redirect URI, click the **default domain name** dropdown menu in your HubSpot social sign-on settings and select a different **domain**.
* In HubSpot, click **Verify**.
* Repeat this process for each separate domain in your HubSpot account. To access a different domain's redirect URI, click the **default domain name** dropdown menu in your HubSpot social sign-on settings and select a different **domain**.