{translations.description}
{products.map((product, index) =>
 {product.name} -
{product.level}
)}
{product.name} -
{product.level}
)}
 * In the *Name* field, enter an **internal name** for your application.
* In the *Supported account types* section, select the **account types** that will be able to view your private content using a Microsoft sign-in. The *Accounts in any organizational directory...and personal Microsoft accounts* option is recommended to support the widest variety of accounts.
* In the *Redirect URI* section, you can provide a URI for the authentication response. It's recommended to return to this step later.
* Click **Register** to complete application creation.
## Set up application information
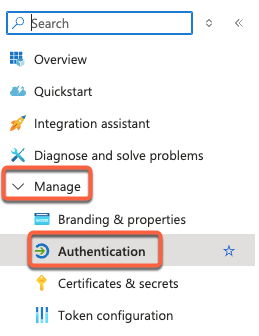
* In your Microsoft Azure account, open your newly created application.
* In the left sidebar menu, click to expand **Manage**, then select **Authentication**.
* In the *Name* field, enter an **internal name** for your application.
* In the *Supported account types* section, select the **account types** that will be able to view your private content using a Microsoft sign-in. The *Accounts in any organizational directory...and personal Microsoft accounts* option is recommended to support the widest variety of accounts.
* In the *Redirect URI* section, you can provide a URI for the authentication response. It's recommended to return to this step later.
* Click **Register** to complete application creation.
## Set up application information
* In your Microsoft Azure account, open your newly created application.
* In the left sidebar menu, click to expand **Manage**, then select **Authentication**.
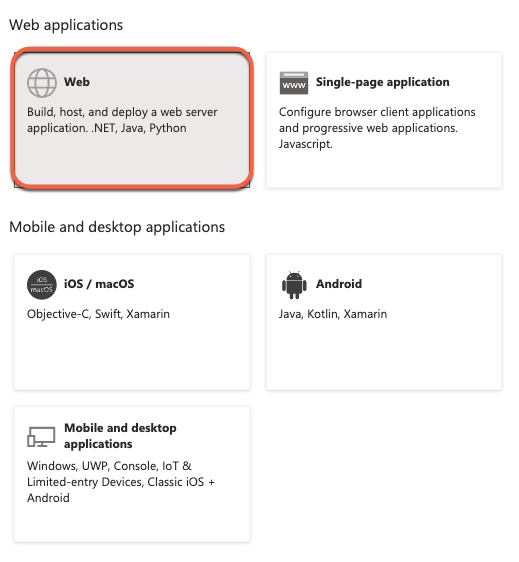
 * In the *Platform considerations* section, click **+** **Add a platform**.
* In the *Web applications* section, select **Web**.
* In the *Platform considerations* section, click **+** **Add a platform**.
* In the *Web applications* section, select **Web**.
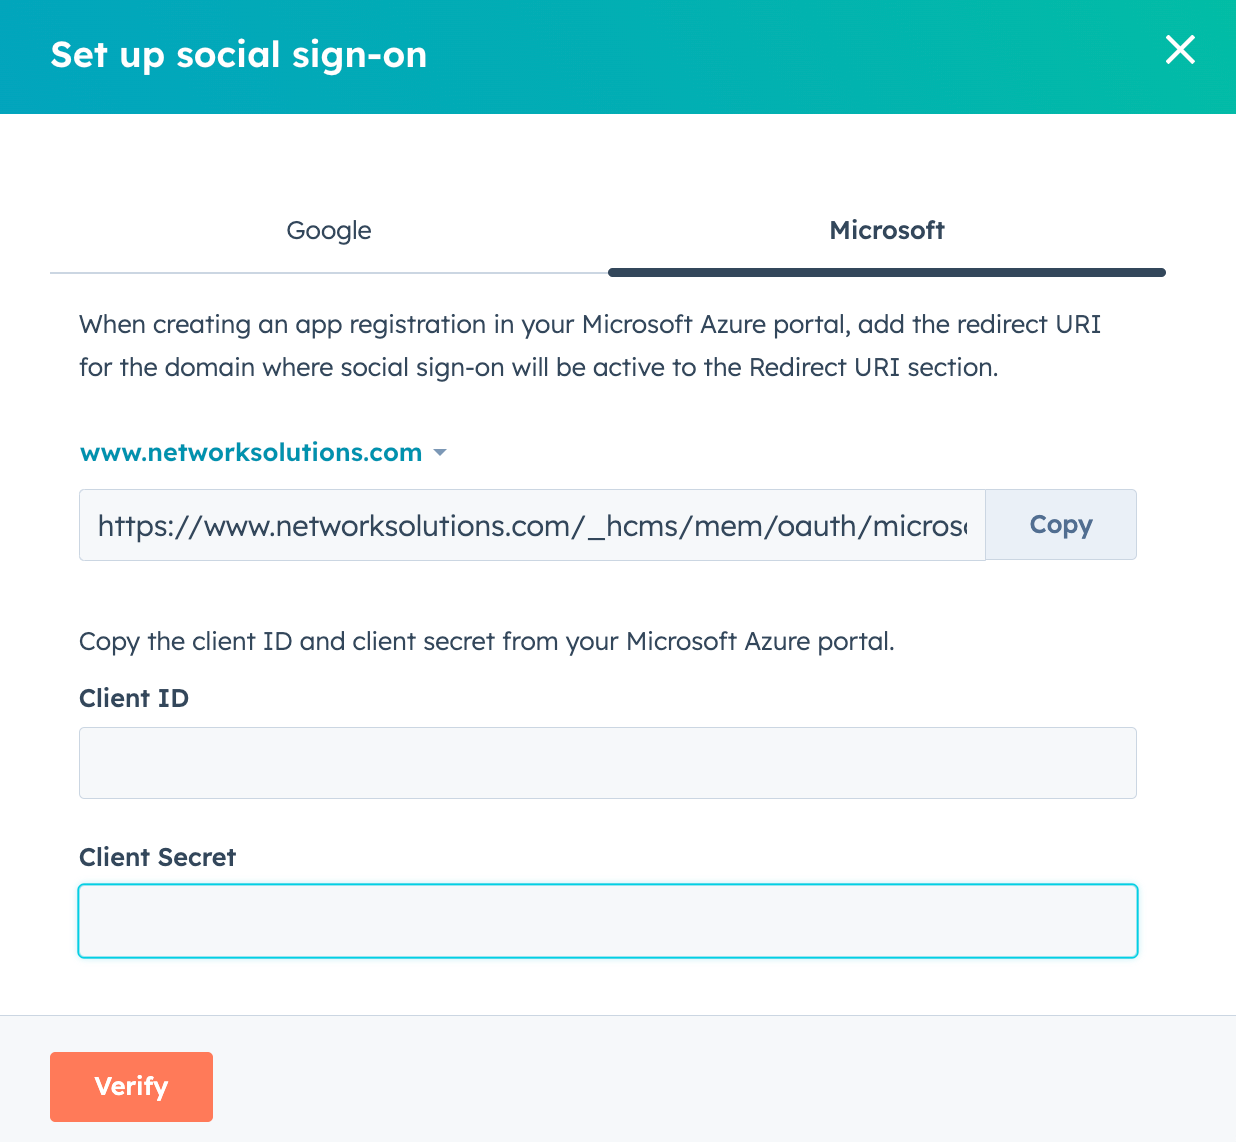
 * In a separate tab, locate your credentials in HubSpot:
* In your HubSpot account, click the **settings icon** in the top navigation bar.
* In the left sidebar menu, navigate to **Content > Private Content**.
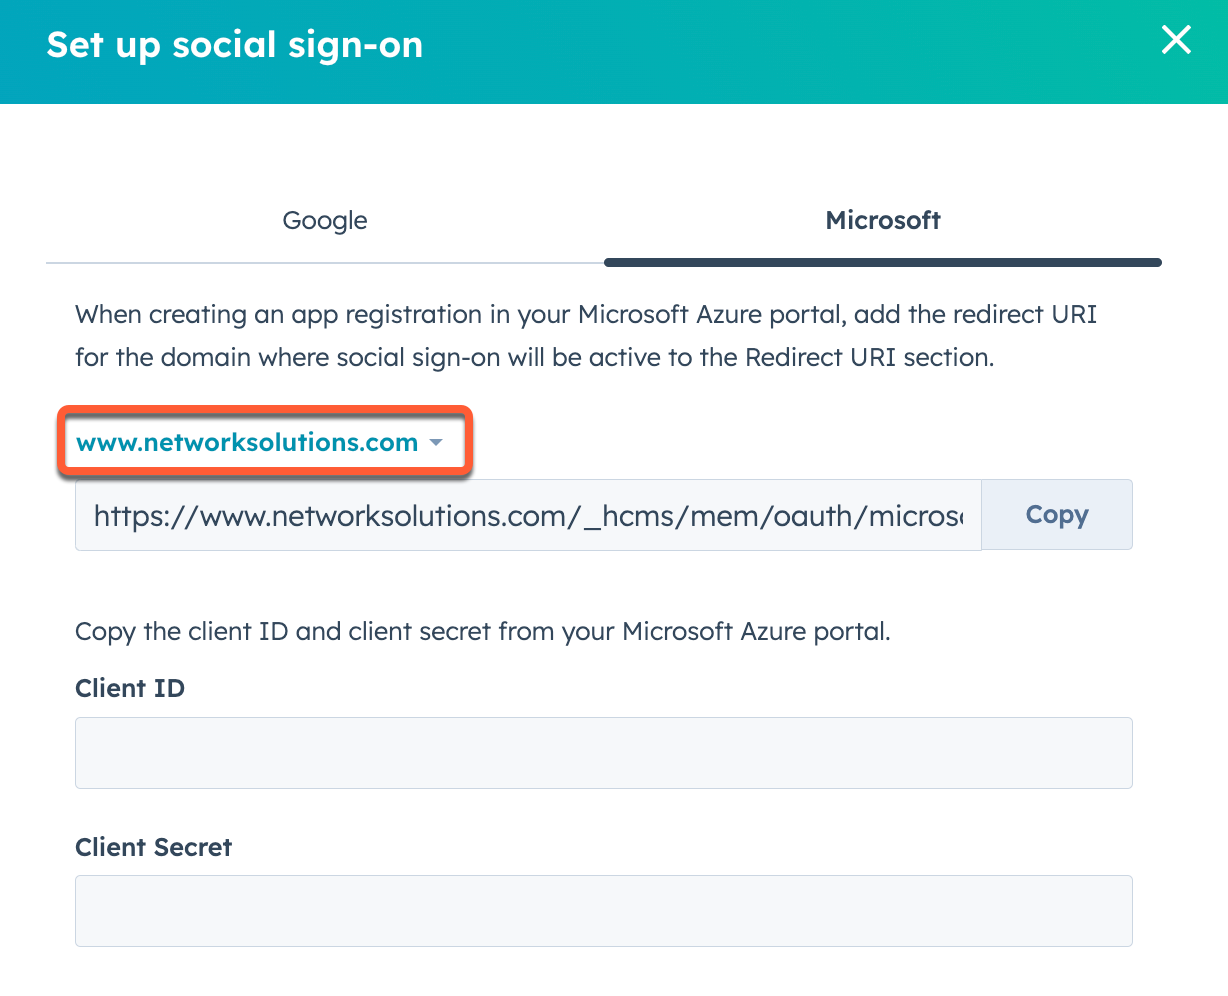
* In the *Sign-in Options* section, click **Set up social sign-on**.
* In the right panel, click the **Microsoft** tab.
* Click **Copy** next to the redirect URI.
* In Microsoft Azure, paste the redirect URI.
* Repeat the process for each separate domain you have connected to HubSpot. To change the domain you are setting up, click the **domain** dropdown menu above the redirect URI field and select a **domain**.
* In a separate tab, locate your credentials in HubSpot:
* In your HubSpot account, click the **settings icon** in the top navigation bar.
* In the left sidebar menu, navigate to **Content > Private Content**.
* In the *Sign-in Options* section, click **Set up social sign-on**.
* In the right panel, click the **Microsoft** tab.
* Click **Copy** next to the redirect URI.
* In Microsoft Azure, paste the redirect URI.
* Repeat the process for each separate domain you have connected to HubSpot. To change the domain you are setting up, click the **domain** dropdown menu above the redirect URI field and select a **domain**.
 * In Microsoft Azure, click **Overview** in the left sidebar menu.
* Click to expand the **Essentials** section.
* Copy the Application (client) ID, then paste the ID into the *Client ID* field in HubSpot.
* Click **Add new certificate or** **secret**.
* In Microsoft Azure, click **Overview** in the left sidebar menu.
* Click to expand the **Essentials** section.
* Copy the Application (client) ID, then paste the ID into the *Client ID* field in HubSpot.
* Click **Add new certificate or** **secret**.
 * Click **+** **New client secret**.
* Edit your client secret description and expiration settings.
* Copy the client secret, then paste the value into the *Client Secret* field in HubSpot.
* In HubSpot, click **Verify**.
* Click **+** **New client secret**.
* Edit your client secret description and expiration settings.
* Copy the client secret, then paste the value into the *Client Secret* field in HubSpot.
* In HubSpot, click **Verify**.