> ## Documentation Index
> Fetch the complete documentation index at: https://developers.hubspot.com/docs/llms.txt
> Use this file to discover all available pages before exploring further.

---
id: c417feb9-9082-4c5e-906a-1b77edb0f95a
---

# Get started with serverless functions

> Create your first serverless function on the HubSpot CMS, and get a response from it.

export const SupportedProducts = ({marketing, sales, service, cms, data, commerce, marketingLevel, salesLevel, serviceLevel, cmsLevel, dataLevel, commerceLevel}) => {
  const translations = {
    description: "Requires one of the following products or higher.",
    productNames: {
      marketing: "Marketing Hub",
      sales: "Sales Hub",
      service: "Service Hub",
      cms: "Content Hub",
      data: "Data Hub",
      commerce: "Commerce Hub"
    },
    tiers: {
      free: "Free",
      starter: "Starter",
      professional: "Professional",
      enterprise: "Enterprise"
    }
  };
  const translateTier = tier => {
    if (!tier) return '';
    const lowerTier = tier.toLowerCase();
    return translations.tiers[lowerTier] || tier;
  };
  const products = [{
    name: marketing ? translations.productNames.marketing : '',
    level: translateTier(marketingLevel),
    icon: "https://mintlify-assets.b-cdn.net/Icons/marketing-bolt.svg",
    alt: "Marketing Hub"
  }, {
    name: sales ? translations.productNames.sales : '',
    level: translateTier(salesLevel),
    icon: "https://mintlify-assets.b-cdn.net/Icons/sales-star.svg",
    alt: "Sales Hub"
  }, {
    name: service ? translations.productNames.service : '',
    level: translateTier(serviceLevel),
    icon: "https://mintlify-assets.b-cdn.net/Icons/service-heart.svg",
    alt: "Service Hub"
  }, {
    name: cms ? translations.productNames.cms : '',
    level: translateTier(cmsLevel),
    icon: "https://mintlify-assets.b-cdn.net/Icons/content-play.svg",
    alt: "Content Hub"
  }, {
    name: data ? translations.productNames.data : '',
    level: translateTier(dataLevel),
    icon: "https://developers.hubspot.com/hubfs/Knowledge_Base_2023-24-25/subscription_key_icons/operations_icon.svg",
    alt: "Data Hub"
  }, {
    name: commerce ? translations.productNames.commerce : '',
    level: translateTier(commerceLevel),
    icon: "https://developers.hubspot.com/hubfs/Knowledge_Base/subscription_key_icons/commerce_icon.svg",
    alt: "Commerce Hub"
  }].filter(product => product.name && product.level);
  if (products.length === 0) return null;
  return <div>
      <div className="text-sm mb-2">{translations.description}</div>
      <div className={`grid ${products.length === 1 ? 'grid-cols-1' : 'grid-cols-2'} gap-1.5`}>
        {products.map((product, index) => <div key={index} style={{
    display: 'flex',
    alignItems: 'center'
  }}>
            <img src={product.icon} alt={product.alt} className="w-3.5 h-3.5 mr-1.5 mt-2.5 mb-2.5 flex-shrink-0 align-middle" />
            <span className="font-medium mr-1 text-sm">{product.name} -</span>
            <span className="text-sm">{product.level}</span>
          </div>)}
      </div>
    </div>;
};

<Accordion title="Supported products" defaultOpen="true" icon="cubes">
  <SupportedProducts cms={true} cmsLevel="enterprise" />
</Accordion>

Serverless functions provide a way to execute JavaScript through HubSpot on the server-side, preventing it from being exposed to the client. This can be especially important for making API requests that contain sensitive information, such as an API key or other credentials. When the function is invoked, HubSpot executes the function on its back-end, which means you don't need to provide your own back-end servers to make requests for your CMS website. HubSpot's serverless functions use the [NodeJS](https://nodejs.org/en/about/) runtime.

In this guide, you'll walk through creating a simple serverless function that fetches a quote from a third-party service, then displays that quote on a website page. To build and deploy the serverless function to your account, you'll use a HubSpot developer project (version `2025.1`).

<Warning>
  **Please note:**

  While the previously documented method of uploading serverless functions to the design manager is still supported, it's recommended to use developer projects, as they include an app for streamlined authentication while also allowing for third-party dependencies. The content of this guide has been updated to use the newest method. You can find reference information for design manager-based serverless functions in the [reference section](/cms/reference/serverless-functions/serverless-functions).
</Warning>

For a high-level review of serverless functions, check out the [serverless functions overview](/cms/start-building/features/serverless-functions/overview). You can also check out the [HubSpot Developers YouTube channel](https://www.youtube.com/watch?v=N0arXQOyfXo) for a walkthrough of using serverless functions in a CMS project.

## Prerequisites

Before starting this tutorial, you'll need:

* A ***Content Hub** Enterprise* account, or a [CMS developer sandbox account](https://app.hubspot.com/signup-hubspot/cms-developers).
* The [HubSpot CLI](/developer-tooling/local-development/hubspot-cli/reference#install-the-cli) (latest version recommended), which will need to be installed and authenticated with the account you're using. To check which accounts are authenticated, you can run `hs accounts list`. Learn more about [getting started with local development](/developer-tooling/local-development/hubspot-cli/install-the-cli).

## Create a project

Start by creating a project locally so that you can build and deploy it to your account. You'll be using the `2025.1` platform version, as serverless functions are not supported in `2025.2`.

* In the terminal, navigate to the directory where you'll be storing your project using the `cd` command.

```shell theme={null}
cd Documents/Dev/serverless-function-project
```

* Run the command below to create a new project using the `2025.1` platform version. Running the command without the `--platform-version` flag will create a `2025.2` project, which doesn't support serverless functions.

```shell theme={null}
hs project create --platform-version 2025.1
```

<Tip>
  You can manage the platform version of any project within the project's `hsproject.json` file. Be sure to review the [platform versioning documentation](/developer-tooling/platform/versioning) before making any changes.
</Tip>

* Follow the terminal prompts to create your project. For the template, select **Create an empty project (no template)**.

<Frame>
  <img src="https://www.hubspot.com/hubfs/Knowledge_Base_2023-24-25/terminal-select-empty-project.png" alt="Terminal prompt option for creating an empty project with no template" />
</Frame>

* Navigate into the new project directory using the `cd` command. For example, if you named your project *my new project*:

```shell theme={null}
cd my-new-project
```

## Add a serverless function to the project

Once your project has been created, open it in your preferred editor, such as [VS Code](/developer-tooling/local-development/vs-code-extension). HubSpot will have automatically created a project directory along with an empty `src` directory and a `hsproject.json` configuration file.

In the `src` directory, create an `app` directory, then add the following directories and files within it:

```text theme={null}
project-folder/
└── hsproject.json
└── src/
    └── app/
       ├── app.json
       └── app.functions/
           ├── function.js
           ├── package.json
           └── serverless.json
```

* `app/app.json`: the app configuration file.
* `app/app.functions`: the serverless function directory. You can use any name you'd like, as long as it ends in `.functions`.
  * `app/app.functions/function.js`: the JavaScript code that will be executed when the function is invoked.
  * `app/app.functions/serverless.json`: the serverless function configuration file.
  * `app/app.functions/package.json`: includes necessary dependencies.

Copy the example code below into your respective local `app.json`, `function.js`, `serverless.json`, and `package.json` files.

<Tabs>
  <Tab title="app.json">
    ```json theme={null}
    {
      "name": "Serverless function app",
      "description": "This app runs a serverless function to fetch a quote using the Zen Quotes API.",
      "scopes": ["crm.objects.contacts.read", "crm.objects.contacts.write"],
      "uid": "serverless-function-app",
      "public": false
    }
    ```

    | Field         | Type   | Description                                                                                                                                                                                                                                                                                          |
    | ------------- | ------ | ---------------------------------------------------------------------------------------------------------------------------------------------------------------------------------------------------------------------------------------------------------------------------------------------------- |
    | `name`        | String | The name of the app, which will display in HubSpot's UI.                                                                                                                                                                                                                                             |
    | `description` | String | The app's description, which will display in HubSpot's UI.                                                                                                                                                                                                                                           |
    | `scopes`      | Array  | The scopes that the app has access to for authenticating requests with the private app access token. The two scopes above are the minimum required scopes. No additional scopes are added for this tutorial, as you won't need to use the private app access token for the request you'll be making. |
    | `uid`         | String | The app's unique identifier. This can be any string, but should meaningfully identify the app. HubSpot will identify the app by this ID so that you can change the app's `name` locally or in HubSpot without removing historical or stateful data, such as logs.                                    |
    | `public`      | String | Set to `false` for private apps.                                                                                                                                                                                                                                                                     |
  </Tab>

  <Tab title="function.js">
    This function will fetch a random quote from the [Zen Quotes API](https://zenquotes.io/).

    ```js theme={null}
    const axios = require('axios');

    exports.main = async (context) => {
      try {
      // Make GET request to the ZenQuotes API
      const response = await axios.get('https://zenquotes.io/api/random');

      // Extract the quote data (first item in the array)
      const quoteData = response.data[0];

      // Log the quote and author to console
      console.log(`"${quoteData.q}" — ${quoteData.a}`);

      // Return a properly formatted response with status code and body
        return {
        statusCode: 200,
        body: quoteData,
          headers: {
            'Content-Type': 'application/json',
          },
        };
      } catch (error) {
      // Handle any errors that occur during the request
      console.error('Error fetching quote:', error.message);

       // Return an error response
        return {
          statusCode: 500,
          body: { error: 'Failed to fetch quote' },
          headers: {
            'Content-Type': 'application/json',
          },
        };
      }
    };
    ```
  </Tab>

  <Tab title="serverless.json">
    ```js theme={null}
    {
    "appFunctions": {
      "quote-function": {
          "file": "function.js",
          "secrets": [],
          "endpoint": {
          "path": "fetch-quote",
          "method": ["GET"]
        }
      }
    }
    }

    ```

    | Field            | Type   | Description                                                                                                                                                                                                                         |
    | ---------------- | ------ | ----------------------------------------------------------------------------------------------------------------------------------------------------------------------------------------------------------------------------------- |
    | `quote-function` | Object | An object containing the serverless function's configuration details. This object can have any name, but it must match the associated field name you reference in the `appFunctions` field in your `serverless.json` file.          |
    | `file`           | String | The name of the JavaScript file containing the serverless function code to execute.                                                                                                                                                 |
    | `secrets`        | Array  | An array containing names of secrets that the function will use for authenticating requests. For this tutorial, no secrets are needed.                                                                                              |
    | `endpoint`       | Object | An object containing details about the endpoint that you can hit to invoke the function. The `path` field defines the last value in the `/hs/serverless/<path>` endpoint path, while the `method` field defines the request method. |
  </Tab>

  <Tab title="package.json">
    ```json theme={null}
    {
      "name": "example-serverless-function",
      "version": "0.1.0",
      "author": "HubSpot",
      "license": "MIT",
      "dependencies": {
        "@hubspot/api-client": "^7.0.1",
        "axios": "^0.27.2"
      }
    }
    ```

    | Field          | Type   | Description                                            |
    | -------------- | ------ | ------------------------------------------------------ |
    | `dependencies` | Object | The dependencies included for the serverless function. |
  </Tab>
</Tabs>

## Upload the project to HubSpot

With your changes saved, you can now upload the project to HubSpot to build and deploy the app and serverless function.

* In the terminal, run `hs project upload`.

```shell theme={null}
hs project upload
```

* Confirm that you want to create the project in the account. You won't need to confirm again this for after initial creation. The terminal will display the current status of the build and deploy steps as they progress.
* Once the upload completes, run `hs project open` to view the project in HubSpot.

```shell theme={null}
hs project open
```

In HubSpot, you're able to view the project details, build and deploy logs, serverless function logs, manage the project and app, and more. Learn more about [managing apps in HubSpot](/apps/developer-platform/build-apps/manage-apps-in-hubspot).

## Test the function

With the serverless function deployed, you can invoke it by hitting its public URL. Serverless functions built with developer projects have the following public URL structure: `https://<domain>/hs/serverless/<endpoint-path-from-config>`.

* `<domain>`: you can use any domain connected to the account. For example, if both website.com and subdomain.brand.com are connected to the account, you could call the function using `https://website.com/hs/serverless/<path>` or `https://subdomain.brand.com/hs/serverless/<path>`.
* `<endpoint-path-from-config>`: the value in the `path` field in `serverless.json`.

Based on the example code provided in this tutorial, the public URL to invoke the function will be: `https://<domain>/hs/serverless/fetch-quote`.

<Info>
  In the URL to call the function, the endpoint path is global rather than
  scoped to the app or project. If you have identical endpoint paths across
  multiple apps or projects, the most recently deployed endpoint function will
  take precedence.
</Info>

To view the function's output, navigate to that URL in your browser, replacing the domain with one of your HubSpot-hosted domains. If you haven't connected a custom domain, you can use one of the default domains that HubSpot provides: `<hubId>.hs-sites.com` (e.g., `123456.hs-sites.com`). Your browser should display the data returned by the Zen Quotes API.

<Frame>
  <img src="https://www.hubspot.com/hubfs/Knowledge_Base_2023-24-25/zen-quotes-api-return.png" alt="Browser displaying the data returned by the Zen Quotes API" />
</Frame>

## Invoke the function from a website page

Now that you've created the serverless function and confirmed that it returns data, implement it into a page to see the data returned in a more realistic context. For this tutorial, you'll create a page template containing some custom JavaScript and HTML to execute the function and display the response data.

First, create a new page template:

* In your local environment, create a new directory to contain your page template. For the purposes of this tutorial, create this directory outside of this tutorial's project directory.

* In the terminal, navigate into that directory using the `cd` command.

```shell theme={null}
cd Documents/Dev/serverless-page
```

* Run `hs create template "serverless-template"` to create a new template named `serverless-template`.

```shell theme={null}
hs create template "serverless-template"
```

* Select the **page** template type.
* Open the newly created page template file in your editor, then replace the boilerplate code with the code below. Be sure to replace `<domain>` in the function endpoint URL (`fetch('http://<domain>/hs/serverless/fetch-quote')`) with a domain that's connected to your HubSpot account.

```html theme={null}
<!--
    templateType: page
    label: Serverless function example template
    isAvailableForNewContent: true
-->
<!doctype html>
<html>
  <head>
    <meta charset="utf-8" />
    <title>{{ content.html_title }}</title>
    <meta name="description" content="{{ content.meta_description }}" />
    {{ standard_header_includes }}
  </head>
  <body>
    {% module "page_template_logo" path="@hubspot/logo" label="Logo" %}
    <!-- Button to fetch quote via serverless function -->
    <div class="serverless-container">
      <h2>Get quote</h2>
      <p class="subtitle">Click the button to fetch and display a quote.
      <button id="data-button" type="button">Get quote!</button>
      <div id="data-container">
        <p class="data">
      </div>
    </div>
    <!-- End button section -->

    {{ standard_footer_includes }}

    <!-- JavaScript that invokes the serverless function
     and adds returned data into the "data" text element -->
    <script>
      const dataButton = document.getElementById('data-button');
      const dataContainer = document.getElementById('data-container');

      dataButton.addEventListener('click', function (e) {
        console.log('Button clicked!');

        // Show loading state
        dataContainer.innerText = 'Loading...';
        // Replace <domain> with your own domain
        fetch('http://<domain>/hs/serverless/fetch-quote')
          .then((response) => {
            if (!response.ok) {
              throw new Error(`HTTP error! Status: ${response.status}`);
            }
            // Parse the JSON response
            return response.json();
          })

          .then((data) => {
            console.log('Raw data received:', data);

            // Clear container
            dataContainer.innerText = '';

            // Create the paragraph element
            const newDataElement = document.createElement('p');
            newDataElement.innerText = `"${data.q}" — ${data.a}`;
            dataContainer.appendChild(newDataElement);
          });
      });
    </script>
  </body>
</html>
```

* Save the file, then run `hs upload` to upload it to HubSpot. Follow the terminal prompts to select the local source and destination path. For this tutorial, you can just press **Enter** for each prompt to use the default paths.

Next, create a new page from the template in HubSpot.

* Navigate to the website pages dashboard of your HubSpot account by running the `hs open website-pages`.

```shell theme={null}
hs open website-pages
```

<Info>
  See the full list of available open shortcuts by running `hs open --list`.
</Info>

* In your browser, click **Create** in the upper right to create a new page.
* In the dialog box, select a **domain** to use, then assign a **Page name**. The domain of the page will need to match the domain that you're using to invoke the serverless function to avoid cross-origin (CORS) errors. You can either select that domain from the dropdown menu, or update the endpoint URL in the page template code (`fetch('http://<domain>/hs/serverless/fetch-quote')`) to use the domain that you select in this step.
* Click **Create page**.
* On the template selection screen, search for your new template. You can use the label or the file name to search for the template (e.g., "Serverless function example page"). The template will appear under *Other templates*, as it's not part of a theme.

<Frame>
  <img src="https://www.hubspot.com/hubfs/Knowledge_Base_2023-24-25/select-new-template.png" alt="Other templates section showing the newly created page template" />
</Frame>

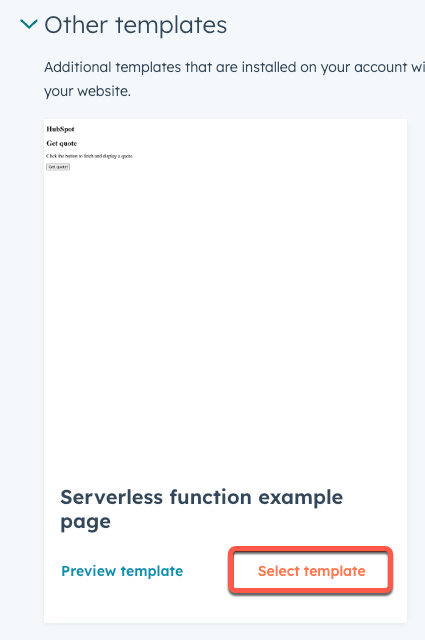
* Click **Select template**.
* In the page editor, click **Preview** in the upper right.

<Frame>
  <img src="https://www.hubspot.com/hubfs/page-preview.png" alt="Page editor preview button" />
</Frame>

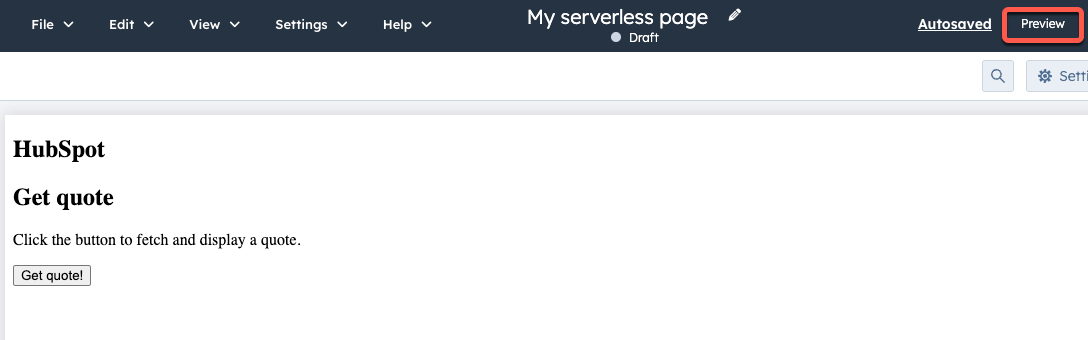
* Click **Open in a new tab**.

In the new tab, you should now be able to click the button to fetch and display quotes.

<Frame>
  <img src="https://www.hubspot.com/hubfs/Knowledge_Base_2023-24-25/quote-button-demonstration.gif" alt="Demonstration of example button that fetches and displays quotes from the Zen Quotes API" />
</Frame>

## Next steps

Now that you've created and implemented a serverless function that interacts with a third-party API, there are a few ways to continue building up your serverless function usage, such as:

* [Including authentication in a request](/cms/reference/serverless-functions/serverless-functions-in-projects#authentication) to make calls to HubSpot APIs or other third-party authenticated APIs.
* Implement the button and JavaScript code into a module rather than hardcode it into the page template. This would give you a more portable option, enabling the function to be invoked from any page that the module is added to. To do so, you would create a module, then add the HTML into the module's `module.html` file, and the JavaScript into the `module.js` file.

<CodeGroup>
  ```html example.html theme={null}
  <div class="serverless-container">
    <h2>Get quote</h2>
    <p class="subtitle">Click the button to fetch and display a quote.</p>
    <button id="data-button" type="button">Get quote!</button>
    <div id="data-container">
      <p class="data"></p>
    </div>
  </div>
  ```

  ```js module.js theme={null}
  const dataButton = document.getElementById('data-button');
  const dataContainer = document.getElementById('data-container');

  dataButton.addEventListener('click', function(e) {
    console.log('Button clicked!');
    dataContainer.innerText = 'Loading...';

    fetch('http://meowmix-2272014.hs-sites.com/hs/serverless/fetch-quote')
      .then((response) => {
          if (!response.ok) {
              throw new Error(`HTTP error! Status: ${response.status}`);
          }
          // Parse the JSON response
          return response.json();
      })
      .then((data) => {
          console.log('Raw data received:', data);

          // Clear container
          dataContainer.innerText = '';

          // Create the paragraph element
          const newDataElement = document.createElement('p');
          newDataElement.innerText = `"${data.q}" — ${data.a}`;
          dataContainer.appendChild(newDataElement);
      });
  });
  ```
</CodeGroup>
