Prerequisites
Ensure you’re running version8.2.0 or higher of the HubSpot CLI to access the latest set of supported MCP clients.
Set up the server
Follow the steps below to set up the Developer MCP server.1
Run hs mcp setup
Run the setup command in your terminal:
2
Select a client
When prompted, select the clients you’d like to add the MCP server to. Use the arrow keys and spacebar to select your clients, then press Enter to proceed.
3
Choose whether to run in standalone mode
Next, choose whether you’d like to operate in standalone mode, which allows you to run the HubSpot MCP server without installing the HubSpot CLI globally on your system: A success message will appear once setup is complete.
- This mode is useful on managed or corporate machines where global
npminstalls are restricted. - Standalone mode will use
npx @hubspot/cliinstead of the installedhscommand.
y to use standalone mode, or N to use the HubSpot CLI globally. If you opt for using standalone mode, you can optionally pin a version of the CLI to stay on while using the MCP server. If left blank, you’ll always use the latest version.4
Restart your client
If the client you selected is open, you may need to restart it to apply the changes.
- In Claude Code, run the
/mcpcommand. You can then select HubSpotDev to view more information about its included tools and more.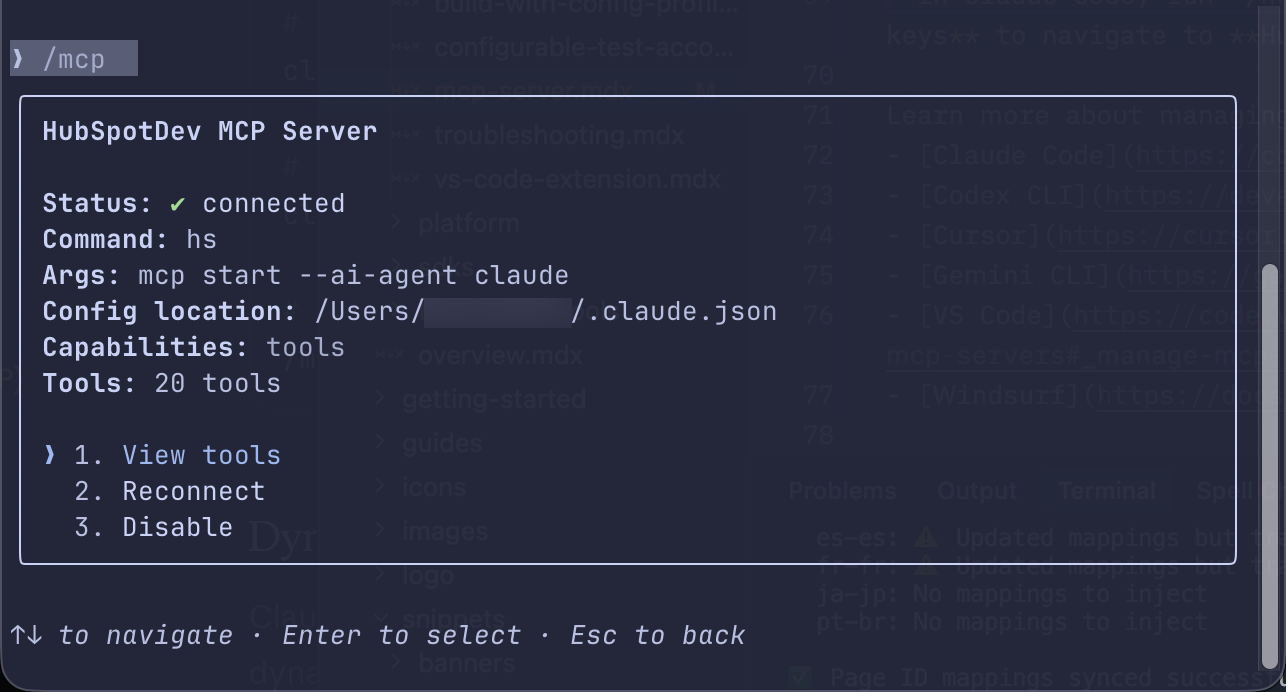
- In Cursor, navigate to Settings > Cursor Settings, then select Tools & MCP in the left sidebar. In the Installed MCP Servers section, you can view and manage the HubSpotDev server along with any other installed MCP servers.
