> ## Documentation Index
> Fetch the complete documentation index at: https://developers.hubspot.com/docs/llms.txt
> Use this file to discover all available pages before exploring further.
---
id: 5e5e3aaa-86d9-42ba-8882-e8c9fd912a27
---
# Quickstart
> Get up and running on the latest version of HubSpot's developer platform.
export const MinimumCliVersion = () =>
The latest version of the HubSpot CLI, which is recommended, is 8.8.0. You can check which version of the CLI you have installed by running hs --version.
;
export const ChromeLocalhostWarning = () =>
As of Google Chrome version 142, you will receive a one-time popup asking for app.hubspot.com to access devices on your local network. Select Accept to enable local development for your apps.
You can also manage this setting in your Chrome settings by navigating to Settings > Privacy & Security > app.hubspot.com > Permissions > Local network access.
;
Get started with app development by building and deploying a simple boilerplate app.
If you don't have a HubSpot account yet, click [here](https://app.hubspot.com/signup-hubspot/crm?intent=developer) to create a new account before proceeding with the steps below.
## Set up your local environment
Before getting started, install the latest version of the [HubSpot CLI](/developer-tooling/local-development/hubspot-cli/install-the-cli). In a terminal window, run the following command:
```shell theme={null}
npm install -g @hubspot/cli
```
After installing the latest version of the HubSpot CLI, it's recommended you run `hs account auth` to authenticate your HubSpot account:
* Follow the prompts to generate a Personal Access Key in your account, then copy and paste it into the terminal to save your configuration.
* It’s recommended that you make this account your default in the CLI.
## Create and upload a project
With the CLI installed, run `hs get-started` to initialize your project.
```shell theme={null}
hs get-started
```
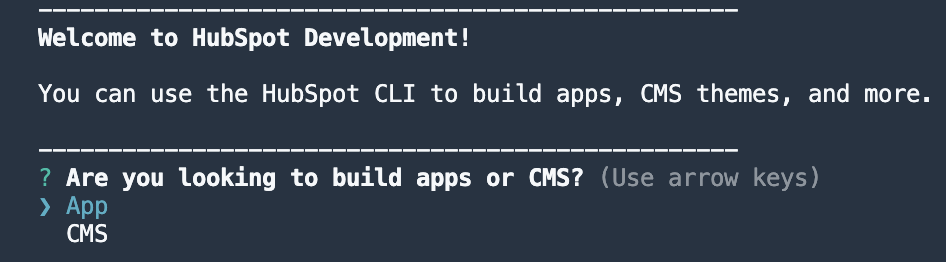
You'll then be greeted with a welcome message, and you can begin setting up your project and app.
* Following the prompts, select **App**.
* Give your project a **name**.
* Set your project's **local directory** (by default this will be your current working directory).
* Upload your project to HubSpot to initialize the first build and deploy.
* You'll then be prompted to install dependencies and upload your project. Installing dependencies before uploading ensures a faster build of the included app card, and makes sure that your local development environment and production match. This step will add a `package-lock.json` file and Node modules directory to the project's `cards/` directory.
* Then, confirm that you want to upload your project to your account.
## Install and preview your app
After your project deploys, you'll be prompted to navigate to your HubSpot account to walk through installing and previewing your app.
* In the terminal, confirm that you want to open your account. A browser window will open the project details page in HubSpot.
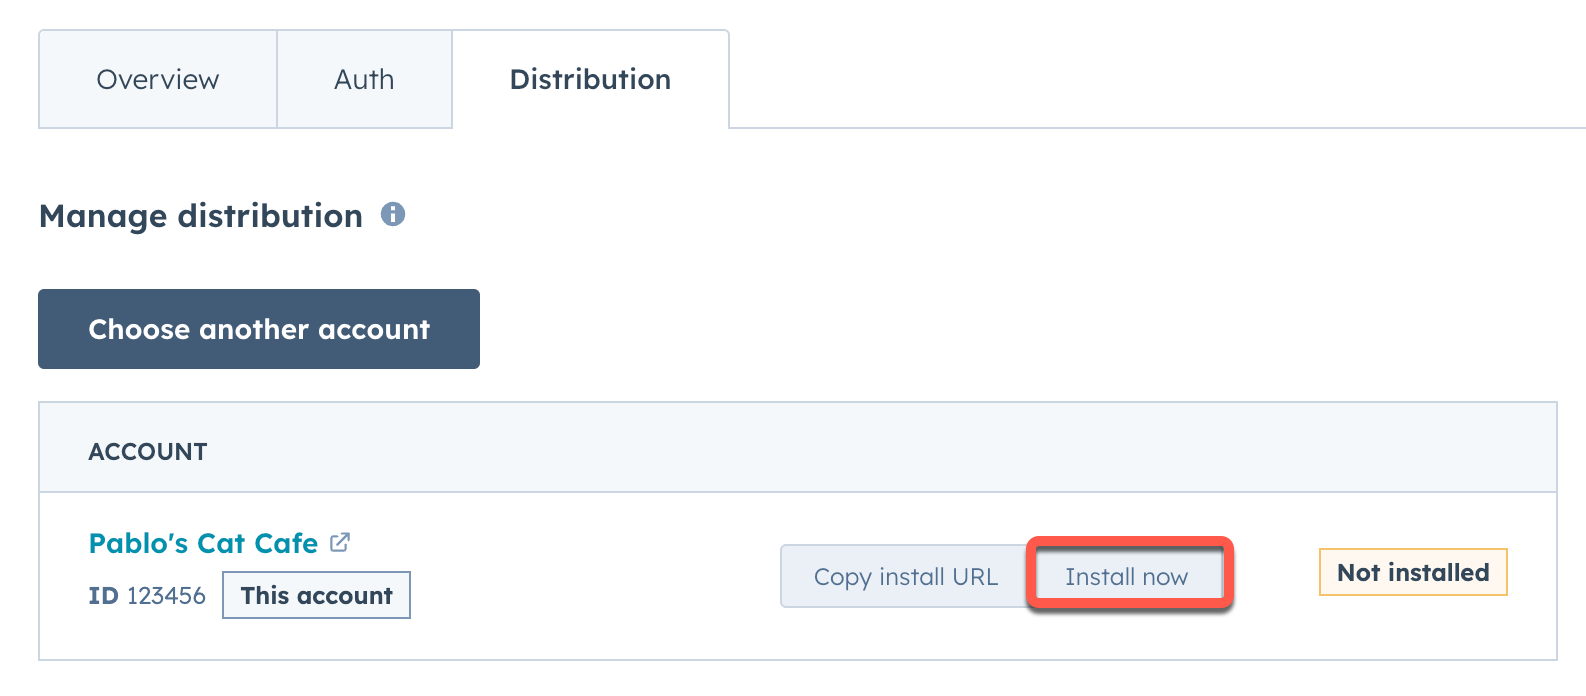
* On the project details page, click **Install now** to install the app. You'll then be taken to the app install page.
* On the app install page, click **Connect App** to install the app in your account.
* A confirmation message will appear once the app successfully installs. You can then close the page or click **return home**.
At any time, you can return to the project details page either through the terminal or in HubSpot:
* In the terminal, run `hs project open` while in the local project directory.
* In HubSpot, navigate to **Development** in the main navigation bar, then locate your project under *Recently updated projects* or through the left sidebar.
With the project uploaded and installed, you can start the local development server to preview your app card.
* In the terminal, navigate into your project directory, then run `hs project dev`.
* When prompted, select the account you want to test in.
* To test in a developer test account within your production account (recommended), select **Test on a developer test account**.
* Select an existing test account, or select **Test on a new developer test account**. Then, follow the prompts to install the app in the test account.
For more advanced testing, you can create [configurable test accounts](/developer-tooling/local-development/configurable-test-accounts), which can be assigned specific combinations of HubSpot subscription tiers to ensure feature compatibility.
* The local development server will then start, and the terminal will provide a link to view the local dev session in HubSpot. Follow the link to open the HubSpot local development page in your account.
Before you can preview the app card on the contact record, you'll need to add your new card to the contact record view.
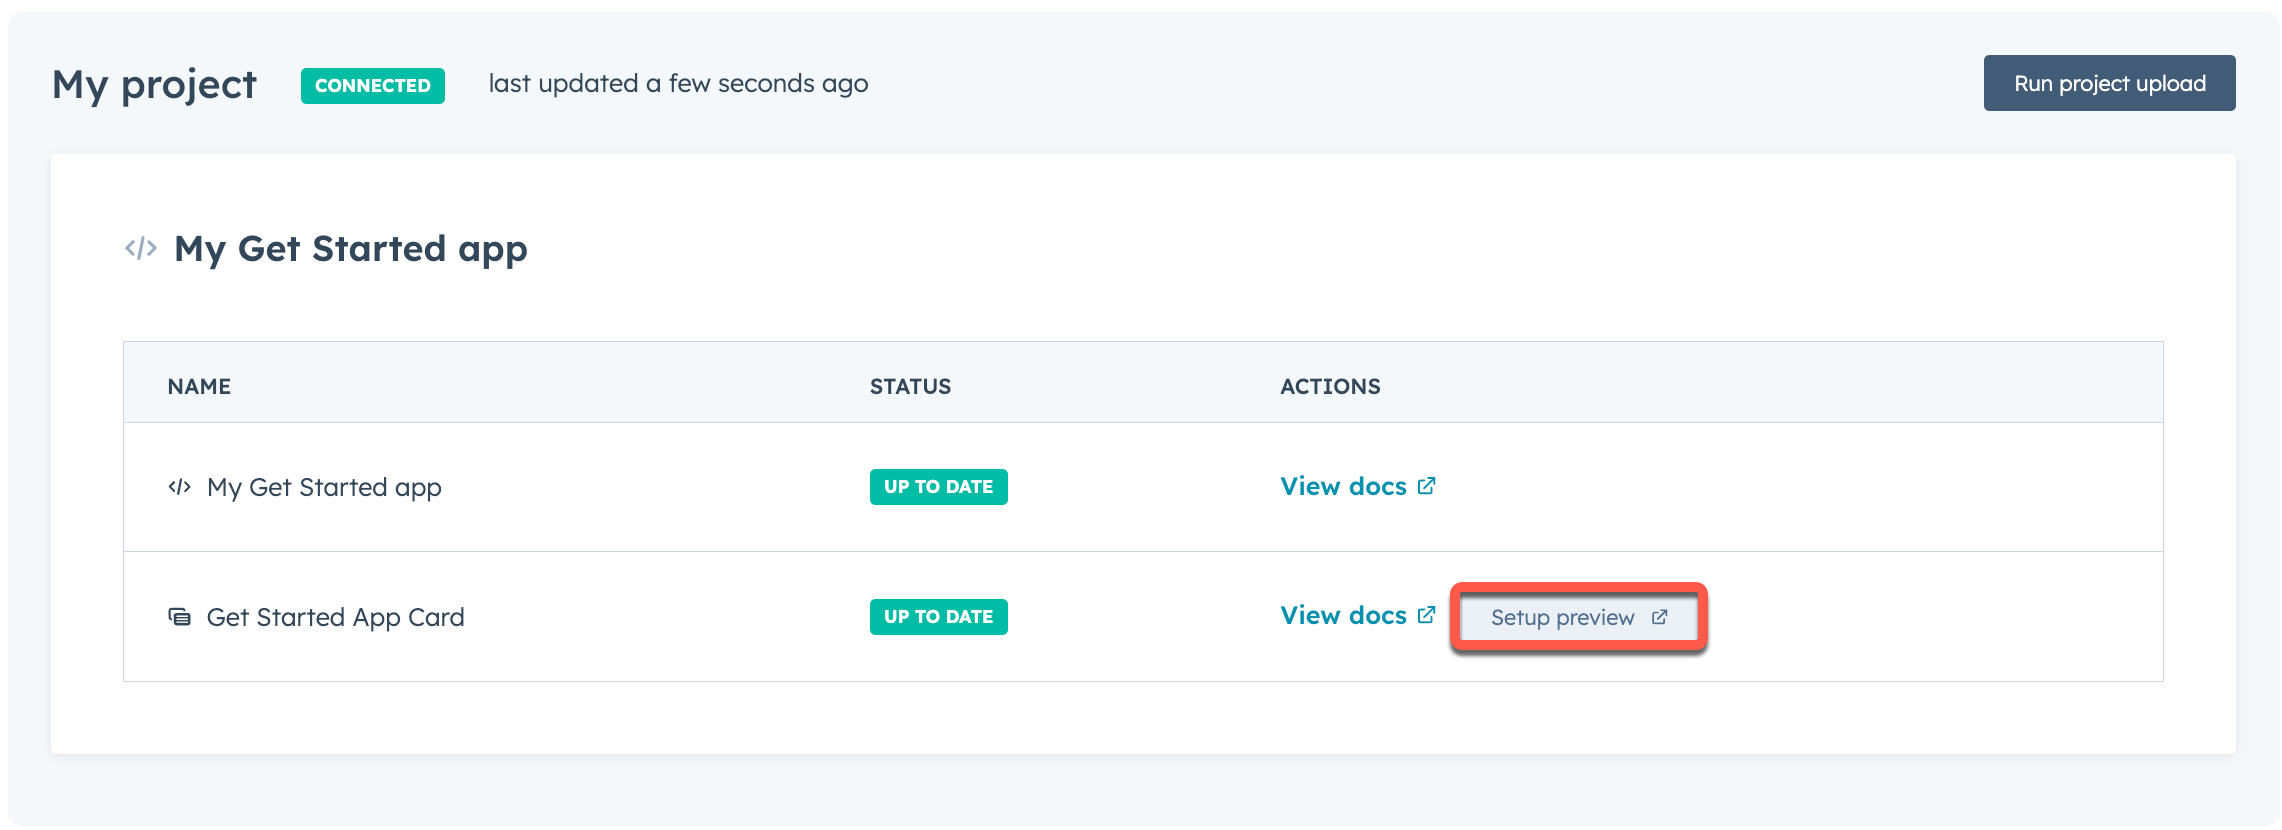
* On the local development page, click **Setup preview**. You'll then be redirected to the contacts index page.
* Click the **name** of a contact record.
* At the top of the middle column of the contact record, click **Customize**.
* Click **Default view**.
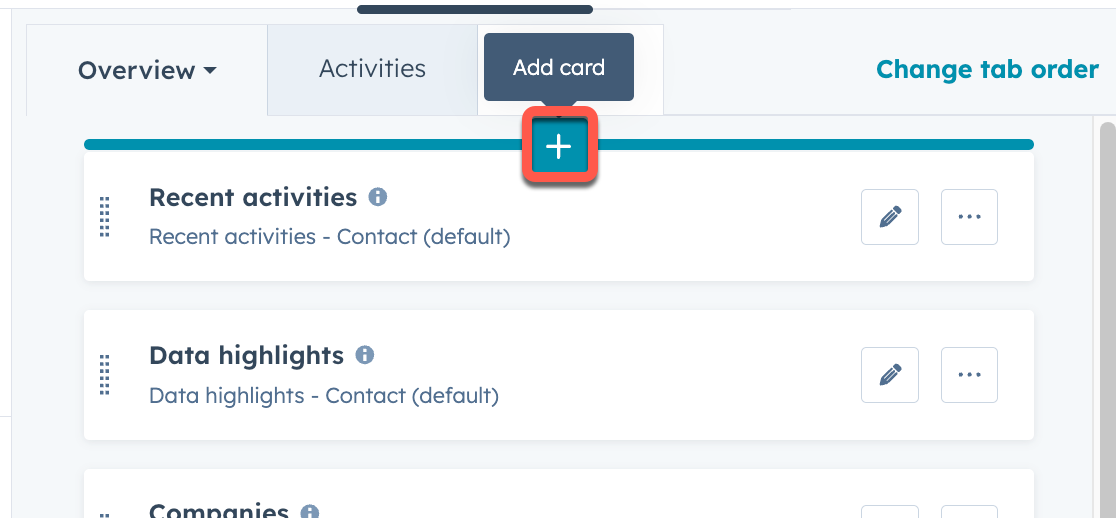
* Select the **tab** that you want to add the card to. You can then hover over the location where you want to place the card and click the **plus button**. This can be adjusted at any time after initial setup.
* In the right sidebar, click the **Card library** tab. Then, click the **Card types** dropdown menu and select **App** to filter for app cards.
* Click **Add card** under the app card you created, then click the **close** button in the top right of the sidebar.
* In the top right, click **Save and exit**.
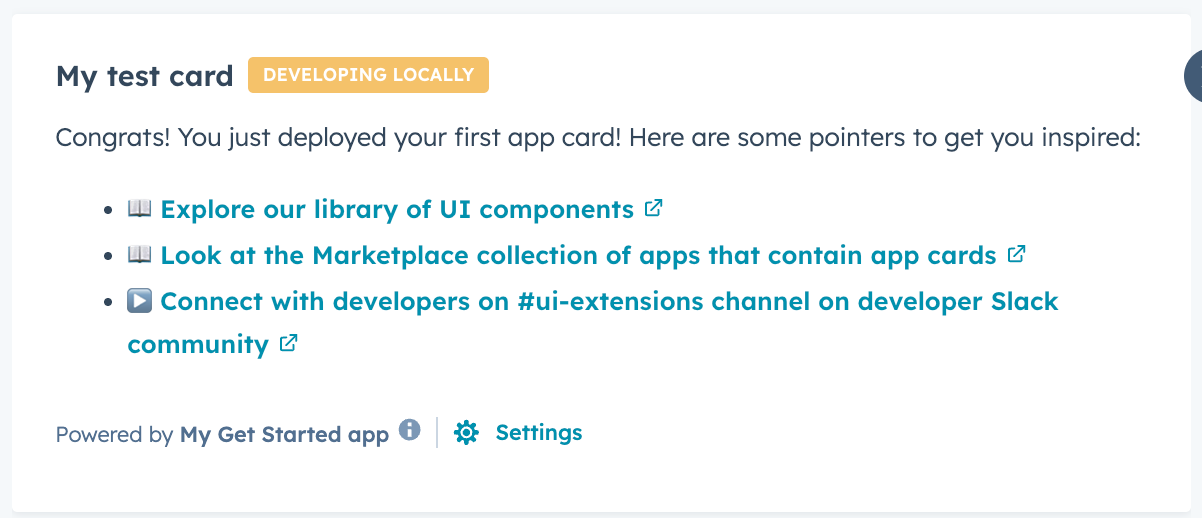
You'll then be redirected back to the contact record, and the app card will display with a `Developing locally` tag to indicate that the local development server is waiting to detect local changes.
You will not need to repeat the preview setup steps moving forward, unless you want to change the position of the card or customize another CRM record view.
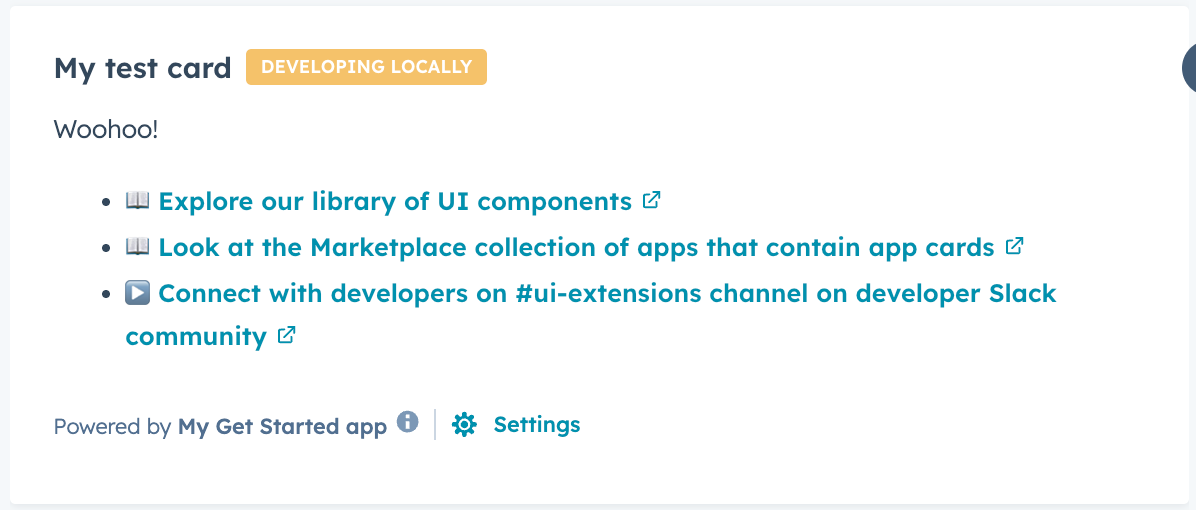
While the local development server runs, it will automatically pick up on any changes saved to the app card's front-end React file. If you need to make changes to other file types, such as a `.json` configuration file, you'll need to reupload the project and restart the local development server.
To test this out, make a change to the app card's local `.jsx` React file, then save your change. For example, change the text within one of the `Text` [components](/apps/developer-platform/add-features/ui-extensions/ui-components/standard-components/text).
```jsx highlight={10-12} theme={null}
import React from "react";
import { Text, Link, List } from "@hubspot/ui-extensions";
import { hubspot } from "@hubspot/ui-extensions";
hubspot.extend(() => );
const Extension = () => {
return (
<>
Woohoo!
📖 Explore our library of UI components
📖 Look at the Marketplace collection of apps that contain app cards
▶️ Connect with developers on #ui-extensions channel on developer
Slack community
);
};
```
## Next steps
Now that you've successfully deployed your quickstart app, check out the following resources to continue building on HubSpot's developer platform:
* [App configuration](/apps/developer-platform/build-apps/app-configuration)
* [Manage apps in HubSpot](/apps/developer-platform/build-apps/manage-apps-in-hubspot)
* [Create app cards](/apps/developer-platform/add-features/ui-extensions/extension-points/app-cards/create-an-app-card)
* [UI extension components](/apps/developer-platform/add-features/ui-extensions/ui-components/overview)
 * Give your project a **name**.
* Set your project's **local directory** (by default this will be your current working directory).
* Upload your project to HubSpot to initialize the first build and deploy.
* Give your project a **name**.
* Set your project's **local directory** (by default this will be your current working directory).
* Upload your project to HubSpot to initialize the first build and deploy.
 * You'll then be prompted to install dependencies and upload your project. Installing dependencies before uploading ensures a faster build of the included app card, and makes sure that your local development environment and production match. This step will add a `package-lock.json` file and Node modules directory to the project's `cards/` directory.
* Then, confirm that you want to upload your project to your account.
* You'll then be prompted to install dependencies and upload your project. Installing dependencies before uploading ensures a faster build of the included app card, and makes sure that your local development environment and production match. This step will add a `package-lock.json` file and Node modules directory to the project's `cards/` directory.
* Then, confirm that you want to upload your project to your account.
 * On the app install page, click **Connect App** to install the app in your account.
* A confirmation message will appear once the app successfully installs. You can then close the page or click **return home**.
* On the app install page, click **Connect App** to install the app in your account.
* A confirmation message will appear once the app successfully installs. You can then close the page or click **return home**.
 * Click the **name** of a contact record.
* At the top of the middle column of the contact record, click **Customize**.
* Click **Default view**.
* Select the **tab** that you want to add the card to. You can then hover over the location where you want to place the card and click the **plus button**. This can be adjusted at any time after initial setup.
* Click the **name** of a contact record.
* At the top of the middle column of the contact record, click **Customize**.
* Click **Default view**.
* Select the **tab** that you want to add the card to. You can then hover over the location where you want to place the card and click the **plus button**. This can be adjusted at any time after initial setup.
 * In the right sidebar, click the **Card library** tab. Then, click the **Card types** dropdown menu and select **App** to filter for app cards.
* Click **Add card** under the app card you created, then click the **close** button in the top right of the sidebar.
* In the top right, click **Save and exit**.
You'll then be redirected back to the contact record, and the app card will display with a `Developing locally` tag to indicate that the local development server is waiting to detect local changes.
* In the right sidebar, click the **Card library** tab. Then, click the **Card types** dropdown menu and select **App** to filter for app cards.
* Click **Add card** under the app card you created, then click the **close** button in the top right of the sidebar.
* In the top right, click **Save and exit**.
You'll then be redirected back to the contact record, and the app card will display with a `Developing locally` tag to indicate that the local development server is waiting to detect local changes.
 You will not need to repeat the preview setup steps moving forward, unless you want to change the position of the card or customize another CRM record view.
 ```jsx highlight={10-12} theme={null}
import React from "react";
import { Text, Link, List } from "@hubspot/ui-extensions";
import { hubspot } from "@hubspot/ui-extensions";
hubspot.extend(() =>
```jsx highlight={10-12} theme={null}
import React from "react";
import { Text, Link, List } from "@hubspot/ui-extensions";
import { hubspot } from "@hubspot/ui-extensions";
hubspot.extend(() =>