Before you get started
Before you can start using OAuth with HubSpot, you’ll need to have:- A developer account
- An app associated with your developer account
- A HubSpot account to install your app in (you can use an existing account or create a test account)
How it works
HubSpot supports the OAuth 2.0 Authorization Code grant type, which can be broken down into four basic steps:- Your app opens a browser window to send the user to the HubSpot OAuth 2.0 server
- The user reviews the requested permissions and grants the app access
- The user is redirected back to the app with an authorization code in the query string
- The app sends a request to the OAuth 2.0 server to exchange the authorization code for an access token
In this guide
- Quickstart App: A Node.js demo app that authenticates with HubSpot’s OAuth 2.0 server
- Getting OAuth tokens: How to authorize your app with users
- Using OAuth tokens: How to make queries with a token
- Refreshing OAuth tokens: How to use the refresh token provided by HubSpot
All code examples in this guide are written in JavaScript (Node.js)
Quickstart app
If this is your first time using OAuth authentication with HubSpot’s APIs, it’s strongly recommended that you check out the OAuth 2.0 Quickstart App, written in Node.js. This sample app is designed to get you started using OAuth 2.0 as quickly as possible by demonstrating all the steps outlined below in the getting OAuth tokens section below.Get the quickstart app
Getting OAuth tokens
1. Create the authorization URL and direct the user to HubSpot’s OAuth 2.0 server
When sending a user to HubSpot’s OAuth 2.0 server, the first step is creating the authorization URL. This will identify your app and define the resources (scopes) it’s requesting access to on behalf of the user. The query parameters you can pass as part of an authorization URL are shown in the table below. For more detailed information on this step, read the reference doc.Fields marked with * are required.
Once you’ve created your URL, start the OAuth connection process by sending the user to it.
The code blocks below provide examples of using different redirect types:
Using a server-side redirect:
userA.integration.com and userB.integration.com). To do so, use the state parameter to encode more information about the user state:
1. Generate and store a nonce value for the state parameter.
2. Store the user’s state in a local datastore using the nonce as its key.
3. Include the nonce value as the state parameter in the authorization URL.
4. When the user authenticates and is redirected to your redirect URL, validate the state parameter and use it as the key to retrieve the user state that was stored.
5. From there, redirect the user as needed (e.g. redirecting again to a user specific URL).
2. HubSpot prompts user for consent
HubSpot displays a consent window to the user showing the name of your app and a short description of the HubSpot API services it’s requesting permission to access. The user can then grant access to your app.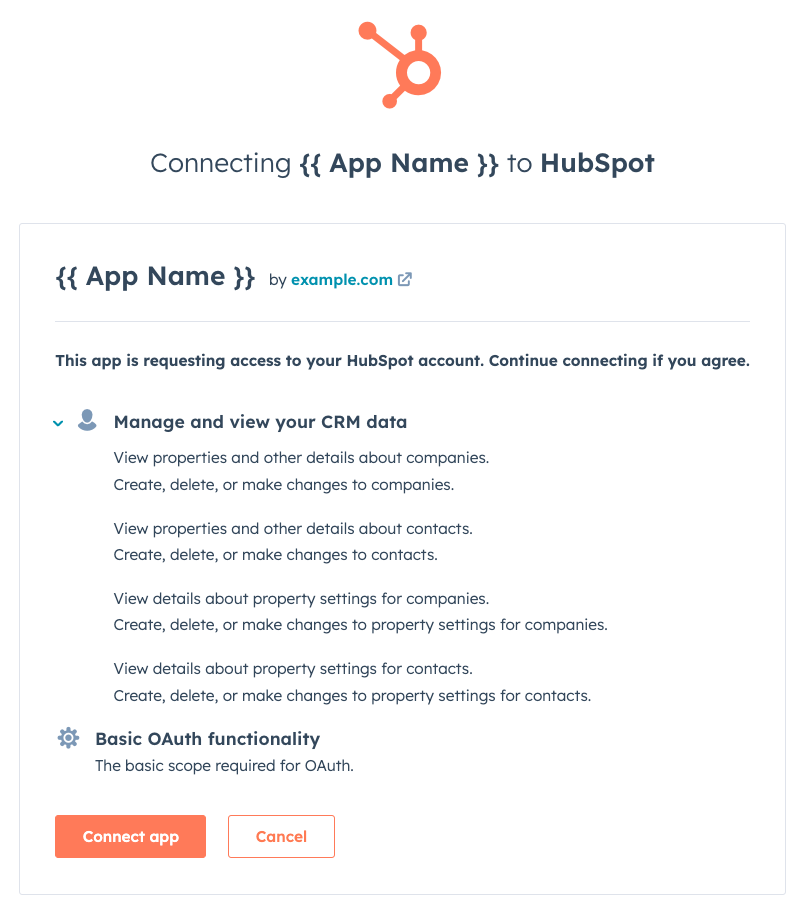
3. Handle the OAuth server response
When the user has completed the consent prompt from Step 2, the OAuth 2.0 server sends aGET request to the redirect URI specified in your authentication URL. If there are no issues and the user approves the access request, the request to the redirect URI will be returned with a code query parameter attached. If the user doesn’t grant access, no request will be sent.
Example:
4. Exchange authorization code for tokens
After your app receives an authorization code from the OAuth 2.0 server, it can exchange that code for an access and refresh token by sending a URL-form encodedPOST request to https://api.hubapi.com/oauth/v1/token with the values shown below. For more detailed information on this step, take a minute to read this reference doc.
Example:
Using OAuth tokens
Once the authorization code flow is completed, your app is authorized to make requests on behalf of the user. To do this, provide the token as a bearer token in theAuthorization HTTP header. Specific details can be found in the reference doc.
Example:
Refreshing OAuth tokens
OAuth access tokens expire periodically. This is to make sure that if they’re compromised, attackers will only have access for a short time. The token’s lifespan in seconds is specified in theexpires_in field when an authorization code is exchanged for an access token.
Your app can exchange the received refresh token for a new access token by sending a URL-form encoded POST request to https://api.hubapi.com/oauth/v1/token with the values below. For more detailed information on this step, check out the reference doc.
Example: