- A basic deployment workflow that uploads your project to HubSpot on every push to
main. - A multi-environment setup that uses config profiles and multiple workflows to deploy to separate QA and production accounts based on the target branch.
Prerequisites
To set up automation with GitHub Actions, you’ll need the following:- A GitHub repository with
writeaccess for creating repository secrets. - An existing HubSpot project built on platform version
2025.2or higher. For older versions, see the migration steps in the expandable section below.
Show migration steps for pre-2025.2 projects
Show migration steps for pre-2025.2 projects
If you currently use the built-in GitHub integration for a project built on version
2025.1 of the developer platform, you’ll first need to turn it off and migrate your app to the latest version.To turn off the built-in integration:
- In your HubSpot account, click Development in the main navigation bar.
- In the left sidebar menu, click Projects.
- Click the name of the project that you’ll be migrating.
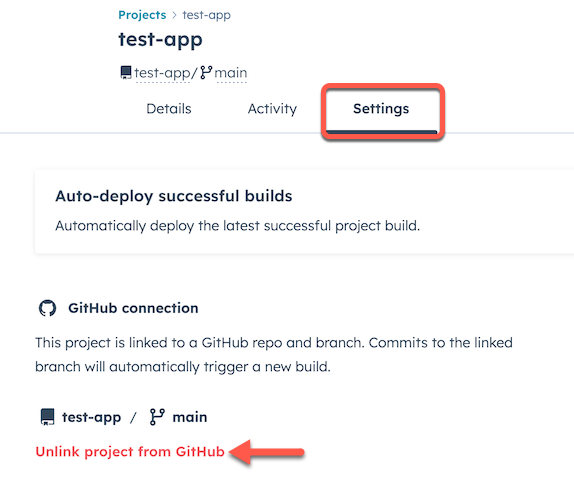
- Click the Settings tab.
- Under GitHub connection, click Unlink project from GitHub, then confirm that you’re unlinking in the dialog box.
Set up a basic action
To set up GitHub Actions, you’ll first create the GitHub secrets used for connecting the repository to your HubSpot account, then create a workflow file that runs the HubSpot project action:- In your GitHub repository, create repository secrets for the following HubSpot details, which you’ll later reference in your workflow file:
HUBSPOT_ACCOUNT_ID: the ID of your HubSpot account.HUBSPOT_PERSONAL_ACCESS_KEY: your personal access key.
- In your local HubSpot project, create a
.github/workflows/directory if one doesn’t already exist, then create amain.ymlfile within it. You can give the file any name you’d like, as long as it uses the.ymlor.yamlextension. - Paste the following code into the file:
.github/workflows/main.yml
- With your action defined, push your changes to GitHub.
main branch will trigger an upload to your target HubSpot account. You can verify that the workflow ran successfully by checking your workflow logs in GitHub and reviewing the project’s build and deploy logs in HubSpot.
Set up multi-environment workflows
If you want to deploy your HubSpot project to separate environments (e.g., a QA account for testing and a production account for live deployments), you can combine HubSpot’s config profiles with multiple workflows. In this type of setup, the config profiles let you define environment-specific settings in your project, including which HubSpot account to target. By pairing each profile with its own workflow file, you can control which HubSpot account gets updated based on which branch you push to. For example:- QA workflow: when you push to the
qabranch, deploy the project to your test HubSpot account. - Production workflow: when you push to
main, deploy the project to your production HubSpot account.
A push is one of many available workflow triggers. Learn more in GitHub’s documentation.
Define config profiles
Before configuring your workflows, create a config profile for each environment you want to target. See build with config profiles for setup instructions. For a standard two-environment setup, you might create:- A
qaprofile targeting your test HubSpot account - A
prodprofile targeting your production HubSpot account
hsprofile.*.json files to your repository. Each workflow references its profile by name and resolves it from these committed files at upload time.
Create GitHub secrets for each environment
In your GitHub repository, create a pair of secrets for each environment. Each pair should contain the account ID and personal access key for that environment’s HubSpot account. Each environment’s account ID secret must match theaccountId defined in that profile’s hsprofile.*.json file.
For example:
- For a
qaprofile targeting account 12345:HUBSPOT_QA_ACCOUNT_ID=12345HUBSPOT_QA_PERSONAL_ACCESS_KEY=<personal access key for account 12345>
- For a
prodprofile targeting account 67890:HUBSPOT_PROD_ACCOUNT_ID=67890HUBSPOT_PROD_PERSONAL_ACCESS_KEY=<personal access key for account 67890>
Create a workflow file for each environment
In your project, create a dedicated workflow file for each environment. Each workflow targets a different branch and passes the profile name along with its credentials as explicitwith inputs to the project-upload sub-action, as shown below.
QA workflow: deploys the project to your test HubSpot account when changes are pushed to the qa branch.
deploy-qa.yml
main branch.
deploy-prod.yml
qa triggers a deployment to your test account, and every push to main triggers a deployment to your production account. You can extend this pattern by adding additional workflow files for other environments, each with their own branch trigger, secrets, and profile name.
Verify workflow success
To verify that your workflows have run successfully, you can review the workflow run history in GitHub as well as the project build and deploy logs in HubSpot. When viewing workflow run history in GitHub, you can view the details of each action defined in the workflow to ensure it ran as expected.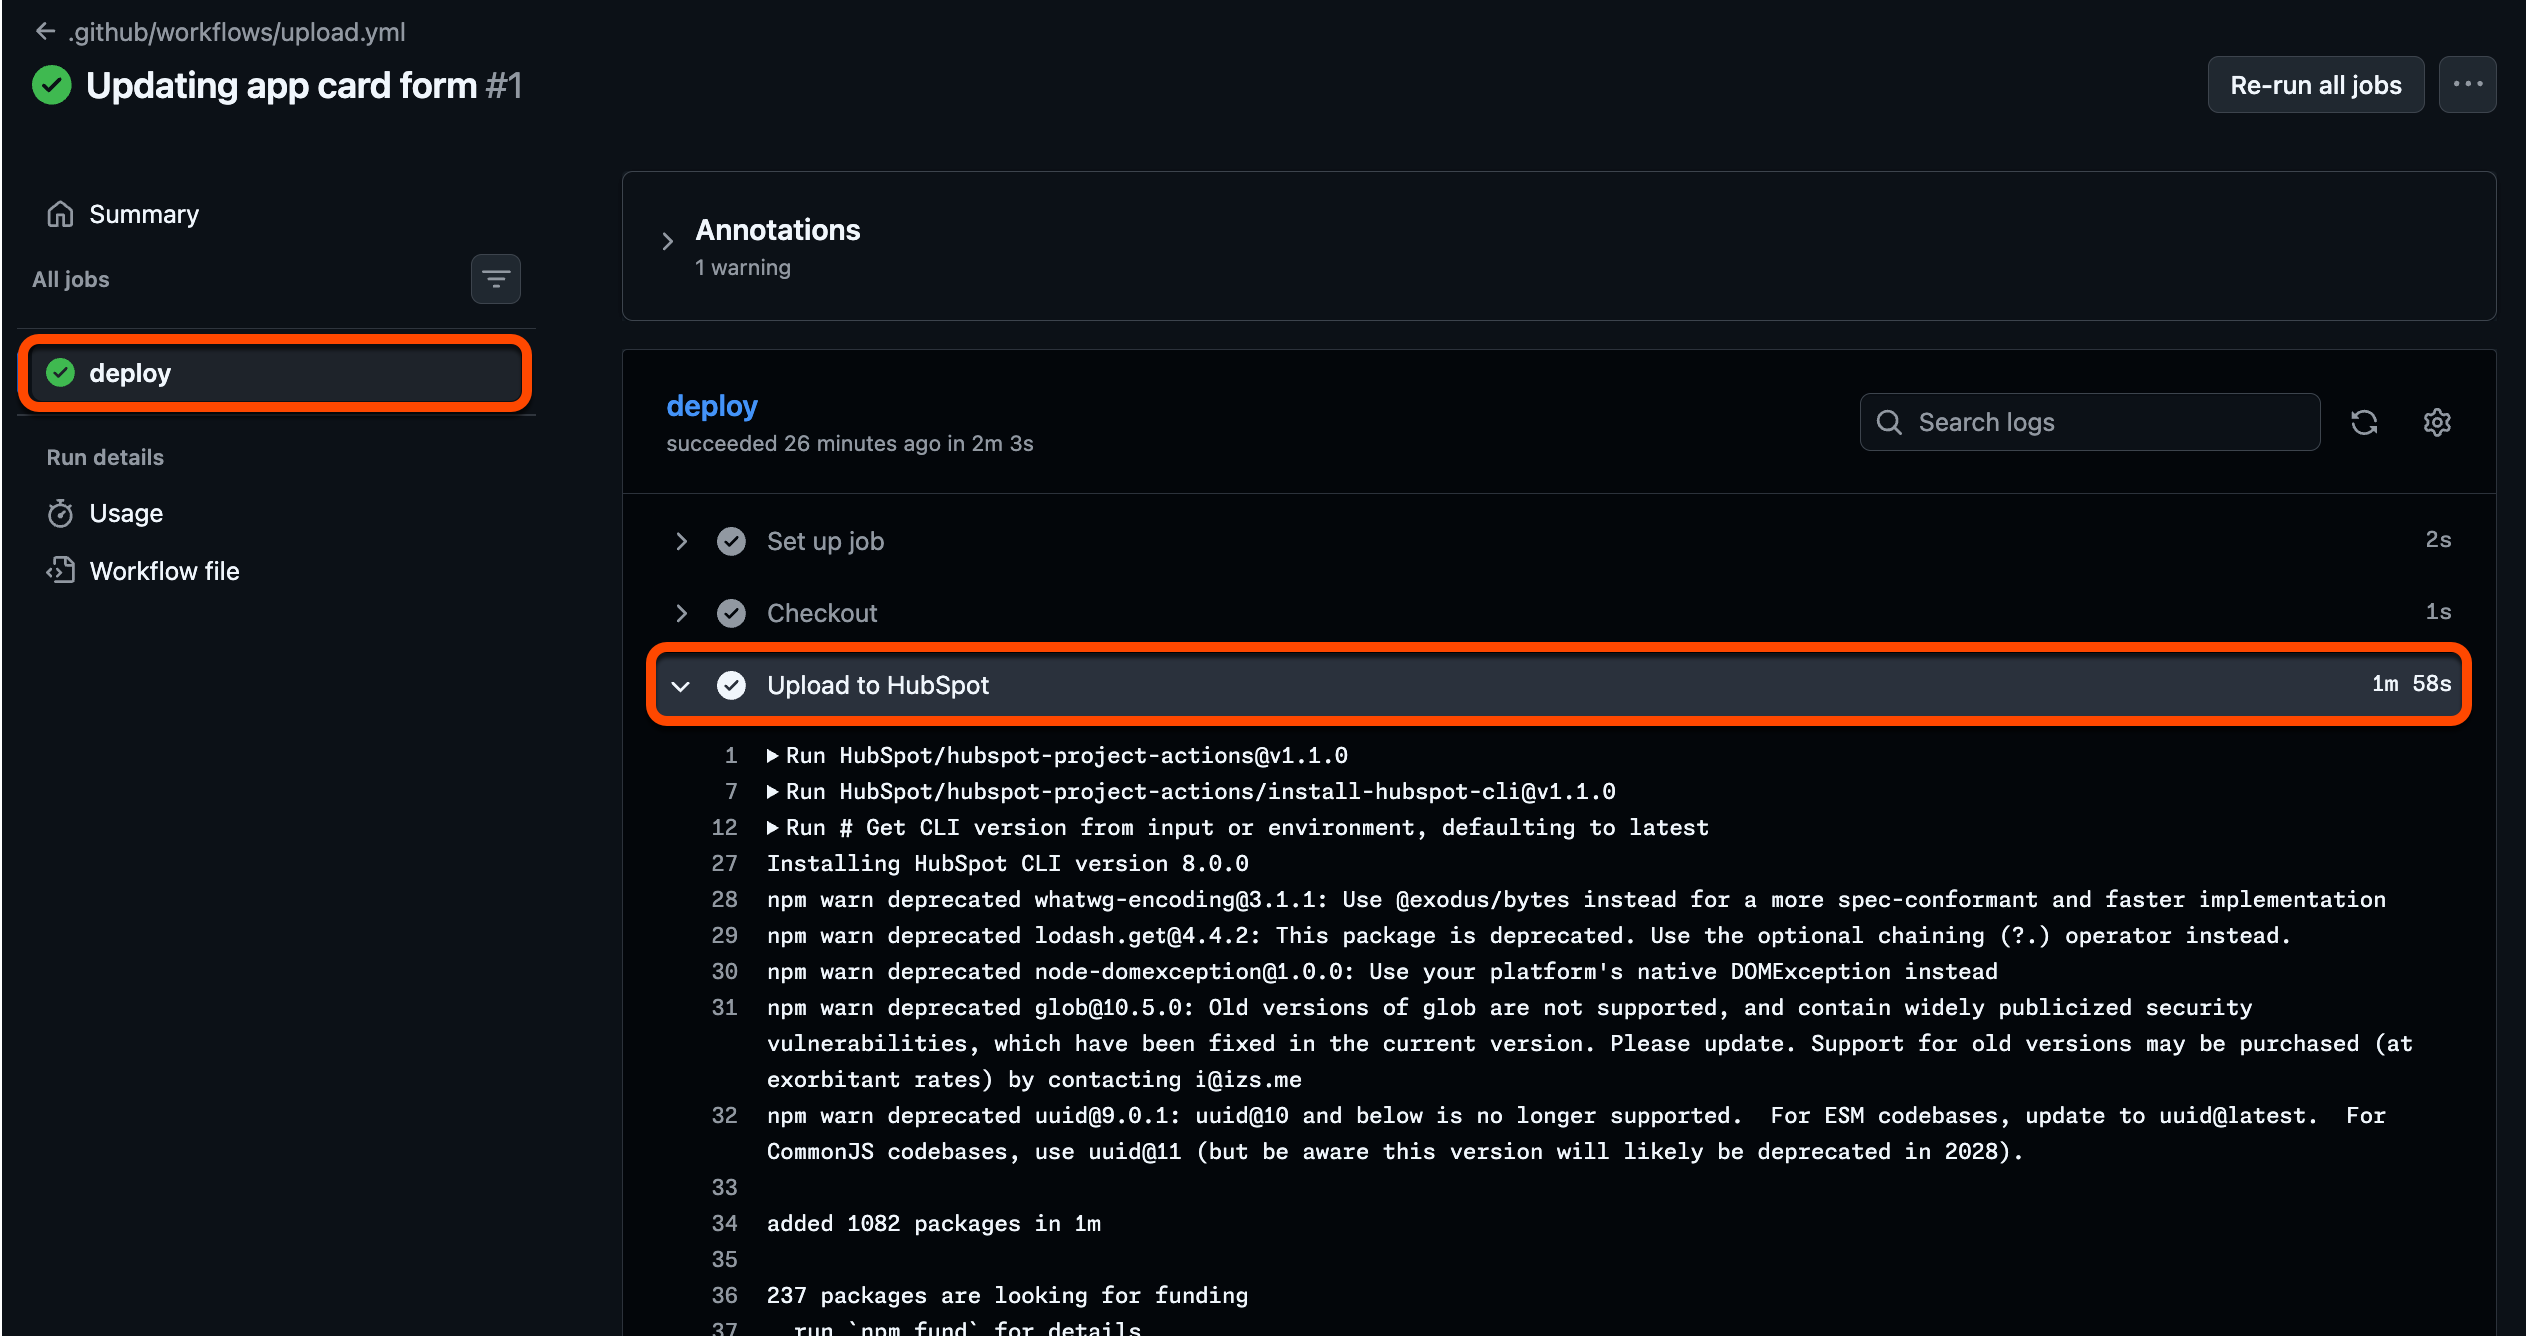
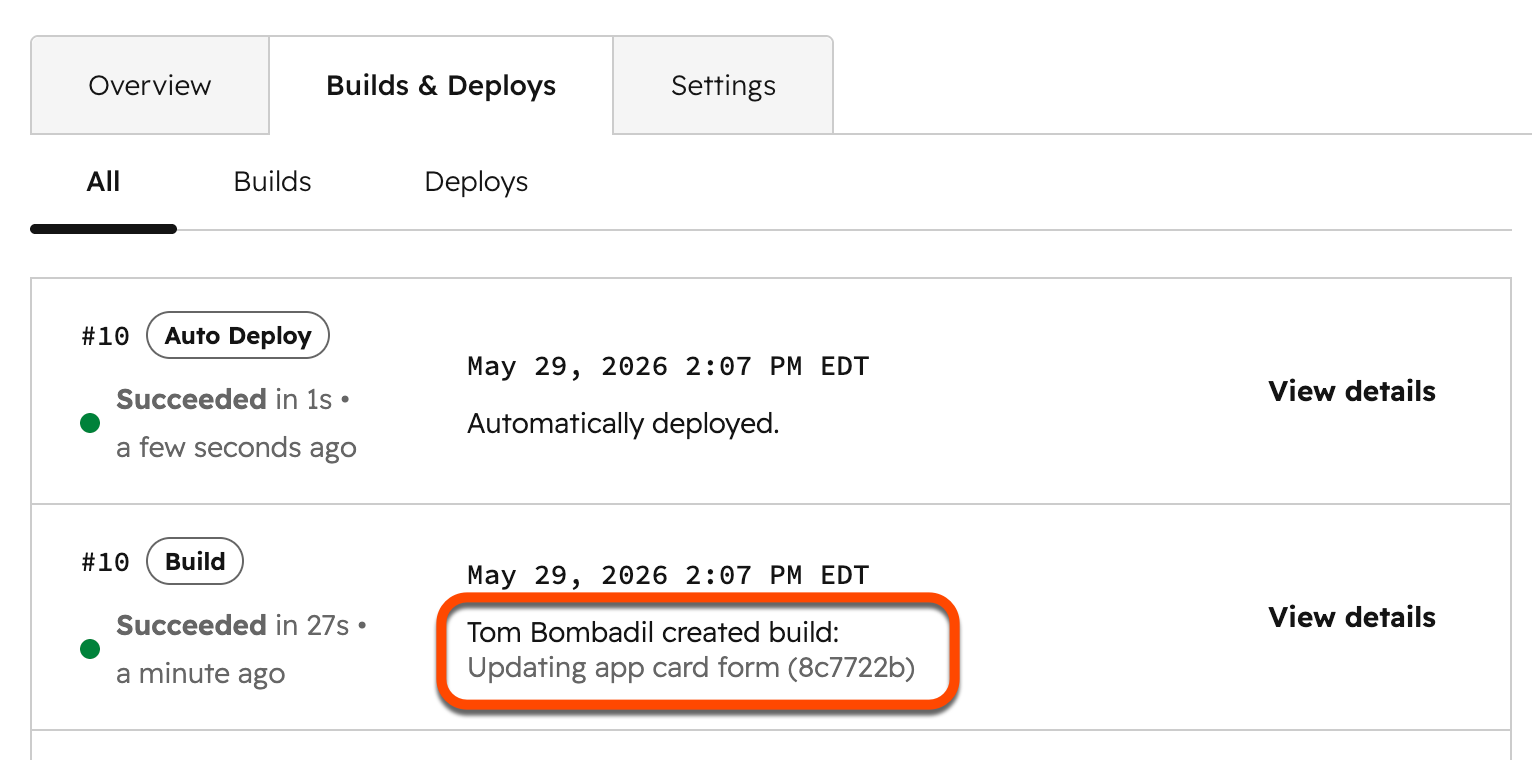
- Open the Projects dashboard.
- Click the name of the project.
- Click the Builds & Deploys tab.
Troubleshooting
If your GitHub Actions workflow isn’t working as expected, review the common issues and solutions below.YAML syntax errors
Branch names and other string values in your workflow file must be quoted. For example,- main without quotes can cause a "no event trigger is defined" error. Use - "main" instead:
Action version mismatch
If a feature you expect (such as profile support) isn’t available, ensure you are on at leastv1.1.0 of the action. Check the hubspot-project-actions repository for available versions and update the uses line in your workflow file accordingly.
Secrets not configured correctly
If your workflow fails with authentication errors, verify the following:- The secret names in your workflow file match exactly what you configured in your GitHub repository settings (e.g.,
HUBSPOT_ACCOUNT_ID, notHUBSPOT_ACCOUNT_Id). - The secret values are correct and have not expired.
- You’re referencing secrets using the
${{ secrets.SECRET_NAME }}syntax.
Workflow not triggering
If pushes to your branch don’t trigger the workflow:- Confirm that the branch name in your workflow file matches the branch you’re pushing to. For example, if your default branch is
masterrather thanmain, update the workflow accordingly. - Check the Actions tab in your GitHub repository for error messages or disabled workflows.
- Verify that the workflow file is located at
.github/workflows/and has a.ymlor.yamlextension.