The features described in this guide are in Early Access beta, separate from the CRM development tools to build UI extensions with React as frontend beta for private app UI extension development.
Migrate a public app to the developer projects framework (BETA)
Using the CLI, you'll migrate an existing production public app to the projects framework. App features that are supported by projects, such as auth configuration and webhooks, will be included automatically in the migration. Features not supported by projects, such as custom workflow actions and timeline events, can be configured through the app settings UI or API as before.
In this guide:
This guide assumes that you meet the following criteria:
- You have an existing public app that has not yet been converted to the developer projects framework.
- You are ready to migrate your public app to the developer projects framework, enabling the creation of UI extensions for your app. If you want to start with a dry run of the migration, you can instead make a copy of your app in a project by running
hs project clone-app
. - You have set up your local environment for project development and set your developer account as the default in the CLI.
- To view your connected accounts, run
hs accounts list
in the terminal. The terminal will list all currently connected accounts, along with the default. - If your developer account is connected but not the default, run
hs accounts use <accountName>
. - If you haven't connected your developer account to the CLI yet, revisit the setup guide.
- To view your connected accounts, run
To begin migration, you'll switch your public app to be configured using projects. This process will preserve the original auth credentials, and all other existing app features, App Marketplace listings, and app installs. No changes are required in your app backend, and customers will not experience any interruptions in service.
- Ensure you've installed the latest version (v6.1.0 or greater) of the HubSpot CLI by running
npm i -g @hubspot/cli@latest
.
- With your developer account connected to the CLI and set as the default, run
hs project migrate-app
.
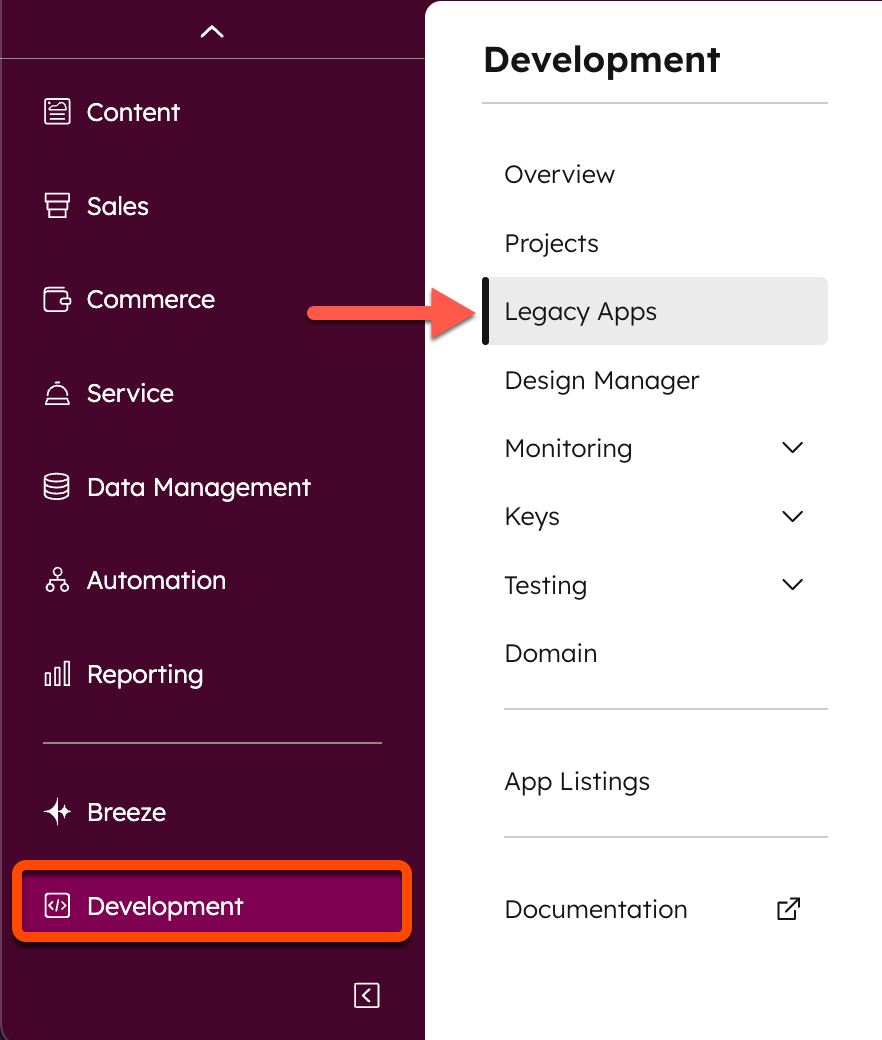
- Select the public app that you'd like to migrate. This will create a new project containing a single public app component that represents the current state of your app.
- Enter a name and local path for your project, then press Enter. The terminal will then display a message to outline the migration process and confirm your intention to convert the app.
- Press Enter to confirm that you're ready to proceed with migration.
- The migration process will then begin, and the terminal will display the migration status. The migration includes:
- Creating the project in your app developer account.
- Converting the project-supported features of the app to source code files, which you can use int he future to update feature configuration.
- Building and deploying the new project (Build #1), which completes the association between the public app and its project. This will preserve the original auth credentials, all app features, App Marketplace listing, and installs.
- Downloading the new project source files to the specified local directory.
With build #1 succeeded, you'll now have captured your original app's configuration state. As you continue to build your app and UI extensions, you can always safely revert to this state by redeploying build #1 by running the hs project deploy --buildId=1
command.
Before you can begin UI extension development and run a local development server, deploy the successful build by running hs project deploy
.
hs project upload
. Other features, such as custom workflow actions or timeline events, can continue to be managed in the developer account app settings UI as before.
With the app successfully migrated, you can now update the public app with app cards.
After the migration is complete, you can add UI extensions to it to customize the HubSpot UI with app cards, along with any other required app feature definition changes from your local development project to the new project-based public app. For guidance around building UI extensions, you can:
- Follow the public app quickstart guide to see HubSpot's boilerplate project template, which includes a simple app card.
- Check out HubSpot's sample UI extensions.
- Review the utilities available in the UI extensions SDK.
- Browse the available UI components for building the UI of your cards.
While developing a UI extension, you can start a local development server to see your changes in the browser in real-time without needing to upload. To enable local development:
- Install dependencies by running
npm i
in thesrc/app/extensions
directory. - Add the card to the UI location through the account's settings. For apps that are currently listed on the App Marketplace, you'll need to complete this step after setting the test account feature flag.
Your development workflow for building out your app will depend on whether it's currently listed in the App Marketplace:
- Migrated apps that are listed in the App Marketplace will automatically be set with a feature flag to prevent your deployed changes from rolling out to active installs. You will need to selectively enable accounts for development and testing using the feature flag API. Learn more about the development workflow for listed apps.
- Migrated apps that are not listed in the App Marketplace will not be set with feature flags by default, so your deployed changes will be available in the accounts where the app is currently installed. However, you can enable feature flagging for your app with the feature flag API if you would like to selectively limit access during the development phase. Learn more about the development workflow for unlisted apps.
If your app is not listed in the App Marketplace, you can begin developing the new app card functionality without needing to set any feature flags on your account. If you do want to selectively control which accounts can access your app's new cards, you can use the feature flags API to control each account's flagState
.
- Enable local development, then start the local development server by running
hs project dev
in the terminal.
- Continue building out your UI extension. The local development server will pick up any changes saved in the React extension file. If you make any changes to non-React files, such as the .json config files, you'll need to end the server and run the
hs project upload
command. - When you're satisfied with your changes, upload and build the project by running
hs project upload
.
- Deploy all updates by running
hs project deploy
, or through the project management UI in HubSpot.
Alternatively, you can run both upload and deploy commands at the same time by running hs project upload && hs project deploy
. You can also enable automatic deploy on successful build in the project's settings.
If your app is listed in the App Marketplace, your migrated app will automatically have a feature flag enabled that controls access to app cards in the accounts where the app is installed. You'll need to use the feature flag API to selectively enable accounts to use the new app cards. By default, app cards for listed public apps are restricted to a maximum of five accounts.
To start developing new app cards without impacting production accounts, first create a test account within your developer account if you haven't done so yet. Then, using your developer account's developer API key, set your test account's feature flag to ON
by making a request to the feature flag API.
With your test account feature flag configured, you'll be able to view new app cards in HubSpot as you develop your UI extensions.
- Enable local development, then start the local development server by running
hs project dev
in the terminal.
- Select your developer test account, then press Enter. The terminal will update with a message displaying the status of the development server. You can press q at any time to end the server.
Unable to find extensions files
error when attempting to start the local development server, ensure that you've added the extensions definition in your public-app.json
file.
- When you're satisfied with your updates, upload your changes to your developer account.
- When the build succeeds, deploy your changes by running
hs project deploy
.
Alternatively, you can run both upload and deploy commands at the same time by running hs project upload && hs project deploy
. You can also enable automatic deploy on successful build in the project's settings.
You can continue testing your app and its new cards in additional accounts by using the feature flag API to set the flagState
to ON
, as shown in the first step above. You can enable this flag for up to five accounts, including beta customers.
Once you've sufficiently tested your updated app, you'll need to submit it for review by emailing details to app-card-review@hubspot.com.
hs project deploy --buildId=1
command.
After receiving approval for unlimited distribution from the App Card marketplace review process, your app will be ready for distribution. Before proceeding with app distribution, it's recommended to consider the following:
- If your app previously included a classic CRM card in the sidebar, consider adding card update guidance so that users can seamlessly add your new cards and remove the old ones.
- It’s recommended to gradually roll out your app card updates to catch any issues before distributing to the full install base. You can also roll out to all installed accounts at the same time.
To help users migrate to your new cards, HubSpot includes a default update state that you can apply to your classic cards. This update includes messaging to indicate that the card should be updated, along with a link to the record customization settings page where they can then add the app’s new cards.
The state will only display to super admins, so non-admin users will not see any disruption.
To add this state to your classic cards, include "showMigrationMessage": "true"
in the card's JSON response. This should be included at the top-level of the response.
Alternatively, you can build your own custom update state by manually updating the card's JSON response directly, or even using the feature flag API for conditional responses.
With the default update state enabled for your classic cards, their content will be replaced, and you can walk through what the end-user experience will be for super admins who want to upgrade to your new cards:
- In the test account, navigate to a CRM record that contains your classic card.
- On the CRM record, locate the card, then click the Update card link to navigate to the app settings page.
- The app settings page will display all available cards. Click the link provided for each card to navigate to the customization page for that object.
- Users can then proceed to customize their record pages as needed. They can find your new cards within the Apps section of the customization sidebar.
- After adding the new card, the old card can be removed by locating it in the view editor then clicking Remove.
Learn more about the card updating user experience on HubSpot's Knowledge Base.
Using the feature flag API, you can gradually roll out your app in two ways:
To roll out your app cards to new installs only, you'll use the feature flag API to turn off the feature flag for all existing installs. Then, you'll turn on the default flag state so that new installs have the flag enabled by default.
- For the first request, you'll set the
flagState
toOFF
for all accounts that currently have the app installed. You'll need to gather theportalId
for all existing installed accounts, then make aPOST
request tohttps://api.hubapi.com/feature-flags/v3/{appId}/flags/hs-release-app-cards/portals/batch/upsert?hapikey={developerAPIKey}
.
- With existing app installs set to
OFF
, you can now set thedefaultState
toON
. To do so, make aPUT
request tohttps://api.hubapi.com/feature-flags/v3/{appId}/flags/hs-release-app-cards?hapikey={developerAPIKey}
- Once you feel confident in new customer adoption, you can begin to remove customer
portalIds
that you switched to theOFF
state by making aPOST
request tohttps://api.hubapi.com/feature-flags/v3/{appId}/flags/hs-release-app-cards/portals/batch/delete?hapikey={developerAPIKey}
with the account IDs you want to remove from theOFF
list.
OFF
, you can make a GET
request to /flags/hs-release-app-cards/portals/?hapikey={developerAPIKey}
. Learn more in the feature flag API reference documentation.
- When all previously added accounts have been deleted using the above endpoint, you''ll have successfully completed the rollout and finished migration. At this point, you can safely delete your feature flag by making a
DELETE
request tohttps://api.hubapi.com/feature-flags/v3/{appId}/flags/hs-release-app-cards?hapikey={developerAPIKey}
.
Alternatively, rather than starting with new installs, you can selectively enable your app cards for a subset of accounts that have your app installed. To do so, you'll need to have a list of the account IDs for all existing public app installs. With that list, you can make a POST
request to https://api.hubapi.com/feature-flags/v3/{appId}/flags/hs-release-app-cards/portals/batch/upsert?hapikey={developerAPIKey}
and set their flagState
to ON
.
You can continue making this request for subsets of accounts until all accounts have been migrated. Then, you can delete your feature flag by making a DELETE
request to https://api.hubapi.com/feature-flags/v3/{appId}/flags/hs-release-app-cards?hapikey={developerAPIKey}
.
To release your app cards to all installed accounts simultaneously, delete the app's feature flag by making a DELETE
request to https://api.hubapi.com/feature-flags/v3/{appId}/flags/hs-release-app-cards?hapikey={developerAPIKey}
.
Use the feature flag API to control availability of your app cards in customer accounts. All endpoints are under the https://api.hubapi.com/feature-flags/v3/{appId}
root path. The API currently supports a single App Flag: hs-release-app-cards
. Attempts to specify other App Flags will receive an error.
View the full feature flag API reference documentation.
To streamline making requests to the feature flags API, check out the following HubSpot-provided resources:
Thank you for your feedback, it means a lot to us.