Ejecutar fragmentos de código en bots

Al crear o editar un bot, puedes agregar un fragmento de código haciendo clic en «+» para agregar una acción como normalmente lo harías. En el panel de selección de acción, haz clic en «Ejecutar un fragmento de código»run-a-code-snippet-2

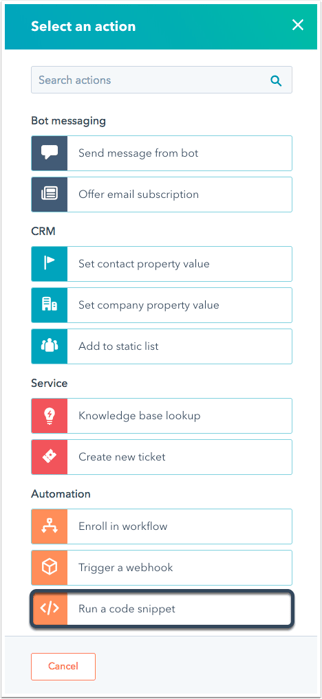
A continuación, asígnale un apodo a tu acción. En el panel de edición de códigos, verás nuestra plantilla predeterminada para Node.js 10. x. Los detalles del objeto «event» y los formatos de objeto de respuesta posibles se detallan a continuación.run-a-code-snippet-editor

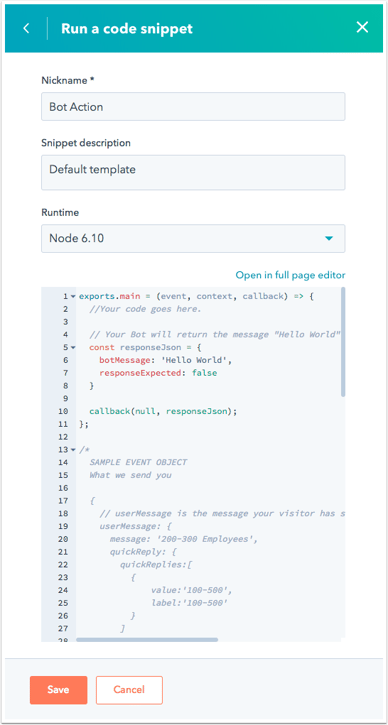
El código se activará cuando se alcance la acción guardada en una conversación.

Hay tres aspectos principales que debes tener en cuenta al trabajar con fragmentos de código:

  • La función exports.main() se llama cuando se ejecuta la acción del fragmento de código.
  • El argumento event es un objeto que contiene detalles para el visitante y la sesión de chat.
  • La función callback() se utiliza para pasar datos al chatbot y al usuario. Se debe llamar en la función exports.main.

El objeto event contendrá los siguientes datos:

//example payload { "userMessage": { // Details for the last message sent to your bot "message": "100-500", // The last message received by your bot, sent by the visitor "quickReply": { // If the visitor selected any quick reply options, this will be a list of the selected options. // Will be 'null' if no options were selected. "quickReplies":[ // A list of quick reply options selected by the visitor { "value":"100-500", "label":"100-500" } ], }, "session": { "vid": 12345, // The contact VID of the visitor, if known. "properties": { // A list of properties collected by the bot in the current session. "CONTACT": { "firstname": { "value": "John", "syncedAt": 1534362540592 }, "email": { "value": "testing@domain.com", "syncedAt": 1534362541764 }, "lastname": { "value": "Smith", "syncedAt": 1534362540592 } } }, "customState":{myCustomCounter: 1, myCustomString:"someString"} // Only present if it customState was passed in from a previous callback payload } }

La función callback() se utiliza para enviar datos al bot. El argumento debe ser un objeto con los siguientes datos:

//sample payload { "botMessage": "Thanks for checking out our website!", // This is the message your bot will display to the visitor. "quickReplies": [{ value:'option', // Passed to the bot as the response on click label:'Option' // Gets displayed as the button label }], // the quickReplies object is optional "nextModuleNickname": "SuggestAwesomeProduct", // The nickname of the next module the bot should execute. If undefined, the bot will follow the default configured behavior "responseExpected": false // If true, the bot will display the returned botMessage, wait for a response, then execute this code snippet again with that new response. "customState":{myCustomCounter: 1, myCustomString:"someString"} // Optional field to pass along to the next step. }

Limitaciones

Los fragmentos de código en los bots deben terminar en un lapso de 20 segundos y solo usar 128 MB de memoria. Exceder estos límites ocasionará un error.

Bibliotecas disponibles

Varias bibliotecas de Node.js están disponibles para usar dentro del fragmento de código.

Las bibliotecas se pueden cargar usando la función require() normal en la parte superior de tu código.

const request = require('request'); exports.main = (event, callback) => { request('http://time.jsontest.com/', function (error, response, body) { const responseJson = { "botMessage": "The current time in GMT is " + JSON.parse(body).time, "responseExpected": false } callback(responseJson); }); };

¿Te resultó útil este artículo?
Con este formulario puedes enviar tu opinión sobre nuestros documentos para desarrolladores. Si tienes comentarios sobre el producto de HubSpot, puedes enviarlos al Foro de ideas.