2025.2 and 2026.03) are initialized using the HubSpot CLI, via a series of streamlined commands. The app’s configuration (name, authentication type, etc.) and any features are specified using individual configuration files, which are bundled into a project.
The steps below walk you through the process of creating a new app using the CLI, uploading the associated project to your HubSpot account, which you can install and test in a developer test account.
Prerequisites
- To create an app on the latest version of the developer platform, you’ll need to install the HubSpot CLI and authenticate it with your account using the
hs account authcommand. Make sure you’re using v7.6.0 of the HubSpot CLI before proceeding. If you’ve already installed the CLI, you can update to the latest version of the CLI by runningnpm install -g @hubspot/cli@latest. - You may want to create a configurable test account so that you can build and test in an isolated environment.
Create a new boilerplate project
- Run the command below in your terminal to create a new project with a boilerplate template to get you started.
- Follow the commands to set up your project. When prompted to select the base contents of your project, select App.
- Continue to follow the CLI prompts to configure your app details, including:
- [—distribution]: select whether you plan to distribute your app on the HubSpot Marketplace or if want to restrict installation to specific HubSpot accounts.
- [—auth]: select whether you want to use OAuth for the ability to authenticate multiple accounts, or opt for a static token to limit installation to a specific account.
- [—features]: select which app features to include, which will create a directory for each feature, along with the respective config files you’ll need to get started. Press spacebar to select a feature, the a key to toggle all features, the i key to invert your current selection, and the enter key to proceed. The following app features are available:
- Card: an app card that will appear on a CRM record page.
- App Function: add support for serverless functions.
- Settings: add an app settings page.
- Webhooks: add a configuration file to specify webhook subscriptions.
- Custom Workflow Action: add a custom workflow action.
You can add a boilerplate feature to your app at any time by running the
hs project add command in the root directory of the project.Configure the newly created project and upload it to your developer account
The projects framework moves app features that were previously configured in the UI or via the API over to source code files, typically defined as<file-name>-hsmeta.json configuration files.
App features are then created using a combination of subfolders from the main /src/app directory and other configuration files as needed. Learn more about your app’s project structure and schema options in the app configuration reference documentation.
Configure UIDs and initial app features
Update the UIDs of your app and any features:- Change the
uidproperty of the app in the top-levelapp-hsmeta.jsonfile and give a unique name to represent your new app. - If you opted for
staticauthentication for a privately distributed app, remove theredirectUrlssub-property within theauthfield of yourapp-hsmeta.jsonconfiguration (see line 10 in the example code block below).
Example app-hsmeta.json
- For any features you want to include (e.g., app cards), update the UID within any associated
*-hsmeta.jsonconfiguration files in your project.
Set up OAuth (if applicable)
If you plan on distributing your app to multiple accounts (either with a specific set of allowlisted accounts or via the HubSpot app marketplace), you’ll need to set up OAuth for your app by following the steps below. Otherwise, you can skip this step and proceed to upload your project.- Add one or more valid redirect URLs to the
app-hsmeta.jsonfile based on your local (or another non-production) OAuth server configuration. - If you don’t have a backend service set up already, you can get started by using the sample OAuth Node.js example and run it locally. It’s already set up to work with
https://localhost:3000/oauth-callbackas the redirect URL configured in the boilerplate example code from thehs project createcommand you ran in the previous step.
Example app-hsmeta.json
Upload your project
After you’ve updated your app and feature schemas, run thehs project upload CLI command to upload your project to your HubSpot account and automatically trigger a new build.
If your app is configured to use OAuth authentication, proceed to the next step to retrieve the app’s authentication details. Otherwise, you can proceed to app installation.
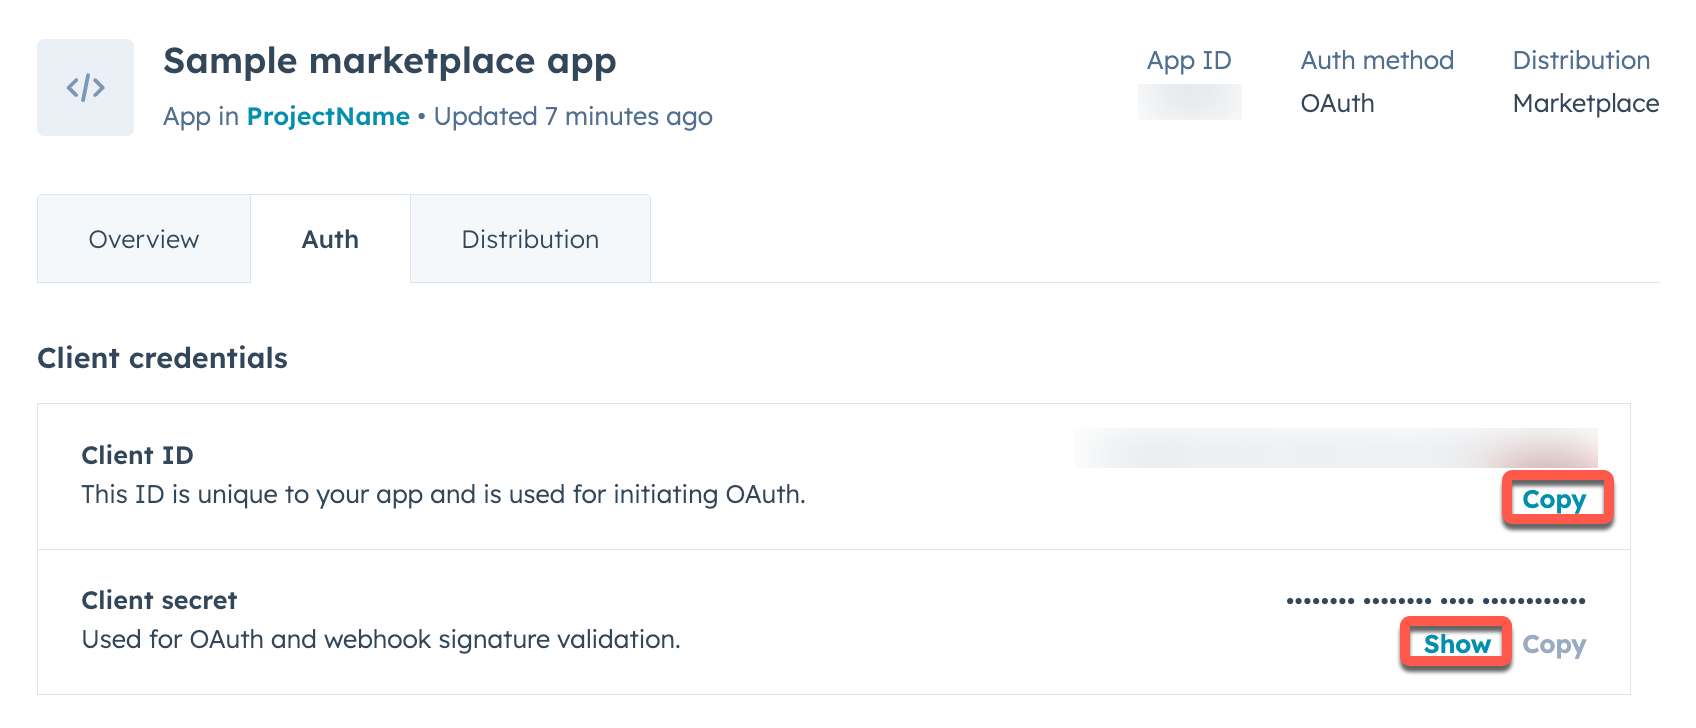
Add the client ID and client secret of your app to your app
If you configured the authentication type to useoauth, you’ll need to set up your backend OAuth server to use your app’s client ID and secret, which you can find in HubSpot:
- In the terminal, run
hs project openfrom within your local project directory to open the project details page in HubSpot. - Under Project Components, click the name of your app.
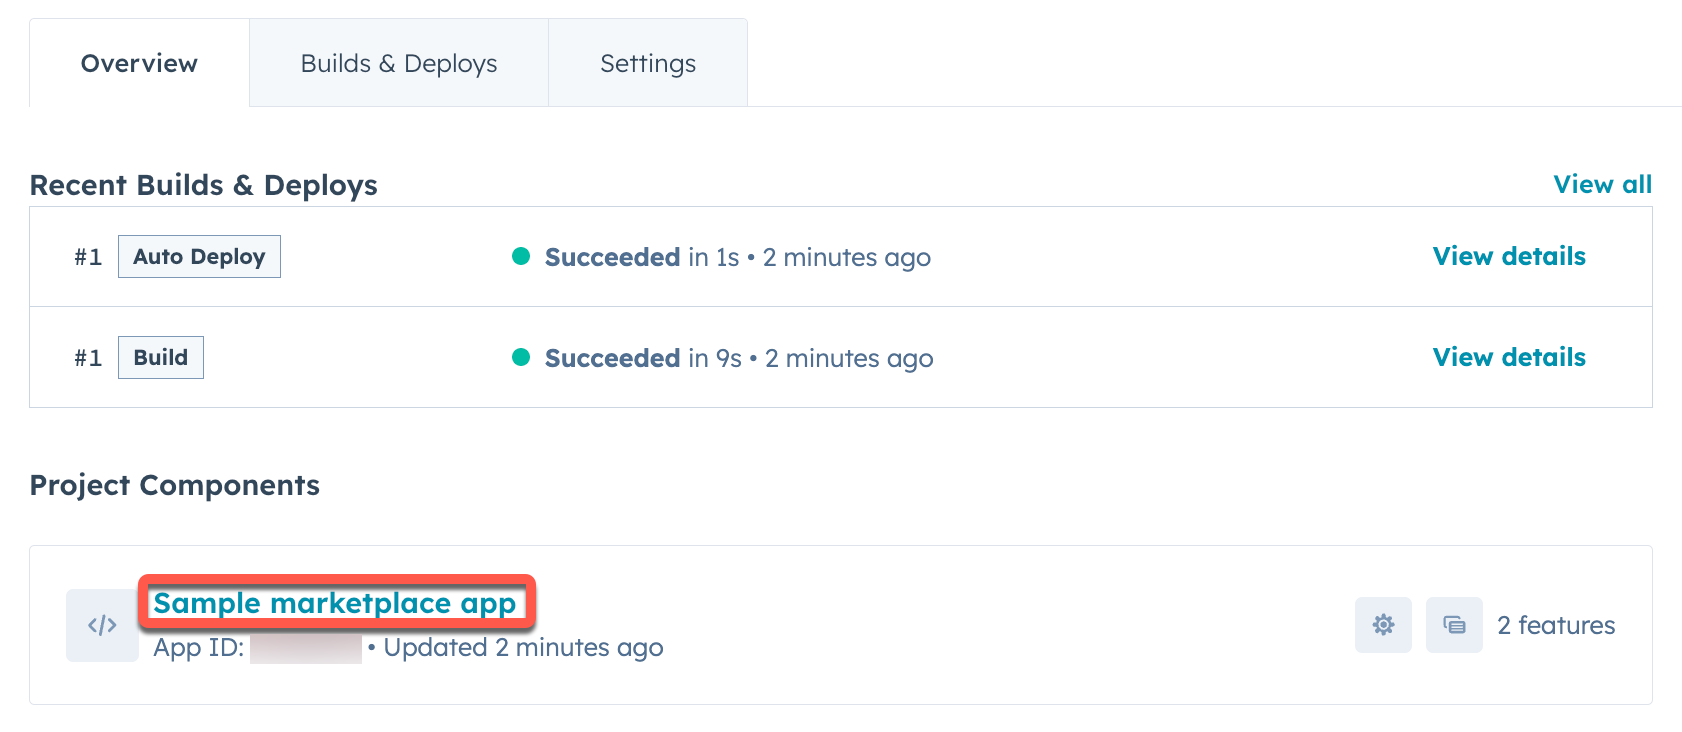
- Click the Auth tab.
- Under Client credentials, copy the Client ID and Client secret from your new app and paste them into the corresponding locations in your OAuth server’s configuration, then restart your OAuth server.
Install your app
If you’re still planning on testing your app out before getting it ready for a production setting, it’s recommended you start by installing it in a developer test account. Otherwise, users with the required user permissions can install the app directly in their standard HubSpot account.Install in a developer test account
If you don’t already have a test account, you can create one in HubSpot:- Navigate to Test accounts in the Development navigation menu, then click Create developer test account. Follow the prompts to create your new test account.
- In the left sidebar menu, navigate to Projects, click the name of your new project, then click the UID of your app in the component list.
- On the Distribution tab, next to Test installs, click Add test install(s).

- In the right panel, click Install next to the test account you created.
- Review the app permissions, select the checkbox to authorize installing an unverified app, then click Connect app.
Install in a standard account
If you have the required user permissions, you can also install your app directly in your standard account:- In your HubSpot account, navigate to Development.
- In the left sidebar menu, navigate to Projects, click the name of your new project, then click the UID of your app in the component list.
- On the Distribution tab, under Standard install, click Install now.

- Select the checkbox to authorize installing an unverified app, then click Connect app.
- Once successful, click View installed app details to navigate to the Connected Apps page of the account where you installed your app.

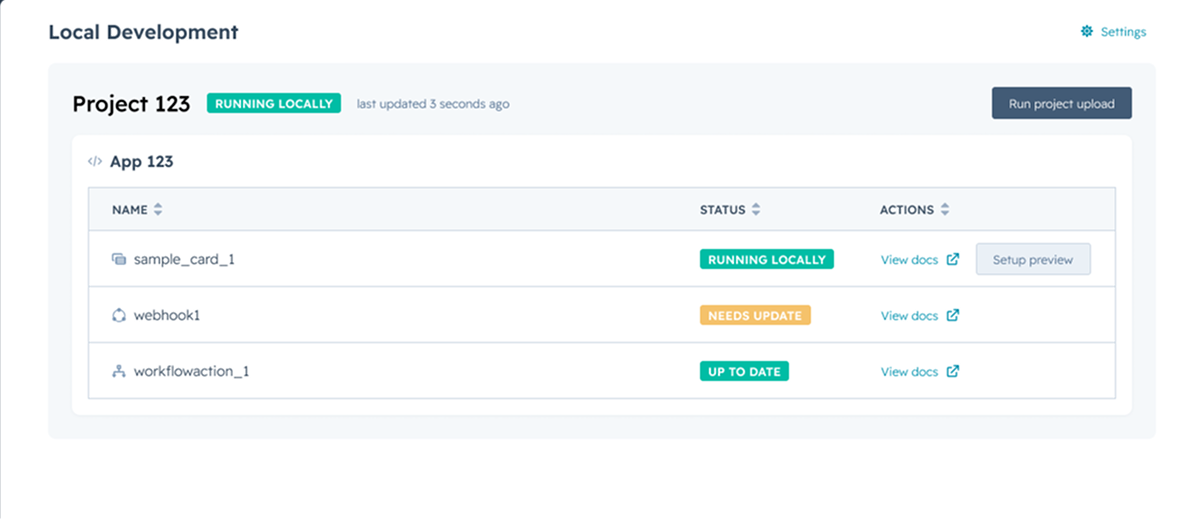
Local development and previews
Once you’ve successfully installed the app into the test account, you can runhs project dev to start developing your app locally.
- When running this command, you’ll see a link to view your project status and source code within your primary developer account as well as a link to access a local development homepage in your test account.
- This homepage will provide you details about the active local development session, including which components are being developed locally and how you can preview those components to test your changes in real time.