Prerequisites
To create a configurable test account, you’ll need to be developing a project on platform version2025.2 or later and using CLI version 8.3.0 or later.
- To create a new project or migrate an existing project, visit the developer platform overview to get started.
- To install the latest version of the HubSpot CLI, run the following terminal command:
Create test accounts using the CLI
Using the CLI, you can create and configure test accounts from scratch or from an existing config file.- Create from scratch: walk through test account configuration options using the CLI.
- Create from a config file: use a pre-written test account configuration file to create the account. This can be particularly useful for automated testing workflows, as you can define a consistent automated test account creation flow.
Create from scratch
1
Run the test-account command
- In the terminal run the command below:
- Using the arrow keys, select Create test account from scratch.
You can also access this test account creation flow when starting local development with the
hs project dev command. After running hs project dev, you can select Test on a developer test account, then create a new account from scratch.2
Configure account details
Continue following the terminal prompts to configure the test account details:
- Enter a name for the test account.
- Enter a description for the account.
- Select the subscriptions to assign to the account. You can select up to one tier per Hub.
Create from a config file
1
Generate the config file
- Generate a config file by running the following command in your terminal:
- Follow the terminal prompts to configure the account details:
- Enter a name for the test account.
- Enter a description for the account.
- Select the subscriptions to assign to the account. You can select up to one tier per Hub.
- Enter a local path for the config file, which you’ll later point to when creating the account.
2
Create a new test account
- In the terminal, run the following command:
- Select Create test account from config file.
- Enter the local path of the config file.
For more flexibility, you can use the
--config-path flag directly:hs test-account create --config-path ./test-portal-config.jsonThis method enables you to maintain multiple configurations in your repository. For example, you could include one configuration for a Starter portal and another for Enterprise. With multiple configurations, you can spin up test accounts on demand as part of your development or QA process.Create test accounts in HubSpot
In addition to using the CLI to create test accounts, you can also create test accounts using the HubSpot UI.1
Navigate in HubSpot
- In the main navigation bar, navigate to Development.
- In the left sidebar menu, navigate to Testing > Test Accounts.
2
Create a new test account
- On the Developer test accounts page, click Create developer test account.
- In the dialog box, enter an account name.
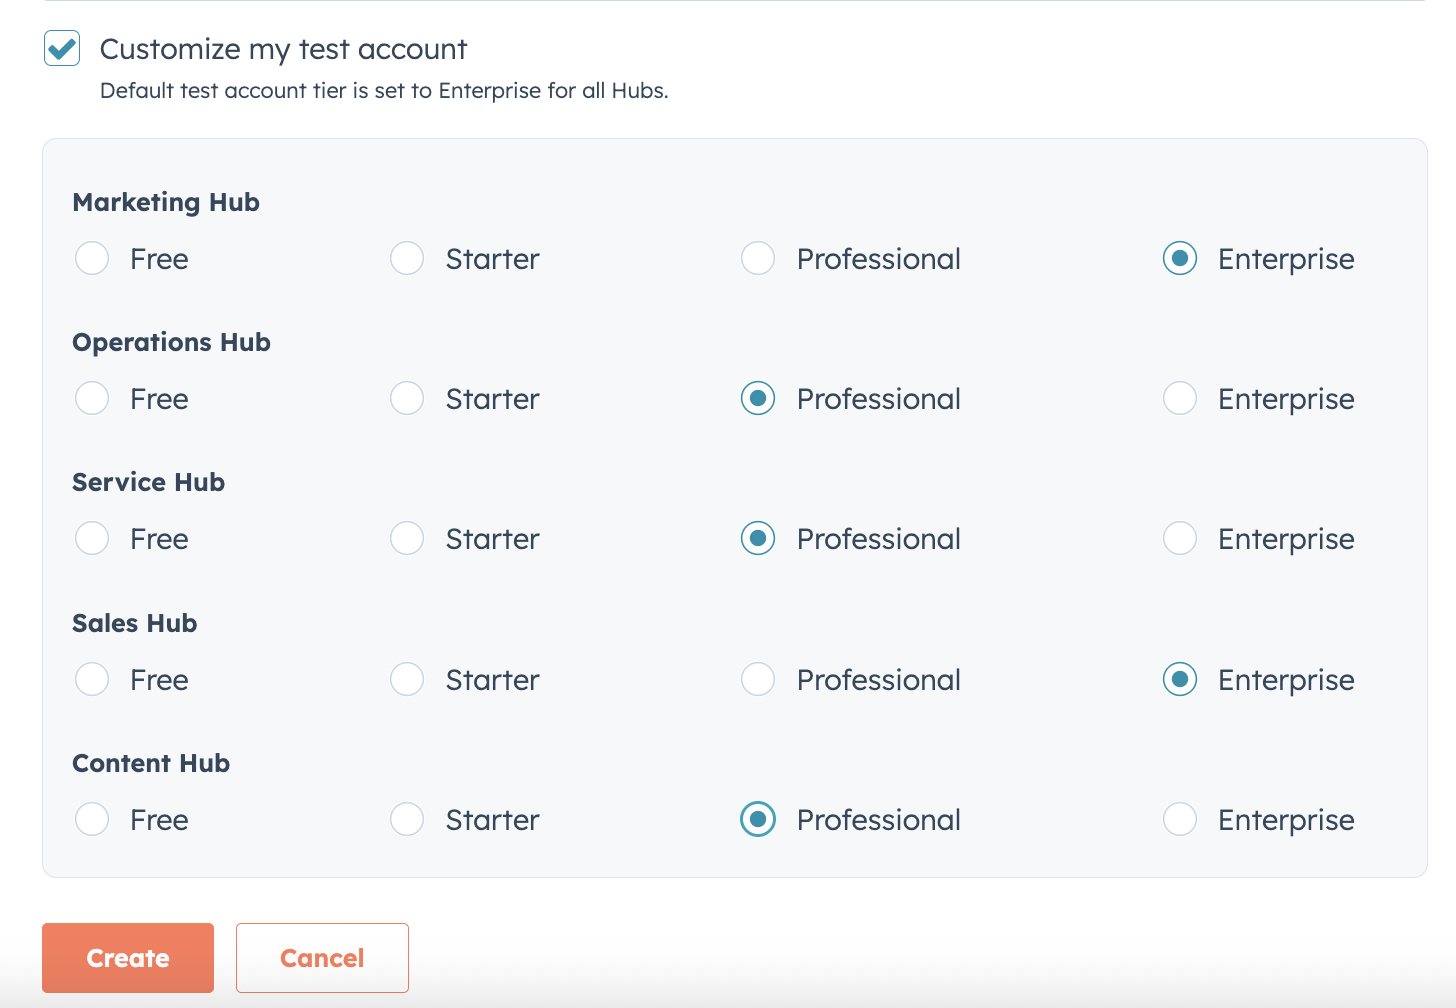
- By default, the account will be set up with trials for Enterprise level features for all Hubs. To customize the Hubs and tiers, select the Customize my test account checkbox. Then, use the radio buttons to select the Hub tiers you want to include for the account.
- Click Create.
Access and manage test accounts in HubSpot
To access test accounts in HubSpot:- In the main navigation bar, navigate to Development.
- In the left sidebar menu, navigate to Testing > Test Accounts.
- To open an account in a new tab, click the test account name.
- To renew a test account’s trials, click Actions, then select Renew trials.
- To delete a test account, click Actions, then select Delete. In the dialog box, confirm the deletion by entering the test account name, then clicking Delete.
- From the Developer test accounts page, click the name of a test account.
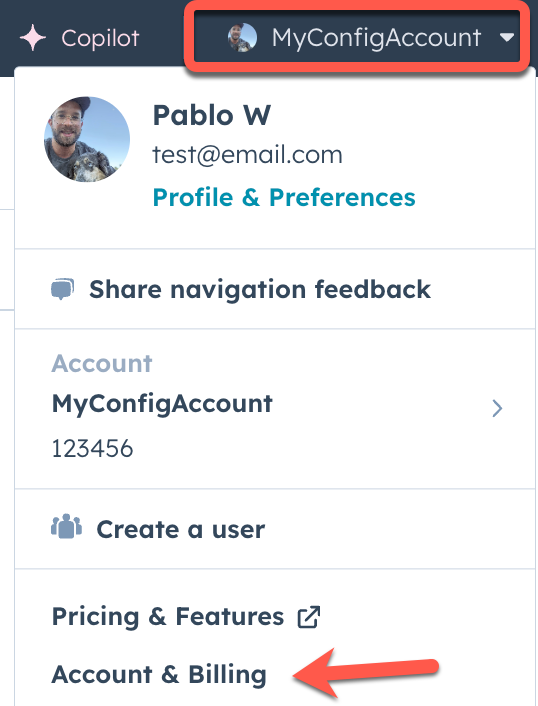
- In the new tab, click the account name in the top right, then select Account & Billing.
- On the Overview tab, view the list of trials available to the account. If you need to renew any of the trials, navigate back to the Developer test account page as shown above.
Import data into a test account
Using thehs test-account import-data command, you can import CRM data from your local environment into a test account. When run, the command will use the CRM imports API to send data from one or more CSV files into the account. Because this command uses the CRM imports API, you have access to the same options that you would when making a POST request to the API directly.
Below, learn how to structure your local import files before running the import command.
Structuring your import files
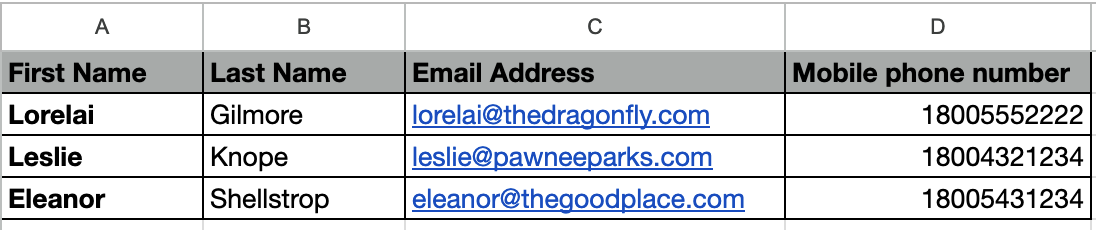
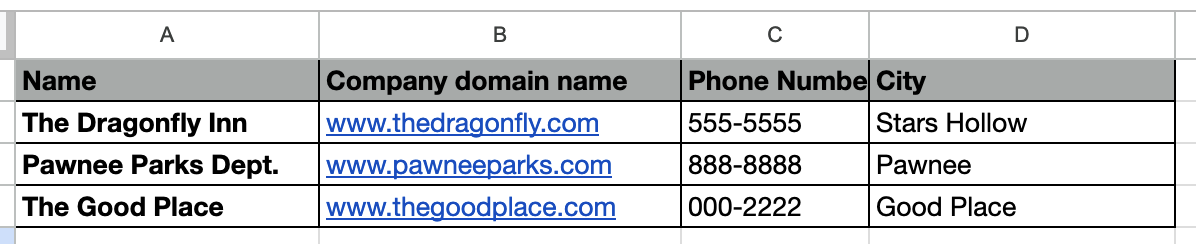
Importing CRM data into a test account requires two types of files:- One or more CSV files containing the CRM object data to import. Each file will contain rows for each CRM record you want to create or update, along with columns for the CRM properties that you want to populate. Note that if you include custom properties in the import file, you’ll need to create them in the account before importing. You can learn more about import files in the following resources:
- A JSON configuration file that provides HubSpot with details for each file, such as file format and column headings. This file follows the same format as the request body for making
POSTrequests to the CRM imports API. For a full breakdown of the available fields, check out the CRM imports API guide.
View more examples of JSON import request formats for single and multi-file imports in the CRM imports API guide.
Running the import command
After setting up your files, you can import them via the CLI:- In the terminal, navigate to the directory that contains your import JSON and CSV files.
- Run the
hs test-account import-datacommand. - Follow the terminal prompts to set up your import:
--account: select the developer test account you want to import into.--file-path: specify the name of the JSON file.
- The terminal will then display the CSV files that will be imported. Confirm the import by pressing Enter.