The HubSpot MCP server documented on this page is separate from the developer MCP server. The developer MCP server helps developers build apps and CMS content assets locally on HubSpot’s developer platform. In contrast, the HubSpot MCP server is intended for making requests to an account’s CRM data, similar to using HubSpot’s APIs.
Implementation overview
At a high level, integrating with the HubSpot MCP server involves:- Creating an MCP auth app in your HubSpot account.
- Configuring your MCP client to connect to the HubSpot MCP server at
https://mcp.hubspot.comusing your app’s OAuth credentials. - Prompting your MCP client using natural language to query your HubSpot data.
Some MCP clients, like the MCP Inspector, handle PKCE automatically. If you’re building a custom integration, ensure your OAuth implementation includes PKCE support. Learn more about OAuth 2.1 authorization in the MCP specification.
Supported data and permissions
The following data is accessible via the remote MCP server. Read access:- CRM records: contacts, companies, deals, tickets, users, carts, invoices, orders, line items, products, quotes, subscriptions, and segments (lists)
- Activities: calls, emails, meetings, notes, and tasks
- Content and marketing: blog posts, landing pages, site pages, campaigns, and marketing events
- Conversations: messages and threads from live chat, team email, WhatsApp, SMS, Facebook Messenger, and custom channels connected to help desk or conversations inbox
Conversations access has additional restrictions based on your HubSpot inbox configuration.
- Help desk conversations are visible to all users.
- For the conversations inbox, if access has been restricted to specific users or teams, only those users can query those conversations through the MCP server.
- Marketing emails: draft emails and previews, email analytics data including aggregate send statistics (sends, opens, clicks, bounces, unsubscribes, and deliveries), account email health diagnostics, and per-contact delivery and engagement details
- CRM records: contacts, companies, deals, tickets, line items, and products
- Activities: calls, emails, meetings, notes, and tasks
- Marketing emails: create and update email drafts
- The tools available in the MCP server at the time of installation.
- The permissions that the user chooses to grant during installation.
Behind the scenes, the HubSpot MCP server is based on the CRM search API, which currently doesn’t include vector search capabilities.
Available tools
Below is a list of the tools provided by the remote MCP server.Create an MCP auth app
Create an MCP auth app in your HubSpot account.- In the main navigation bar of your HubSpot account, navigate to Development.

- In the left sidebar menu, navigate to MCP Auth Apps.
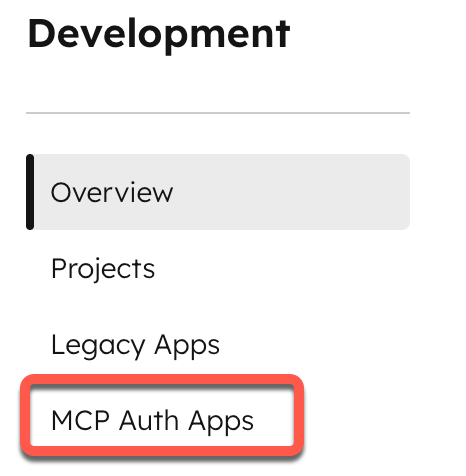
- In the upper right, click Create MCP auth app.
- In the dialog box, enter your app details, which you can update later as needed:
- App name: the name of your app.
- Description: an optional description of your app.
- Redirect URL: the URL to use for OAuth authentication. If you’ll be testing with the MCP inspector, you’ll need to include
http://localhost:6274/oauth/callback/debugas a redirect URL. - Icon: an optional icon for your app.
- Click Create.
If you’re including multiple redirect URLs, the first redirect URL will be used as the default redirect.

Test with the MCP inspector
The MCP Inspector is a debugging tool that handles OAuth with PKCE automatically, making it a quick way to test your connection to HubSpot’s MCP server without building a full integration. To connect using MCP Inspector:- Run the MCP Inspector tool locally.
- In the browser window that loads the MCP Inspector, configure the environment fields in the left sidebar as follows:
- Transport Type: Streamable HTTP
- URL:
https://mcp.hubspot.com/ - Client ID: your app’s client ID, as displayed in HubSpot.
- Client secret: your app’s client secret, as displayed in HubSpot.
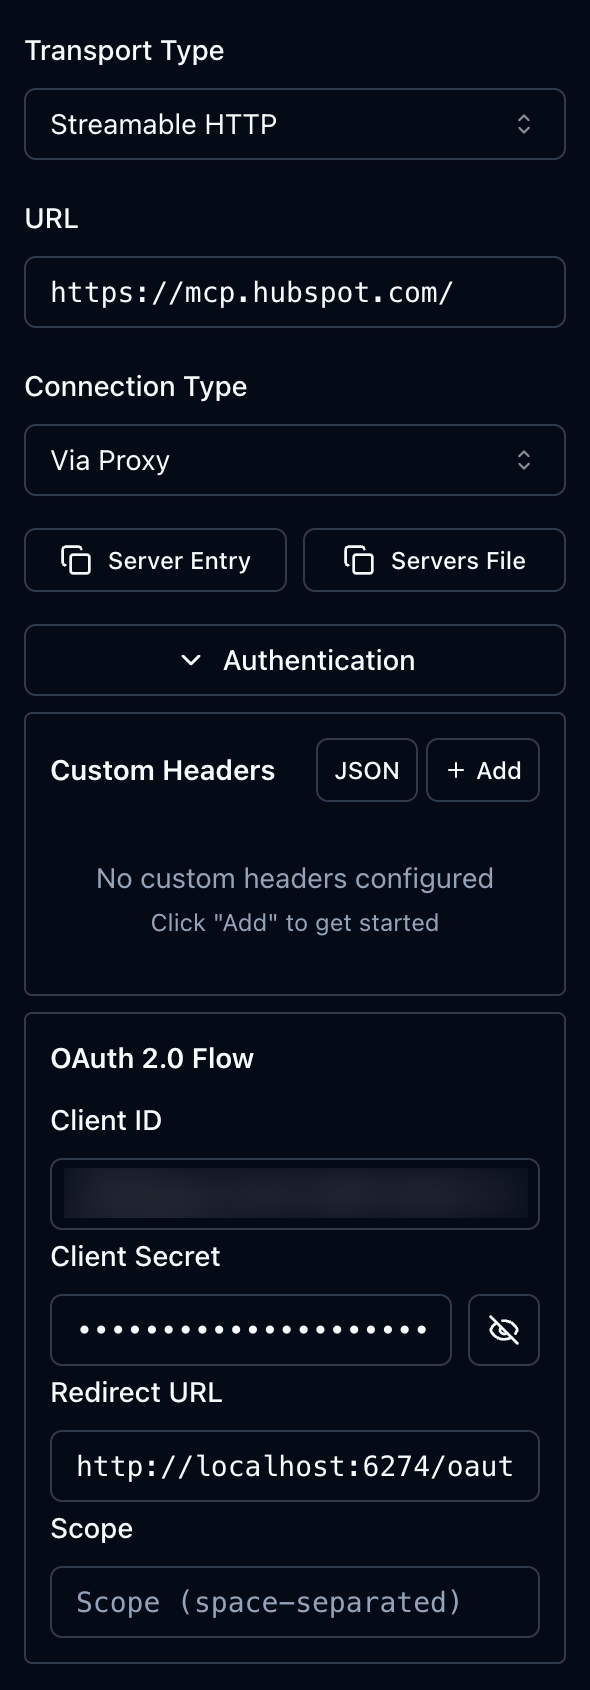
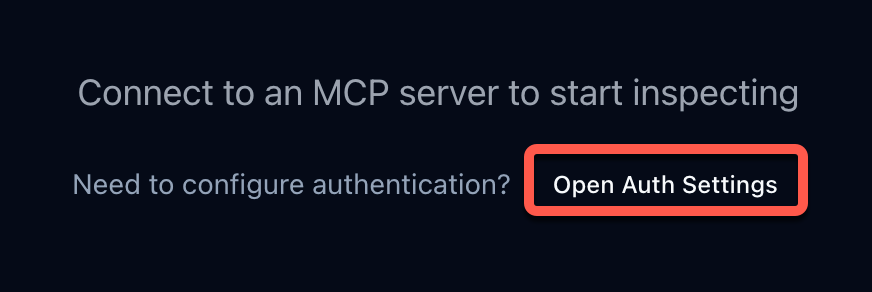
- With your initial details configured, click Open Auth Settings.
- In the OAuth Authentication section, click Guided OAuth Flow.
- In the OAuth Flow Progress section, begin the OAuth flow by clicking Continue below the progress steps.
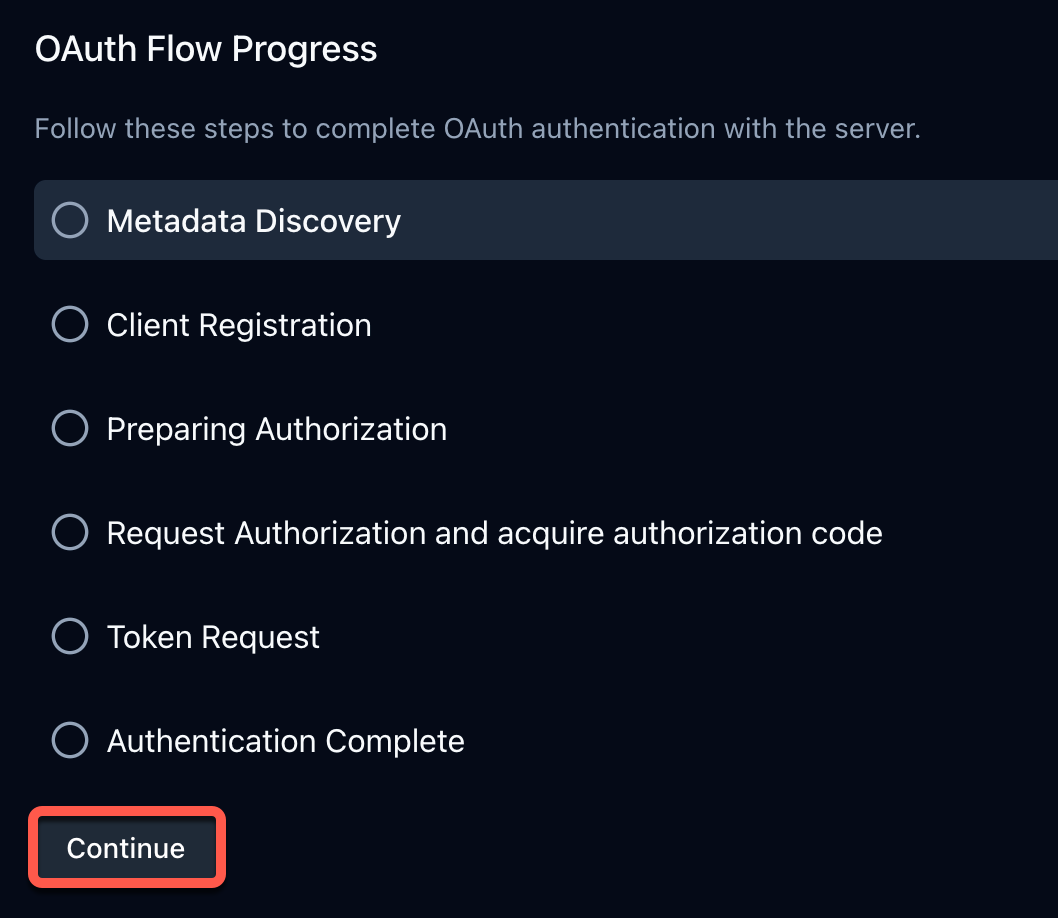
- Click Continue after each step to proceed to the next.
- As you progress, the MCP inspector will provide expandable sections with details about the results of each step. This can be helpful for debugging issues with the OAuth flow, such as confirming the authorization URL and token response.
- During the Preparing Authorization step, an authorization URL will be provided. Click the link icon next to the URL to open it in a new tab and proceed with installing the app in your HubSpot account.
- At the end of the HubSpot account installation process, an authorization code will be provided, which you’ll need to copy into the Authorization Code field in the MCP inspector.
- After completing all steps of the OAuth flow, the MCP inspector will display an Authentication successful! message. Your generated token will automatically be used to authenticate requests to the HubSpot MCP server. As you continue to test with the MCP inspector, you can use the Guided Token Refresh, Quick Refresh, and Clear OAuth State buttons to manage your authentication state.

- With authentication complete, click Back to Connect in the top right to return to the MCP inspector’s main panel.
- In the bottom of the left sidebar, click Connect.
- In the top bar, select Tools.
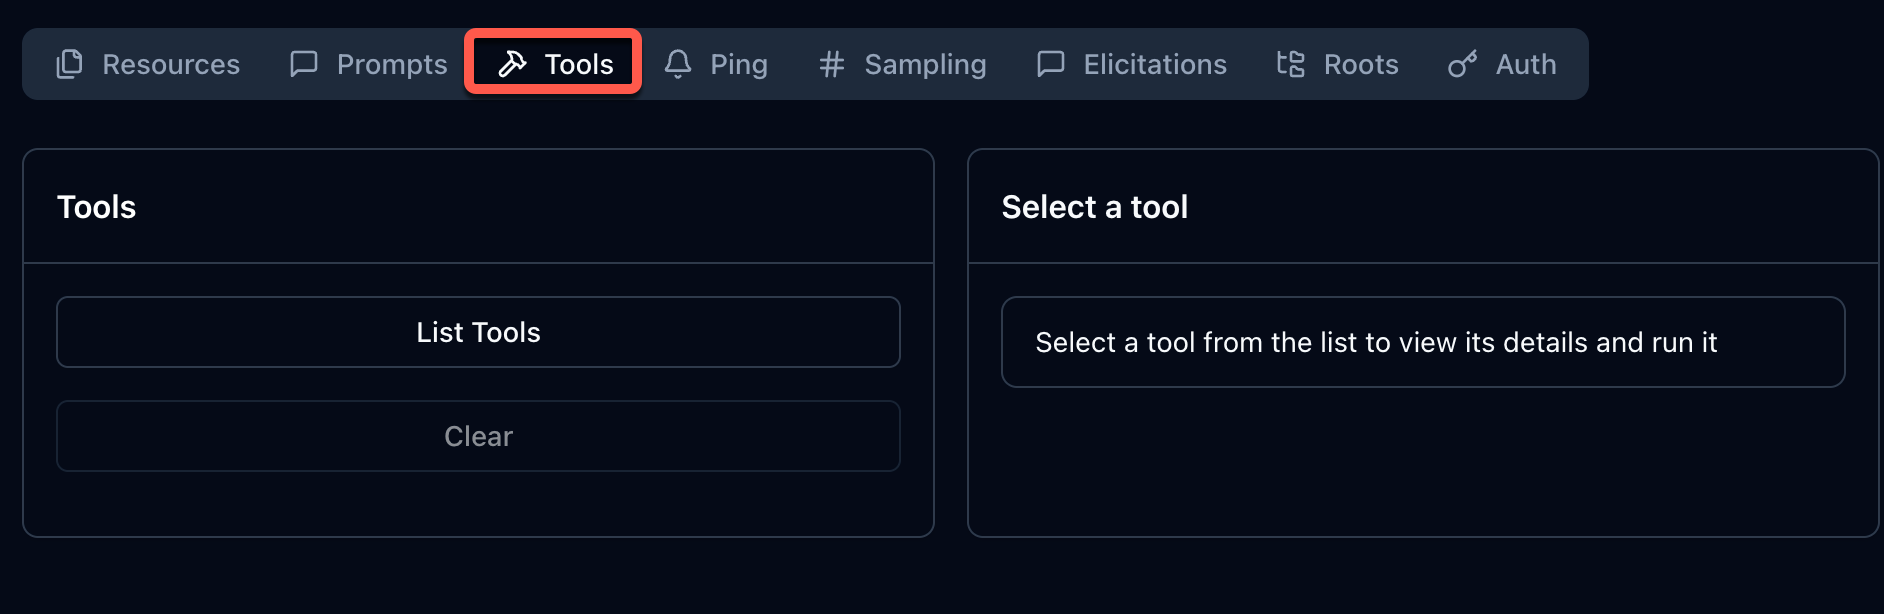
- Click List Tools.
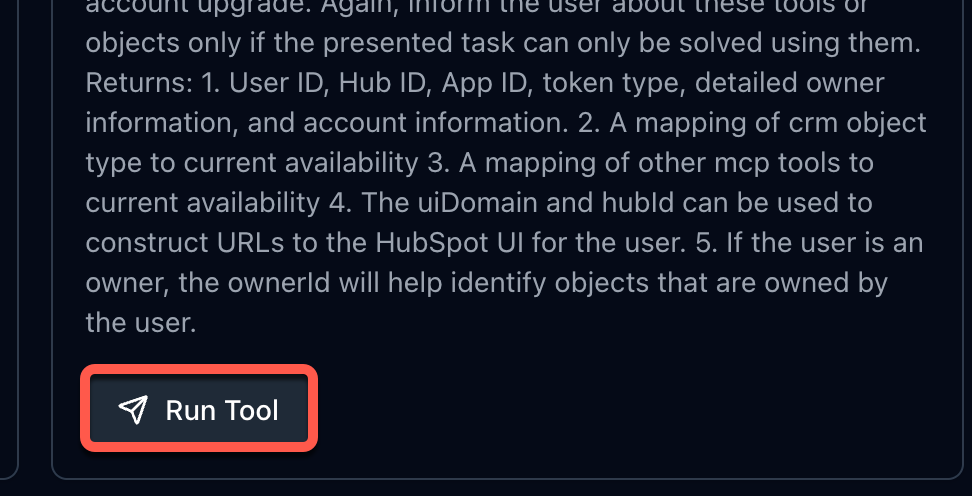
- In the tools list, scroll and select get_user_details. The right panel will display details about the tool.
- Under the tool details in the right panel, click Run tool.
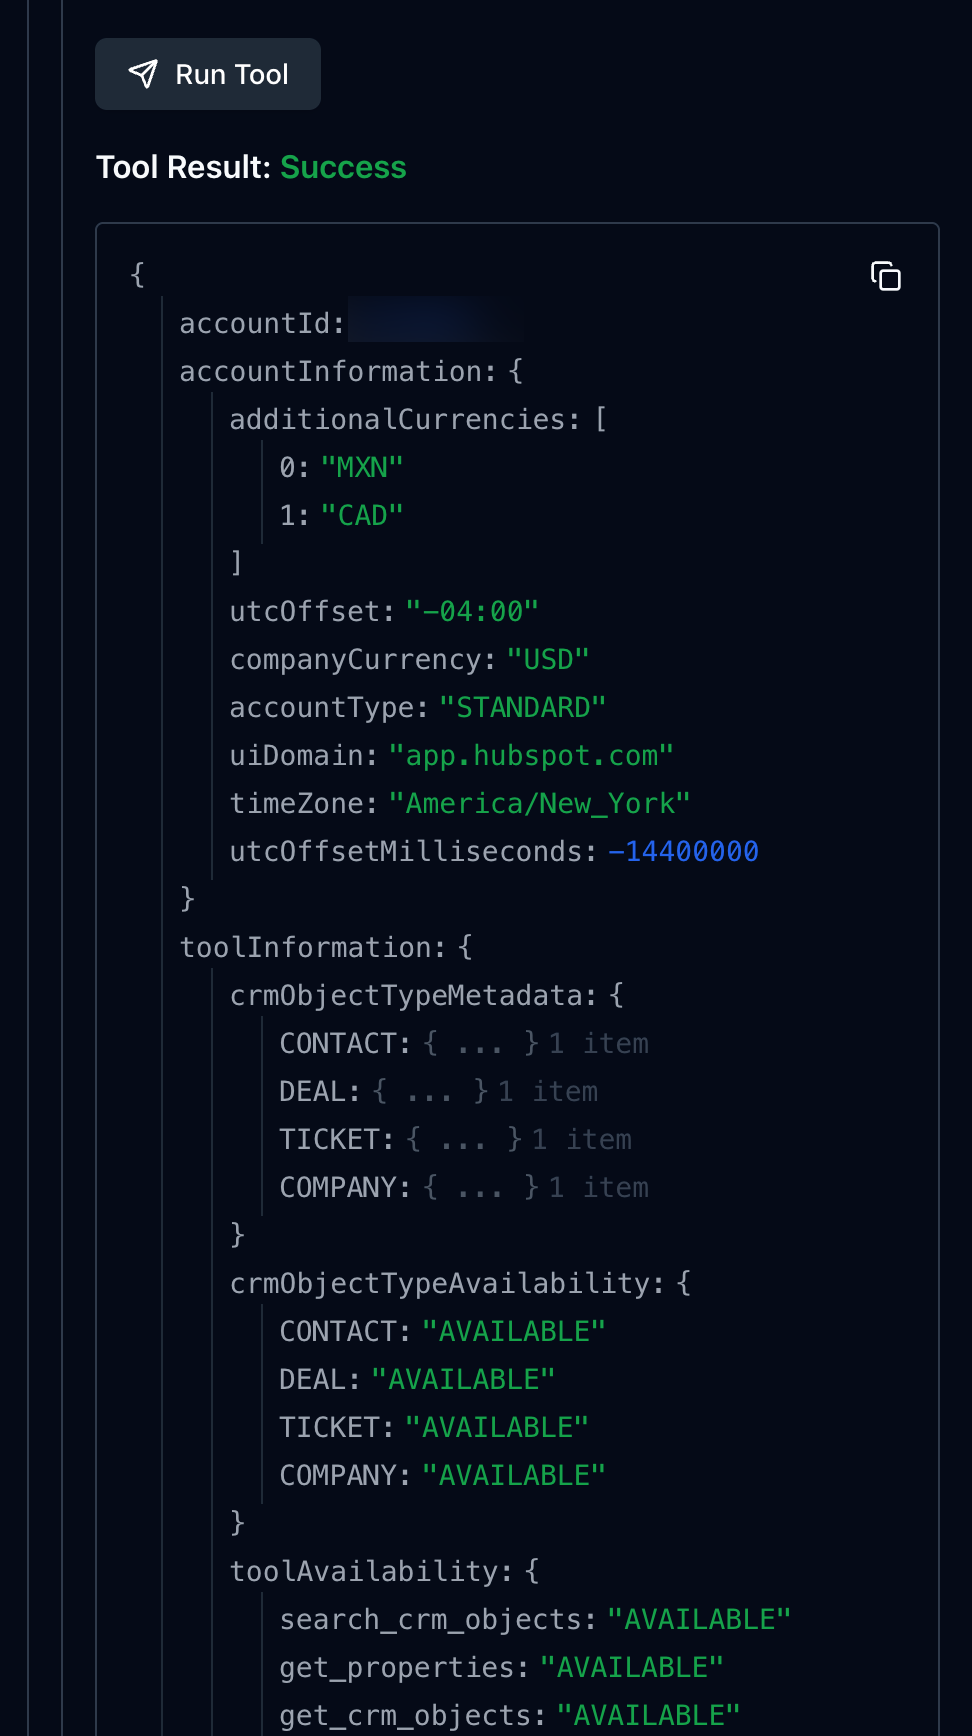
- After the tool runs, it will return a success message along with information about your user, the account you installed the app in, and will show object and tool data availability, based on the app’s scopes and your user permissions.
General MCP client connection instructions
After creating your MCP auth app, you can connect your MCP client tohttps://mcp.hubspot.com using your app’s credentials. Your MCP client will need to handle the OAuth flow, including PKCE, to authenticate with HubSpot.
To configure your MCP client, you’ll need the following from your app’s details page:
- Client ID
- Client secret
- Redirect URL (must match what’s configured in your MCP client)
- Select the HubSpot account to connect.
- Grant permissions to the app. These permissions are based on the user’s permissions in HubSpot and determine what data the app can access.
- Authorize the connection.
Troubleshooting
PKCE-related authentication failures
HubSpot’s MCP server requires PKCE (Proof Key for Code Exchange) for all OAuth authentication flows. If your MCP client doesn’t handle PKCE automatically, you’ll need to implement it yourself:- Generate a random
code_verifier(43-128 characters). - Derive the
code_challengefrom the verifier using the S256 method. - Include the
code_challengeandcode_challenge_method=S256in the authorization request. - Include the
code_verifierin the token exchange request.
Token refresh failures
OAuth access tokens expire after a set period. If your MCP client stops working after a period of inactivity:- Ensure your client is using the
refresh_tokenreturned during the initial OAuth flow to request a new access token. - If the refresh token has also expired or been invalidated, you’ll need to re-run the full OAuth authorization flow.
- Check that your redirect URL in the MCP client matches the redirect URL configured in your MCP auth app in HubSpot.