As of June 23, 2026, legacy public apps can no longer be created. Existing legacy public apps will continue to be supported, but don't have access to the latest app features. Learn more about this sunset on the HubSpot Developer Changelog.
To get started building apps on HubSpot's developer platform, learn how to migrate an existing legacy public app or create a new app.
 * In the app listing table, click the **name** of the app.
From the app details page, you can manage app settings such as:
* [App information](#app-information)
* [Authentication settings](#authentication-settings)
* [Redirect URLs](#redirect-urls)
* [Scopes](#scopes)
* [Domain verification](#domain-verification)
### App information
After [navigating to your app in HubSpot](#manage-legacy-public-apps-in-hubspot), use the *App Info* tab to manage app details such as:
* **Public app name:** the name that appears wherever your app displays in HubSpot. This includes the installation page and the *Powered by* footer for [CRM cards](/api-reference/legacy/crm/extensions/crm-cards/guide) and [timeline events](/api-reference/legacy/crm/extensions/timeline/guide).
* **App logo:** the logo displayed next to your app in HubSpot tools and the App Marketplace.
* **Description:** the app's description that displays in HubSpot tools and the App Marketplace.
To delete the app, scroll to the bottom of the *Basic info* page, then click **Delete**.
* In the app listing table, click the **name** of the app.
From the app details page, you can manage app settings such as:
* [App information](#app-information)
* [Authentication settings](#authentication-settings)
* [Redirect URLs](#redirect-urls)
* [Scopes](#scopes)
* [Domain verification](#domain-verification)
### App information
After [navigating to your app in HubSpot](#manage-legacy-public-apps-in-hubspot), use the *App Info* tab to manage app details such as:
* **Public app name:** the name that appears wherever your app displays in HubSpot. This includes the installation page and the *Powered by* footer for [CRM cards](/api-reference/legacy/crm/extensions/crm-cards/guide) and [timeline events](/api-reference/legacy/crm/extensions/timeline/guide).
* **App logo:** the logo displayed next to your app in HubSpot tools and the App Marketplace.
* **Description:** the app's description that displays in HubSpot tools and the App Marketplace.
To delete the app, scroll to the bottom of the *Basic info* page, then click **Delete**.
 ### Authentication settings
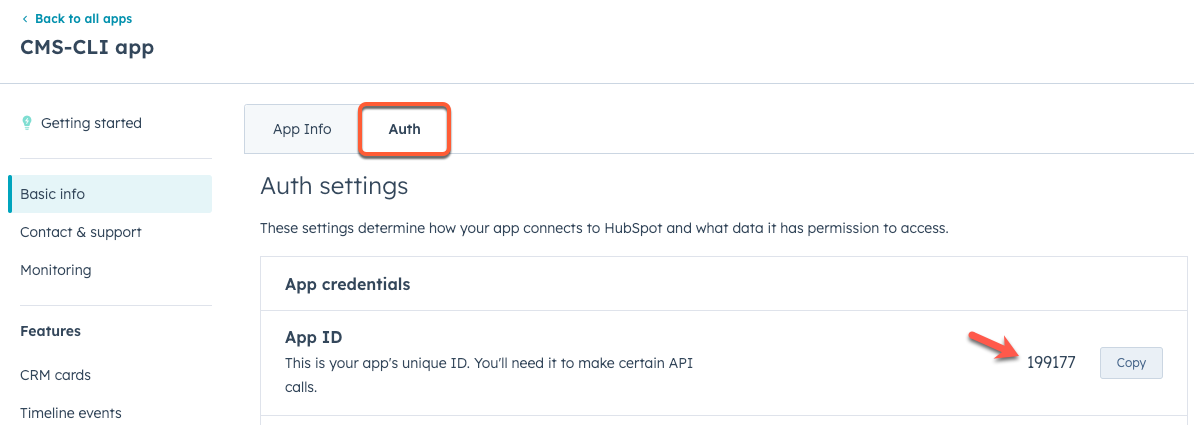
After [navigating to your app in HubSpot](#manage-legacy-public-apps-in-hubspot), click the **Auth** tab to access your app's client credentials and manage its authentication settings, such as redirect URL and scopes.
#### Redirect URLs
In the *Redirect URLs* section, you can update the URL that users are redirected to after installing your app.
* To update an existing redirect URL, click the **URL field** and modify the value, then click **Save changes**.
* To add a redirect URL, click **Add redirect URL**, then enter the value into the field and click **Save changes**. You can add multiple redirect URLs, and can use a `http://localhost` address for local development as you build out and test your app.
* If you have multiple redirect URLs, click the **delete icon** next to the URL you want to delete, then click **Save changes**.
### Authentication settings
After [navigating to your app in HubSpot](#manage-legacy-public-apps-in-hubspot), click the **Auth** tab to access your app's client credentials and manage its authentication settings, such as redirect URL and scopes.
#### Redirect URLs
In the *Redirect URLs* section, you can update the URL that users are redirected to after installing your app.
* To update an existing redirect URL, click the **URL field** and modify the value, then click **Save changes**.
* To add a redirect URL, click **Add redirect URL**, then enter the value into the field and click **Save changes**. You can add multiple redirect URLs, and can use a `http://localhost` address for local development as you build out and test your app.
* If you have multiple redirect URLs, click the **delete icon** next to the URL you want to delete, then click **Save changes**.
 #### Scopes
In the *Scopes* section, you can remove scopes, modify existing scopes, or add new scopes:
* To delete a scope from the app, click **Delete** next to the scope.
* To modify a scope's [type](#scope-types), click the **dropdown menu** next to an existing scope and select a **type**.
* To add new scopes to the app:
* Click **Add new scope**.
* In the right panel, use the **search bar** to search for a scope, then select the **checkbox** next to any scope you want the user to authorize. Click the **dropdown menu** next to the scope and select a **scope type**.
* Click **Update**.
#### Scopes
In the *Scopes* section, you can remove scopes, modify existing scopes, or add new scopes:
* To delete a scope from the app, click **Delete** next to the scope.
* To modify a scope's [type](#scope-types), click the **dropdown menu** next to an existing scope and select a **type**.
* To add new scopes to the app:
* Click **Add new scope**.
* In the right panel, use the **search bar** to search for a scope, then select the **checkbox** next to any scope you want the user to authorize. Click the **dropdown menu** next to the scope and select a **scope type**.
* Click **Update**.
 #### Scope types
There are three different scope types available to configure. You must specify the scopes your app will require for installation, but you can also specify two other scope types: conditionally required scopes and optional scopes.
* **Required scopes:** scopes that must be authorized by the user and must be present in the `scope` query parameter in your app's install URL for successful installation.
* **Conditionally required scopes:** scopes that must be authorized by the user only if they're present in the `scope` query parameter in your app's install URL for successful installation.
* This scope type allows you to be flexible and provide a separate install URL for tiered features or scopes that are only required when users enable certain features in your app. For example, you could offer two install URLs to your users: one install URL could include the conditionally required scope in the `scope` query parameter for users with access to a feature, while another install URL omits that scope in the `scope` query parameter for users without access.
* If a conditionally required scope is present in your app install URL and a user without access to the associated feature attempts to install your app using that URL, the installation will fail.
* **Optional scopes:** scopes that are not required to successfully install your app. These scopes are specified in the `optional_scope` query parameter in your app's install URL. For example, if you want your app to be able to fetch [custom object](/api-reference/latest/crm/objects/custom-objects/guide) data (which is only available to *Enterprise* HubSpot accounts), you could add the `crm.objects.custom.read` scope as an optional scope. Then, if an account has access to the custom objects, the scope will be authorized. Otherwise, they'll still be able to install the app without the custom objects scope.
### Domain verification
When HubSpot users install an app, they consent to give the app's developer access to their account data. The developer's identity and reputation each play an important role in a user's decision to continue with the install. To ensure full user consent when installing an app, HubSpot will display a message on the app install screen to indicate the app's level of verification and HubSpot Marketplace listing:
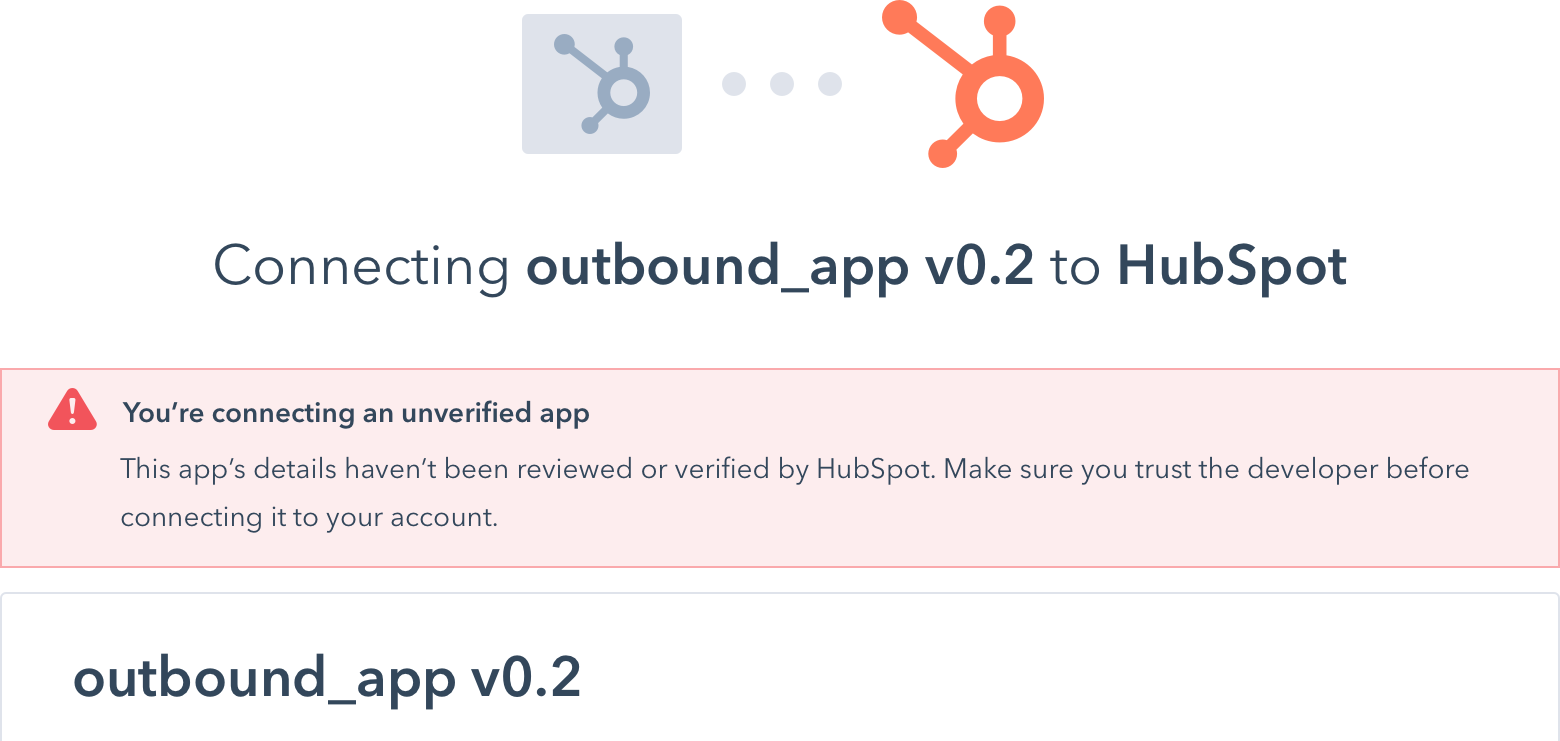
* When an app doesn't have a verified domain, HubSpot will display a banner on the install screen that says the app has not been verified.
#### Scope types
There are three different scope types available to configure. You must specify the scopes your app will require for installation, but you can also specify two other scope types: conditionally required scopes and optional scopes.
* **Required scopes:** scopes that must be authorized by the user and must be present in the `scope` query parameter in your app's install URL for successful installation.
* **Conditionally required scopes:** scopes that must be authorized by the user only if they're present in the `scope` query parameter in your app's install URL for successful installation.
* This scope type allows you to be flexible and provide a separate install URL for tiered features or scopes that are only required when users enable certain features in your app. For example, you could offer two install URLs to your users: one install URL could include the conditionally required scope in the `scope` query parameter for users with access to a feature, while another install URL omits that scope in the `scope` query parameter for users without access.
* If a conditionally required scope is present in your app install URL and a user without access to the associated feature attempts to install your app using that URL, the installation will fail.
* **Optional scopes:** scopes that are not required to successfully install your app. These scopes are specified in the `optional_scope` query parameter in your app's install URL. For example, if you want your app to be able to fetch [custom object](/api-reference/latest/crm/objects/custom-objects/guide) data (which is only available to *Enterprise* HubSpot accounts), you could add the `crm.objects.custom.read` scope as an optional scope. Then, if an account has access to the custom objects, the scope will be authorized. Otherwise, they'll still be able to install the app without the custom objects scope.
### Domain verification
When HubSpot users install an app, they consent to give the app's developer access to their account data. The developer's identity and reputation each play an important role in a user's decision to continue with the install. To ensure full user consent when installing an app, HubSpot will display a message on the app install screen to indicate the app's level of verification and HubSpot Marketplace listing:
* When an app doesn't have a verified domain, HubSpot will display a banner on the install screen that says the app has not been verified.
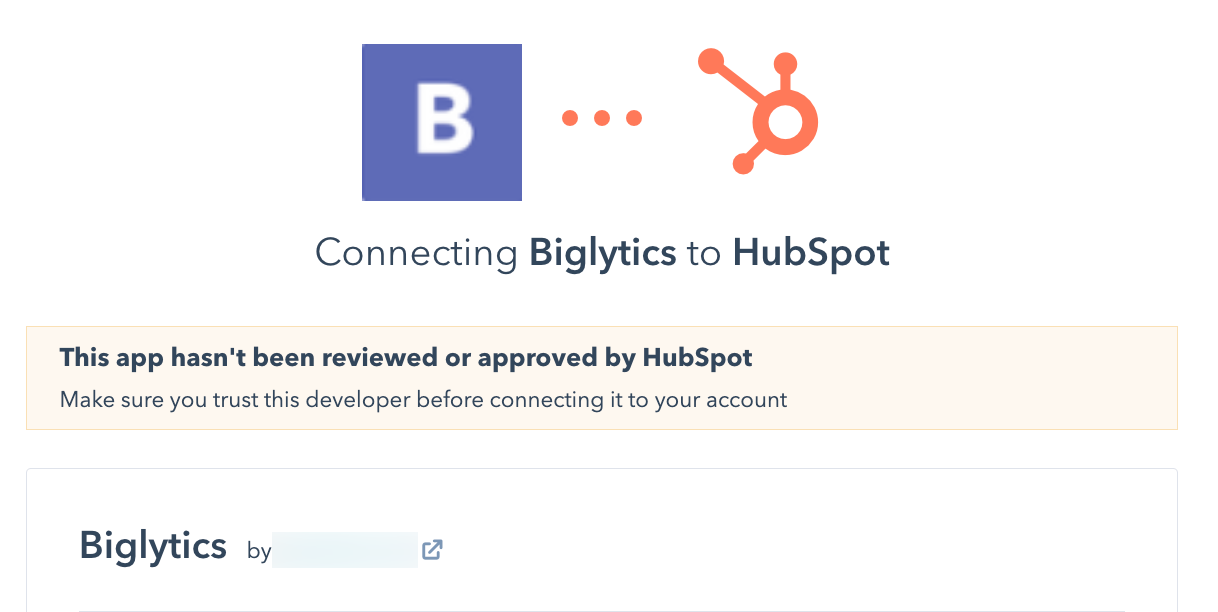
 * When an app has a verified domain but is not [listed on the HubSpot Marketplace](/apps/developer-platform/list-apps/listing-your-app/listing-your-app), HubSpot will display the verified domain along with a banner on the install screen that says the app has not been reviewed or approved by HubSpot.
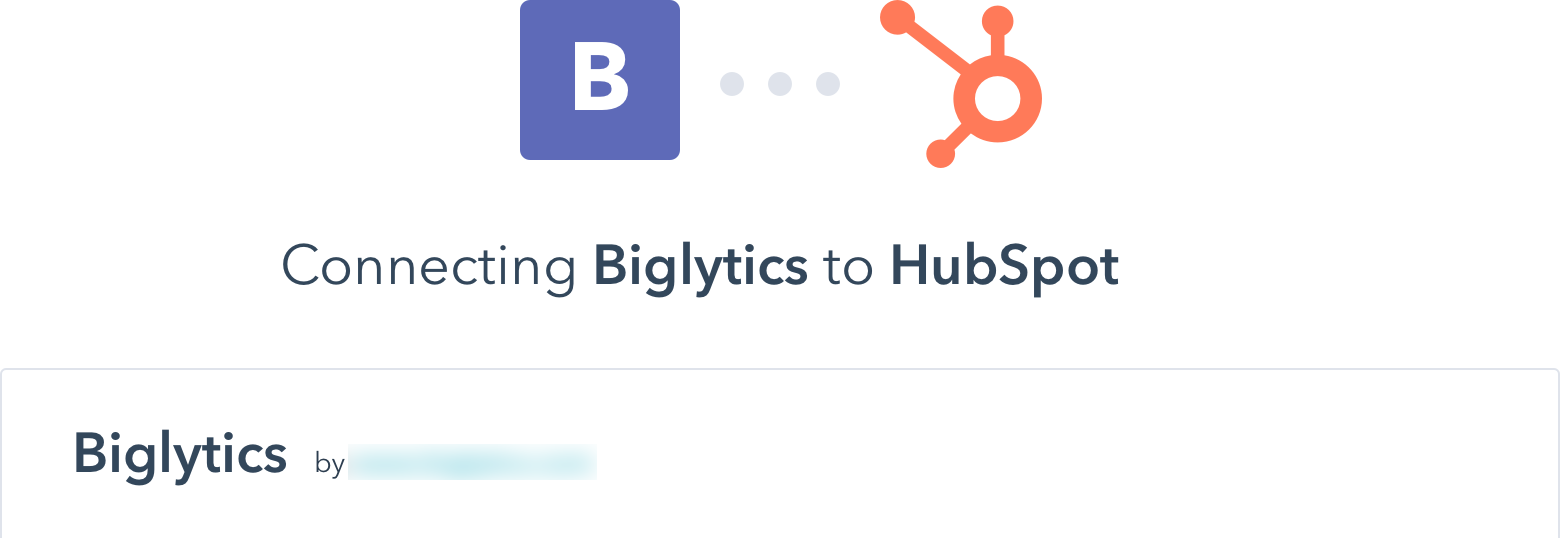
 * When an app has been listed on the marketplace, passing HubSpot's app review process, HubSpot will not display either of the above banners. You're not required to verify the domain if your app has been listed on the HubSpot Marketplace.
 #### Add a verified domain
To add a verified domain to the app, you'll need to first add the domain to the app's settings, then add a TXT record to the domain's DNS settings:
* In your HubSpot account, navigate to **Development**.
* In the left sidebar menu, click **Legacy apps**.
* In the app listing table, click the **name** of the app.
* In the left sidebar, navigate to **Contact & support**.
* In the *Company domain* field, enter your domain, then click **Save**. A message will appear below the *Company domain* stating that the domain has not yet been verified.
* Click **Verify it now** to begin the verification process.
#### Add a verified domain
To add a verified domain to the app, you'll need to first add the domain to the app's settings, then add a TXT record to the domain's DNS settings:
* In your HubSpot account, navigate to **Development**.
* In the left sidebar menu, click **Legacy apps**.
* In the app listing table, click the **name** of the app.
* In the left sidebar, navigate to **Contact & support**.
* In the *Company domain* field, enter your domain, then click **Save**. A message will appear below the *Company domain* stating that the domain has not yet been verified.
* Click **Verify it now** to begin the verification process.
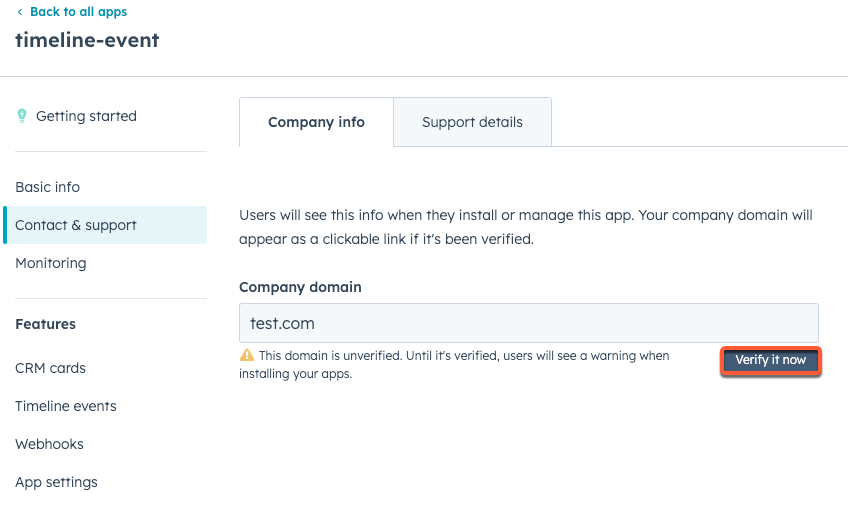 * In the right panel, confirm that the domain has been entered correctly, then click **Next**.
* Copy the required TXT record value by clicking **Copy** in the *Value* column.
* In the right panel, confirm that the domain has been entered correctly, then click **Next**.
* Copy the required TXT record value by clicking **Copy** in the *Value* column.
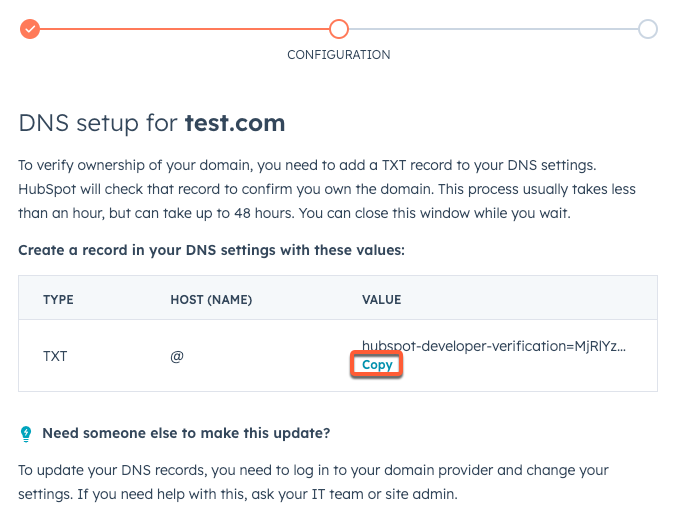 * In your DNS provider, create a TXT record with the copied value. Below are instructions for some common DNS providers:
* [GoDaddy](https://www.godaddy.com/help/add-a-txt-record-19232)
* [BlueHost](https://www.bluehost.com/help/article/dns-management-add-edit-or-delete-dns-entries#add)
* [Namecheap](https://www.namecheap.com/support/knowledgebase/article.aspx/317/2237)
* [Cloudflare](https://developers.cloudflare.com/dns/manage-dns-records/how-to/create-dns-records/#h_60566325041543261564371)
* [Hover](https://support.hover.com/support/solutions/articles/201000064728)
* [Name](https://www.name.com/support/articles/115004972547-Adding-a-TXT-Record)
* [United Domains](https://help.uniteddomains.com/hc/en-us/articles/115000887125-How-to-set-up-a-TXT-record-on-a-domain-name)
* After updating your DNS settings, navigate back to HubSpot, then click **Next** in the right panel. DNS records can take up to 48 hours to update, so HubSpot might not recognize the change immediately. You can get back to this screen any time by selecting **Verify it now** again from the *Company info* settings page.
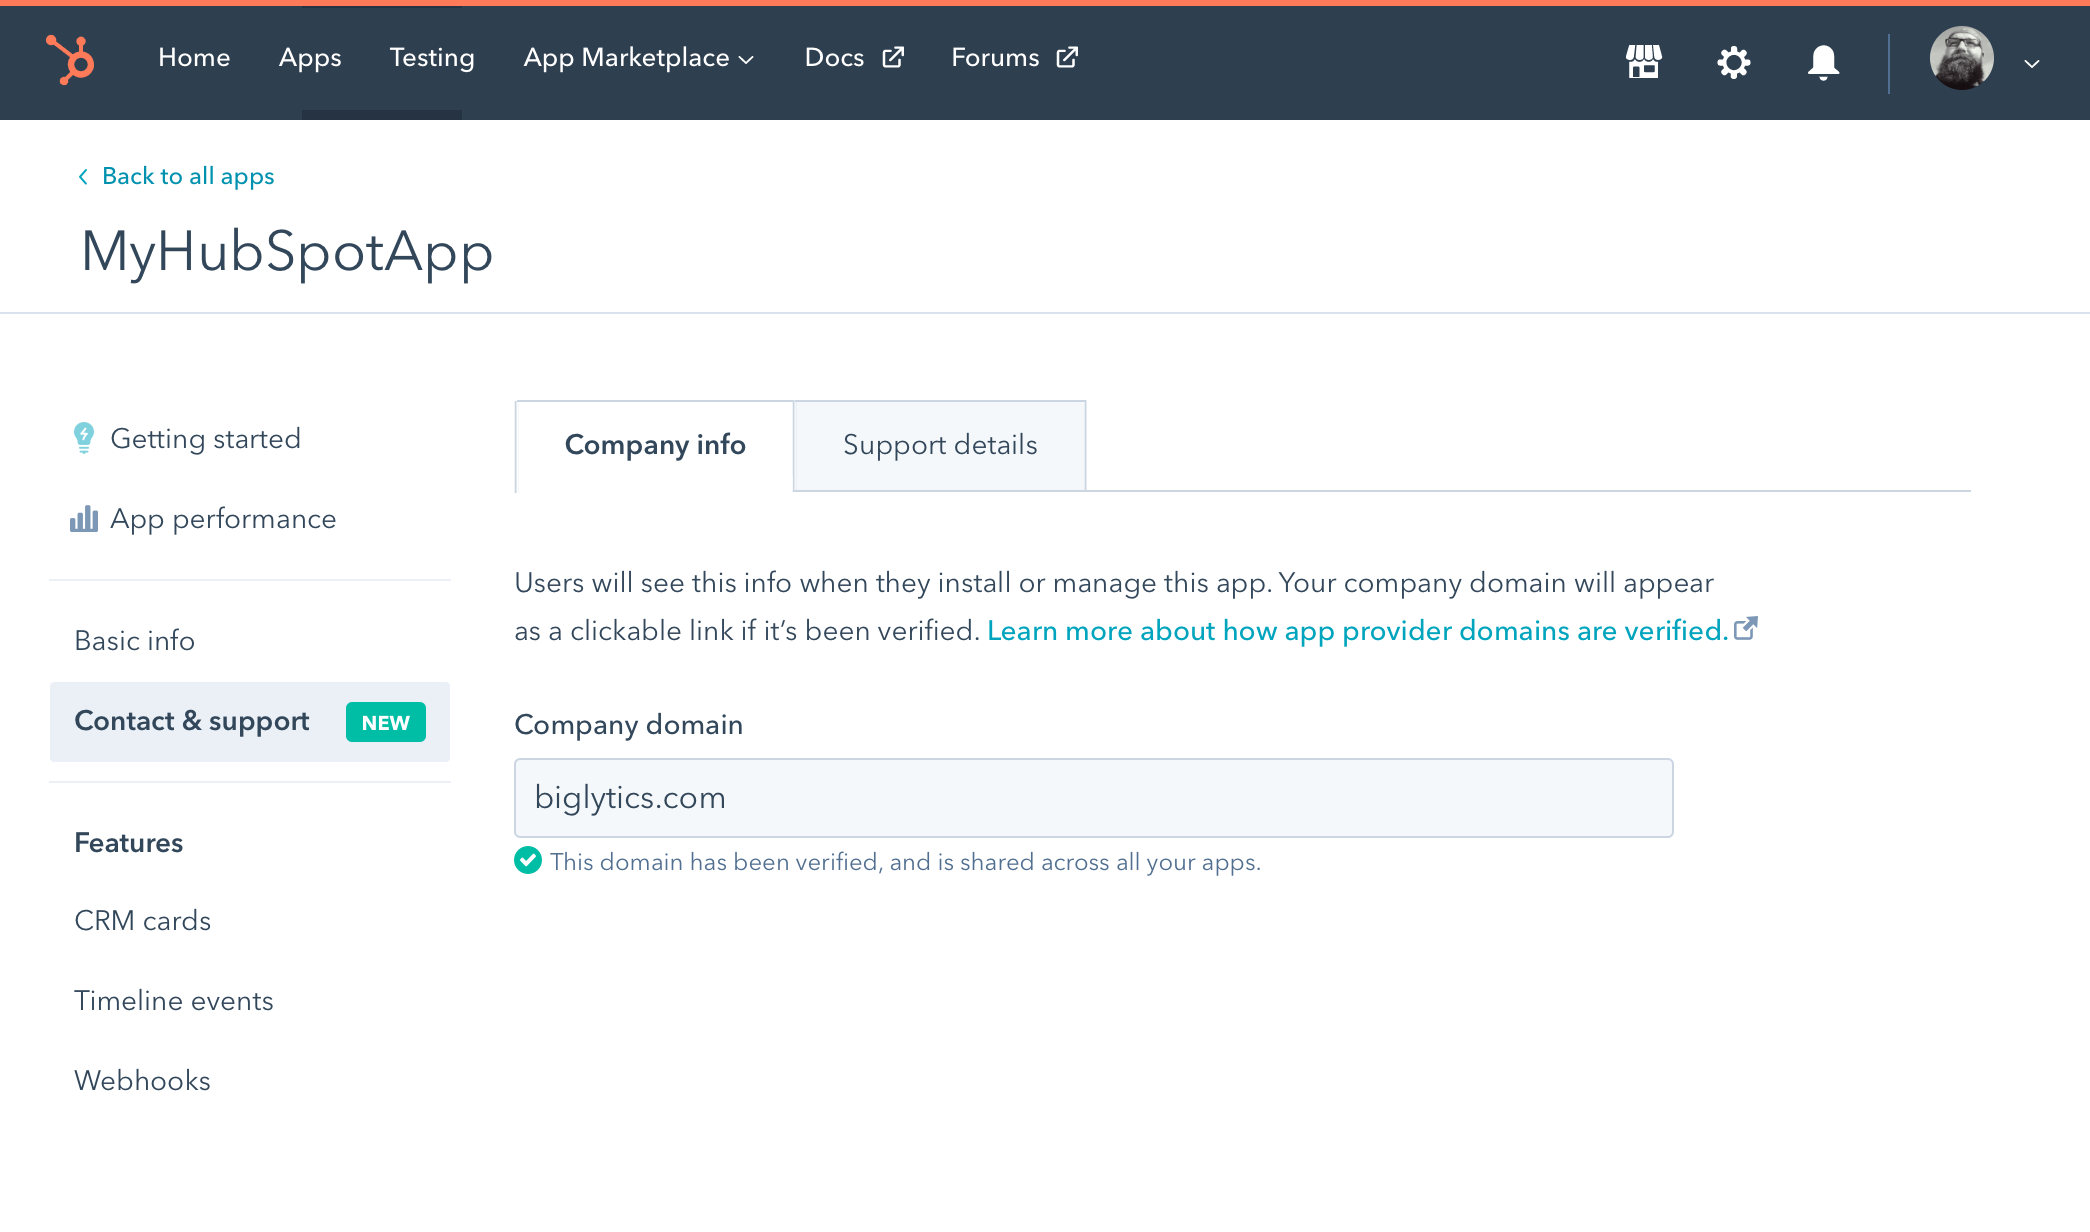
* Once verified, you'll see a success status indicator under the *Company domain* field.
* In your DNS provider, create a TXT record with the copied value. Below are instructions for some common DNS providers:
* [GoDaddy](https://www.godaddy.com/help/add-a-txt-record-19232)
* [BlueHost](https://www.bluehost.com/help/article/dns-management-add-edit-or-delete-dns-entries#add)
* [Namecheap](https://www.namecheap.com/support/knowledgebase/article.aspx/317/2237)
* [Cloudflare](https://developers.cloudflare.com/dns/manage-dns-records/how-to/create-dns-records/#h_60566325041543261564371)
* [Hover](https://support.hover.com/support/solutions/articles/201000064728)
* [Name](https://www.name.com/support/articles/115004972547-Adding-a-TXT-Record)
* [United Domains](https://help.uniteddomains.com/hc/en-us/articles/115000887125-How-to-set-up-a-TXT-record-on-a-domain-name)
* After updating your DNS settings, navigate back to HubSpot, then click **Next** in the right panel. DNS records can take up to 48 hours to update, so HubSpot might not recognize the change immediately. You can get back to this screen any time by selecting **Verify it now** again from the *Company info* settings page.
* Once verified, you'll see a success status indicator under the *Company domain* field.
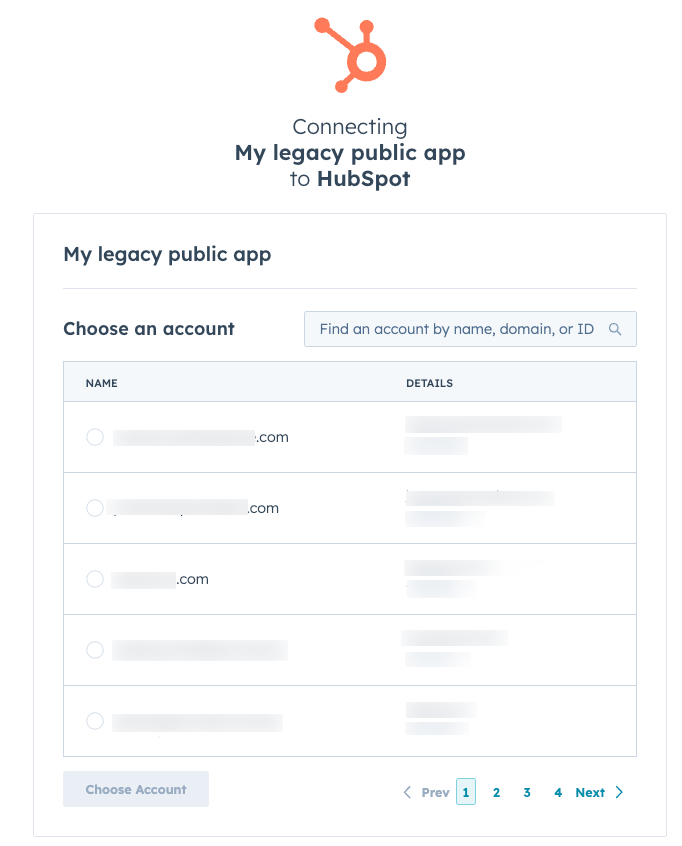 * After choosing an account, you'll be presented with a list of scopes based on the `&scope=` and `&optional_scope=` parameters you set for the authorization URL.
 * After granting access, you'll be redirected based on the `&redirect_uri=` parameter in the original authorization URL, and a `?code=` parameter will be appended to the URL. Use that code in the next step to generate an access token.
### Generate the initial OAuth tokens
To generate your refresh and initial access tokens, you'll need the code from the `?code=` parameter of the authorization URL, `redirect_url`, client ID, and client secret. Learn more in the [Working with OAuth guide](/apps/legacy-apps/authentication/working-with-oauth).
Once you've authorized your app and generated the initial tokens, installation is complete. It'll be listed on your [Connected Apps](https://app.hubspot.com/login?loginRedirectUrl=https%3A%2F%2Fapp.hubspot.com%2Fshortlink%2Fintegrations-beta) page, and you'll start getting [webhook](/api-reference/latest/webhooks) and [CRM Cards](/api-reference/latest/crm/extensions/crm-cards/guide) fetch requests.
* After granting access, you'll be redirected based on the `&redirect_uri=` parameter in the original authorization URL, and a `?code=` parameter will be appended to the URL. Use that code in the next step to generate an access token.
### Generate the initial OAuth tokens
To generate your refresh and initial access tokens, you'll need the code from the `?code=` parameter of the authorization URL, `redirect_url`, client ID, and client secret. Learn more in the [Working with OAuth guide](/apps/legacy-apps/authentication/working-with-oauth).
Once you've authorized your app and generated the initial tokens, installation is complete. It'll be listed on your [Connected Apps](https://app.hubspot.com/login?loginRedirectUrl=https%3A%2F%2Fapp.hubspot.com%2Fshortlink%2Fintegrations-beta) page, and you'll start getting [webhook](/api-reference/latest/webhooks) and [CRM Cards](/api-reference/latest/crm/extensions/crm-cards/guide) fetch requests.
 ## Monitor app behavior
HubSpot logs all requests made to or from a connected app, including incoming requests using an [OAuth access token](/api-reference/legacy/authentication/oauth-tokens/v1/guide) or outgoing requests for webhooks or CRM cards.
To view an app's request log:
* In your HubSpot account, navigate to **Development**.
* In the left sidebar menu, click **Legacy apps**.
* In the app listing table, click the **name** of the app.
* In the left sidebar menu, navigate to **Monitoring**.
## Monitor app behavior
HubSpot logs all requests made to or from a connected app, including incoming requests using an [OAuth access token](/api-reference/legacy/authentication/oauth-tokens/v1/guide) or outgoing requests for webhooks or CRM cards.
To view an app's request log:
* In your HubSpot account, navigate to **Development**.
* In the left sidebar menu, click **Legacy apps**.
* In the app listing table, click the **name** of the app.
* In the left sidebar menu, navigate to **Monitoring**.
 * Use the **tabs** to view different types of requests being made to or from the app. While viewing these logs, you can click an individual request to view more information about it, including:
* for successful requests, the request method, path, and time of request.
* for unsuccessful requests, additional error information such as response headers and body.
* Use the **tabs** to view different types of requests being made to or from the app. While viewing these logs, you can click an individual request to view more information about it, including:
* for successful requests, the request method, path, and time of request.
* for unsuccessful requests, additional error information such as response headers and body.
 Below, learn more about each tab of the *Monitoring* page.
* **API calls:** the *API calls* tab shows all requests made to your app using an OAuth access token. It can be filtered by HTTP method, response code, timeframe, or request URL.
* **Webhooks:** the *Webhooks* tab shows HubSpot requests for any of your app's [webhook subscriptions](/api-reference/latest/webhooks). Filter by response (including timeouts and connection failures), status (success, will retry, or failure), subscription type, time frame, attempt, batch, event, or account ID.
* In the app listing table, click the **name** of the app.
You can then find the app ID in two places:
* In the browser's address bar, view the ID at the end of the URL.
Below, learn more about each tab of the *Monitoring* page.
* **API calls:** the *API calls* tab shows all requests made to your app using an OAuth access token. It can be filtered by HTTP method, response code, timeframe, or request URL.
* **Webhooks:** the *Webhooks* tab shows HubSpot requests for any of your app's [webhook subscriptions](/api-reference/latest/webhooks). Filter by response (including timeouts and connection failures), status (success, will retry, or failure), subscription type, time frame, attempt, batch, event, or account ID.
* In the app listing table, click the **name** of the app.
You can then find the app ID in two places:
* In the browser's address bar, view the ID at the end of the URL.
 * Click the *Auth* tab, then view the *App ID*.