Supported products
Supported products
hs init to configure the project.
Create and associate CRM custom objects
First, you’ll need to create Role and Job Application custom objects and associate them so they can be queried from the corresponding website pages.- Download the schemas directory from the GitHub repository and copy it into your project directory.
- Using the HubSpot CLI tools, create the two custom objects by running the following commands in the schemas directory:
hs custom-object schema create job_application.jsonhs custom-object schema create role.json
- After creating both custom objects, create an association between them:
- On the command line, run
hs custom-object schema listto get the objectTypeId of each object. - Make a
POSTcall using the objectTypeId of the Role object to/crm/v3/schemas/{objectTypeId}/associations. - In the body of your request, enter the objectTypeId of the Role and Job Application objects as the values for the fromObjectId and toObjectId fields. For example, if the objectTypeId of the Role object is 2-3206084, and the objectTypeId of Job Application is 2-3206072, then the request body would be:
- On the command line, run
- Download the role_data.json file from GitHub, then populate the available roles by running the command
hs custom-object create role role_data.json. - In your HubSpot account, create company records for HubSpot, Spotify, and Tesla, then manually associate each of the roles with the corresponding example company.
- Before you start creating the assets and pages for the site, download the src directory from GitHub, then upload the theme to your HubSpot account by running the command
hs upload src sample-graph-ql-theme.
Create the job application form
After you’ve populated the job listings for your site, you can configure the job application form. This form will prompt users to select the role they’re interested in, and submit a cover letter as part of their application. Before you create the form, update the Job Application and Role property settings to allow the Role identifier and Cover letter properties to be used in forms:- In your HubSpot account, click the Settings icon in the top right.
- In the left sidebar menu, click Properties.
- Click the Select an object dropdown menu, then select Job Application properties.
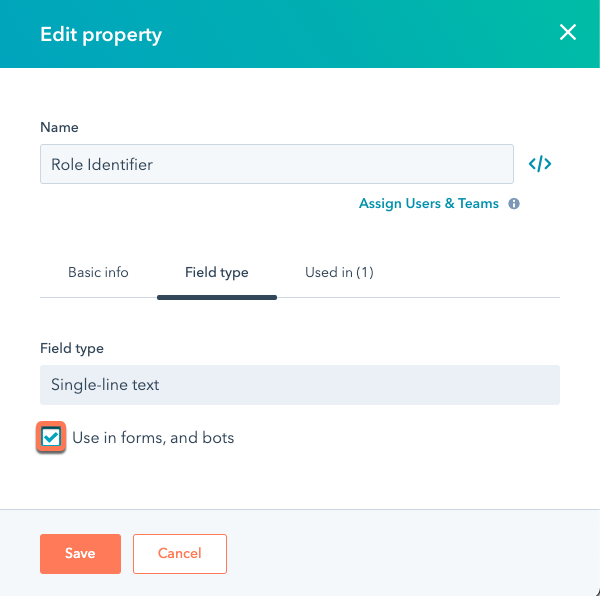
- Hover over the Cover letter property in the Properties table, then click Edit.
- In the right panel, select the Use in forms, and bots checkbox.
- Click Save.
- Click the Select an object dropdown menu again, select Role properties, then repeat the same steps to allow the Role identifier property to be used in forms.
- Now that the Cover letter and Role Identifier properties can be used in a form, you can create the form itself:
- Navigate to Marketing > Lead Capture > Forms.
- In the upper right, click Create form.
- Select Embedded form, then click Next.
- Click Start to begin creating a form from a blank template.
- Click and drag the First name, Last name, and Phone number fields onto the form preview on the right to include them on your form.
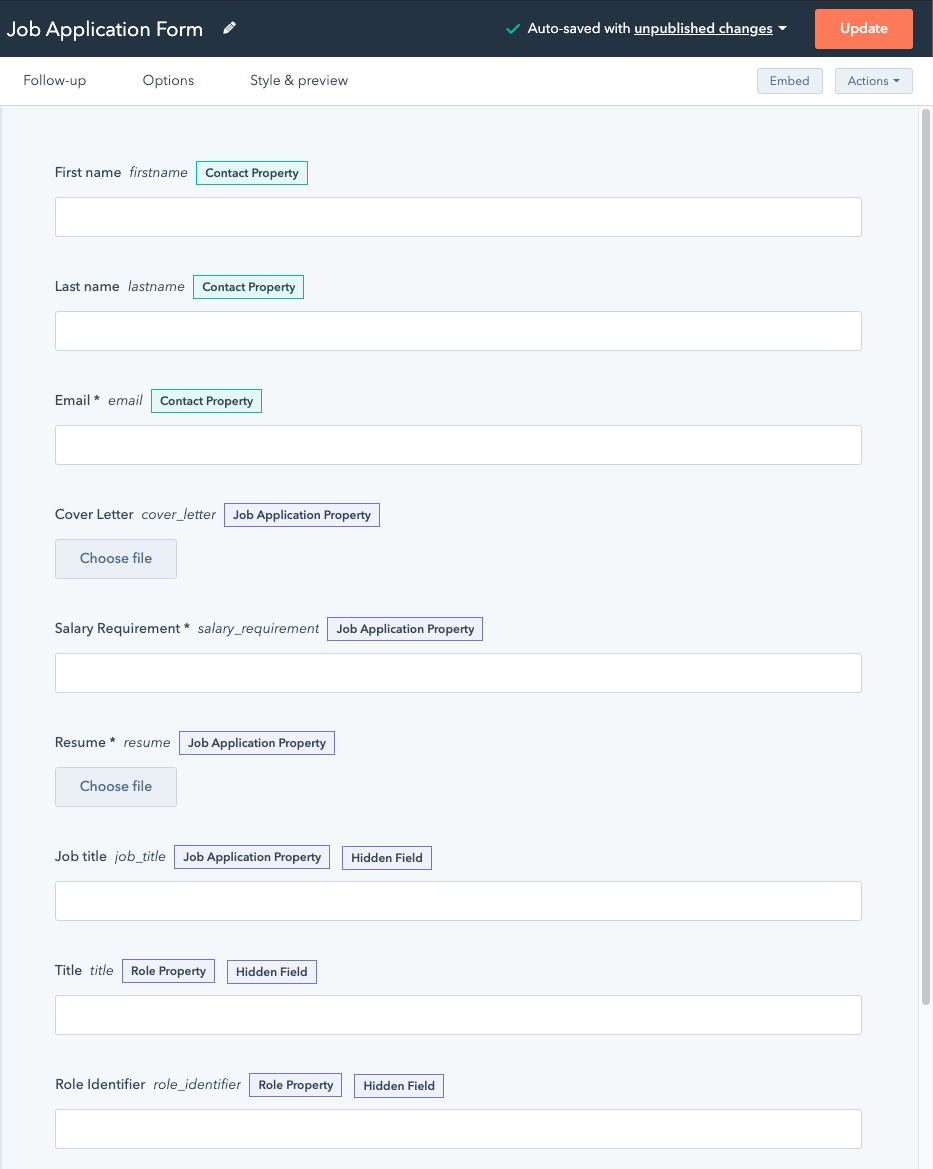
- In the left panel, scroll down and click the Job Application properties and Role properties sections to expand them.
- Click and drag all of the fields under Job Application Information, along with the Role identifier and Title fields under Role Information, onto your form.
- Set the Job title, Role identifier, and Title fields to be hidden, since these fields will be auto-populated by a workflow you’ll set up in the next step. When you’re done configuring your form, enter a name for the form, then click Update in the top right.
Set up a workflow for submitted applications
Now that you’ve created the job application form, you need to set up a workflow to define the default state of a submitted job application.- In your HubSpot account, navigate to Automation > Workflows.
- In the top right, click Create workflow.
- In the left panel, on the Start from scratch tab, select Job application-based, then click Next.
- Click Set Enrollment Trigger to set the enrollment criteria:
- In the right sidebar, under Filter type, select Job application.
- Click Object ID, select is known, then select Apply filter. Click Save.
- Click the + plus icon to create an action.
- In the right sidebar, under Property management, select Set property value.
- Click the Property to set dropdown menu, then select Application Status.
- Click the Application Status dropdown menu, then select Applied.
- Click Save.

- Enter a name for your workflow, then click Review and publish.
- Under Enrollment, select No, only enroll contacts who meet the trigger criteria after turning the workflow on.
- In the top right, click Turn on.
Create role listing and detail pages
Once you’ve created your workflow, you can create the pages where users can view roles and submit applications for jobs they’re interested in. To create the role listing page:- In your HubSpot account, navigate to Marketing > Website > Website Pages.
- In the top right, click Create, then select Website page.
- Select the Role listing - GraphQL template.
- In the dialog box, enter an internal name for the page.
- Click the Settings tab.
- Enter a Page title, then enter roles as the content slug.
- Click Publish in the top right.
- In the top right of the website pages dashboard, click Create, then select Website page.
- Select the Role Details template, then enter an internal name for your page in the dialog box.
- Select the Role details - GraphQL template, then enter an internal page name in the dialog box.
- Click the Settings tab.
- Enter a Page title, then enter roles/role as the content slug.
- Click Publish in the top right.
Create applications page
With your role pages published, the next step is to create a page where an applicant can view their submitted applications and check on the status of each one. Since this page will be private to each applicant, you’ll need to create a membership list to handle registration. Learn more about how membership works in this article. To create the membership list:- In your HubSpot account, navigate to Contacts > Lists.
- In the top right, click Create List.
- Enter a name for your list, then click Next.
- Click + Add filter.
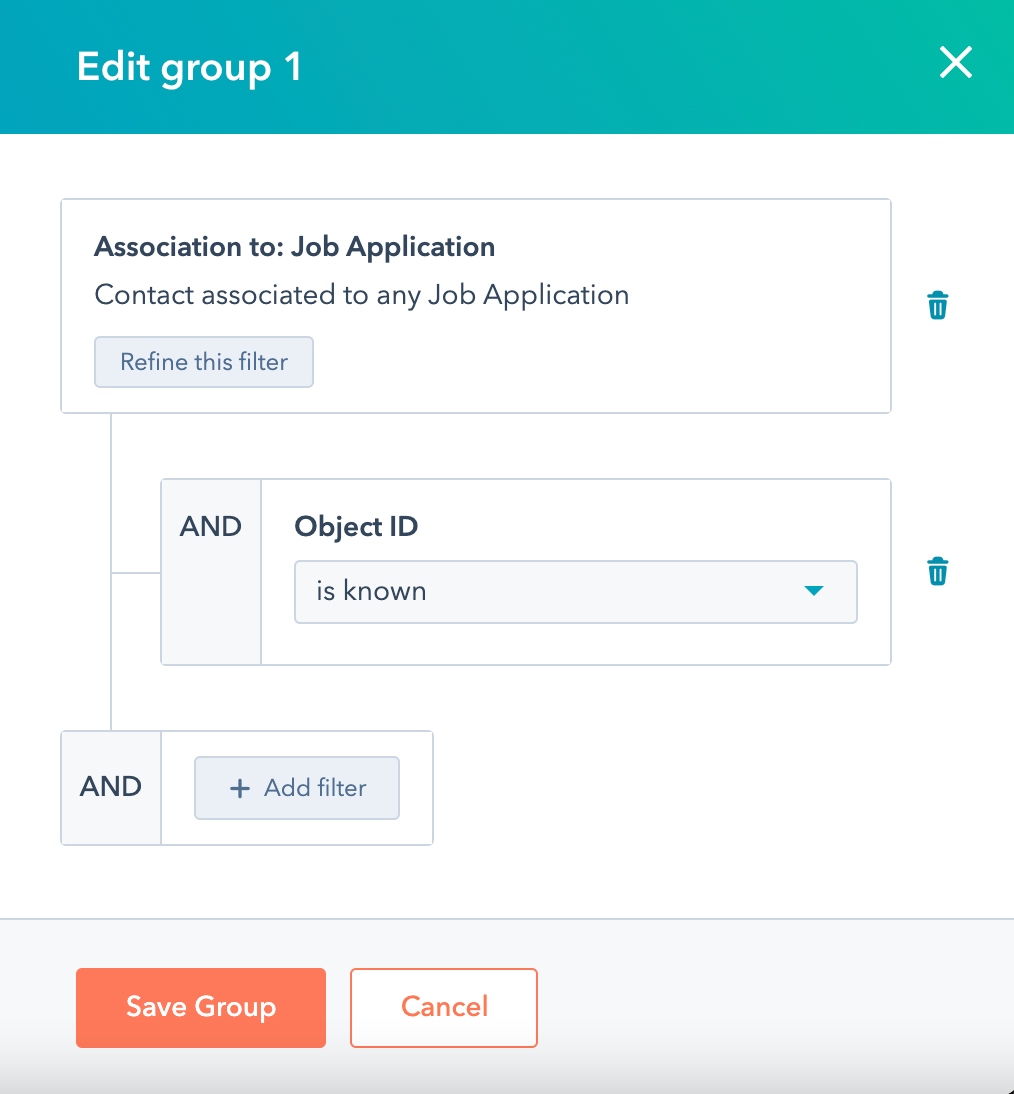
- In the right panel, configure the filter:
- Select Job Application properties.
- Click Object ID.
- Under Object ID, click the dropdown menu and select is known.
- Click Save Group.
- In the top right, click Save list.
- In your HubSpot account, navigate to Marketing > Website > Website Pages.
- Click Create page, then select Website page.
- Select the Application Listing - GraphQL template.
- Enter an internal name for your page.
- Click and drag the Existing Application Listing module into your template.
- Click the Settings tab.
- Enter a page title, then enter my-applications for the content slug.
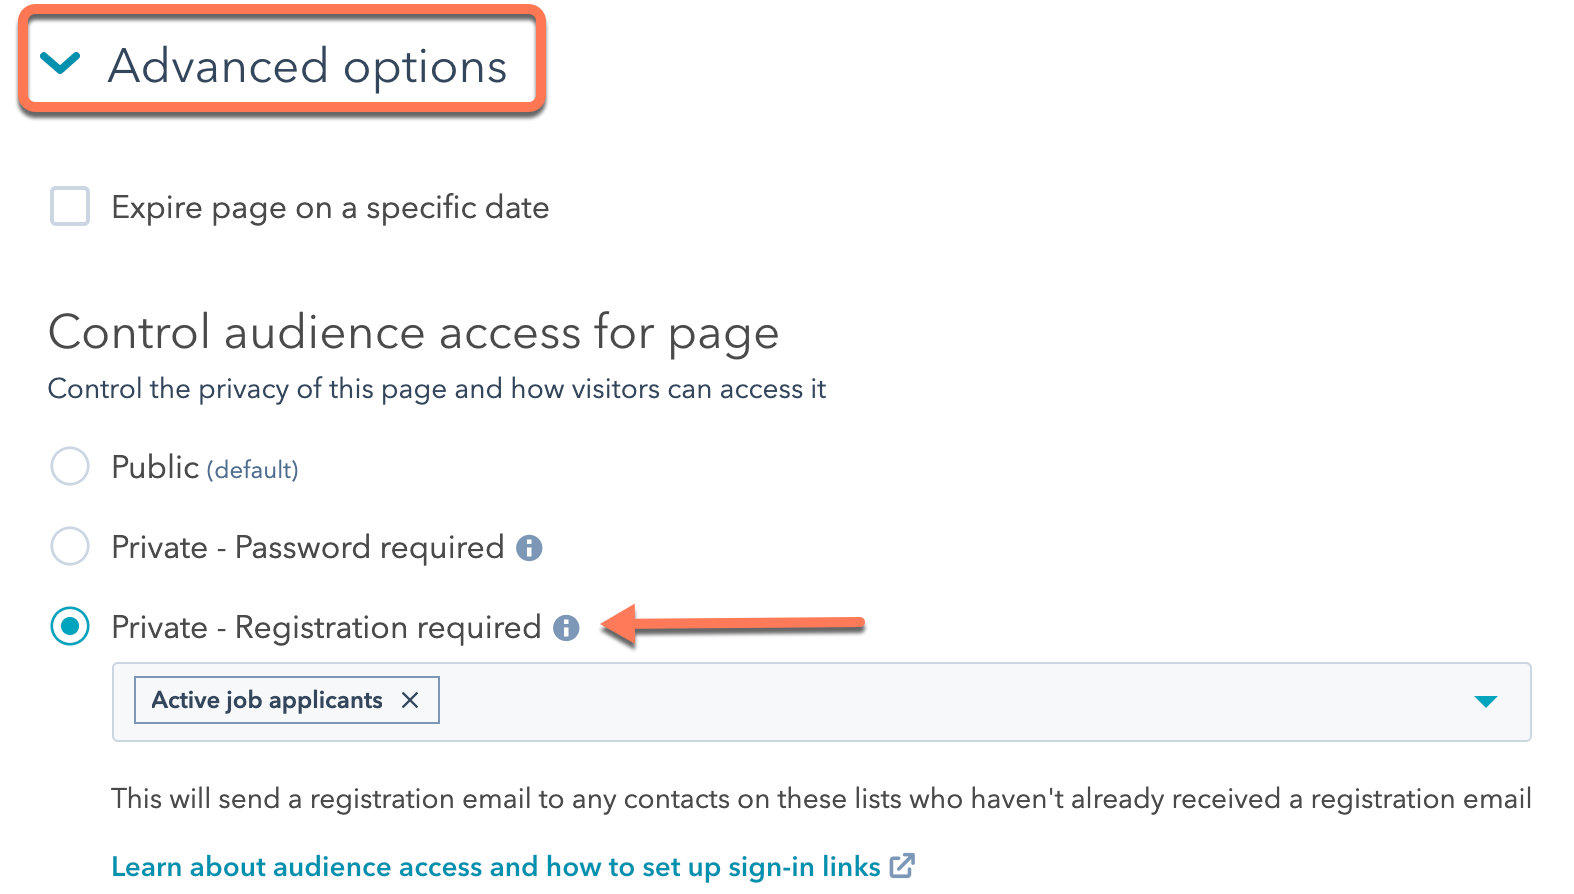
- Scroll down and click Advanced options to expand the section.
- Under Control Audience Access for this page, select Private - Registration required.
- Click the Select lists dropdown menu and select the membership list you created.
- In the top right, click Publish.
- Back on the website pages dashboard, click Create, then select Website page.
- Select the Application details - GraphQL template, then enter an internal name for the page.
- Click and drag the Application Details module into your template.
- Click the Settings tab.
- Enter a page title, then enter application-details for the content slug.
- In the top right, click Publish.
Edit website header and menu items
The final step is to finalize the website header and create a menu that links between each of the pages. All of the application and role pages share a header, so you can edit the global module and the changes will apply to each of the pages.- On the website pages dashboard, hover over one of the pages you created and click Edit.
- Click the website header. In the dialog box, click Open in global content header.
- In the left pane, click the Content tab, then click Primary navigation.
- Click Edit.
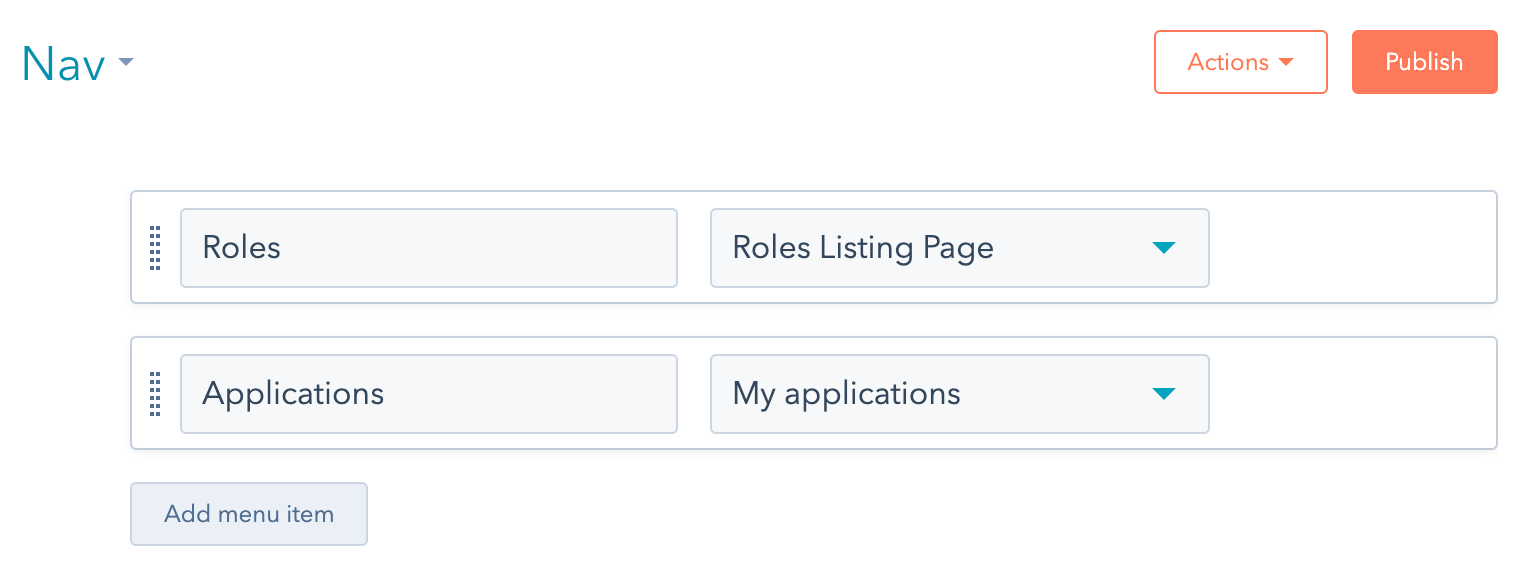
- Add two new menu items:
- Click Add menu item, then select Add page link.
- Enter Roles for the Menu item label, then click the Select page dropdown menu and select Roles listing page.
- Repeat the same steps to add a menu item for the application listing page.
- Click Publish.