- Using Git and GitHub
- Building websites using the HubSpot CLI
Send local files to GitHub
Before you can integrate with GitHub, you’ll first need to gather your files locally.- If you have an existing CMS asset that lives in HubSpot, such as a theme or set of templates, you can fetch it by running the fetch command as follows:
hs fetch <HubSpot_src> <local_dest>. Alternatively, you can download all files in the account’s developer file system by runninghs fetch /. - To create a new local project, it’s recommended to start with the CMS theme boilerplate. If you haven’t worked with the CMS theme boilerplate before, check out the quickstart guide. If you’ve already installed the HubSpot CLI and configured your local environment, you can create a new local theme from the boilerplate by running
hs create website-theme <new-theme-name>. You’ll then need to upload your files to HubSpot with the hs upload command.
Use the HubSpot CMS Deploy GitHub Action (recommended)
To streamline the process, HubSpot created a GitHub Action that you can install to your GitHub project to handle automatically deploying changes from a branch to your production HubSpot account.Create and merge a pull request in main
- With your secrets, workflows, and scripts in your GitHub repository, create a pull request and merge it into main.
- After merging the pull request, navigate to Actions. You should see your deploy Action run, which will then deploy your code to your HubSpot account.
Lock your asset in the design manager
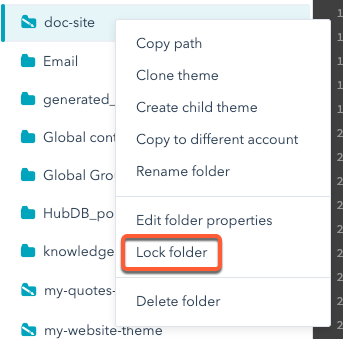
Now that your source of truth lives in GitHub, you should lock your asset in HubSpot to prevent edits from being made there. This ensures that changes only come through the deploy action. To lock assets in the design manager:- In your HubSpot account, navigate to Marketing > Files and Templates > Design Tools.
- Locate your asset’s folder in the left sidebar, then right-click and select Lock folder.