
Creating a user-friendly, fast-loading website with the HubSpot CMS can feel challenging at first. However, with the right knowledge and guidance, you can rise to the top. Fortunately, HubSpot takes care of the most complex aspects, like managing the CDN and server infrastructure, so you don’t have to worry about the technical heavy lifting.
That said, to ensure your website stands out among the best, you’ll need to master a few key strategies for optimizing templates and performance. The good news is that these tricks aren’t hard to learn and can make a world of difference in how your site performs.
Today, I’ll share some actionable tips to address the most common challenges I’ve faced when creating fast, efficient templates. With these insights, you’ll be well-equipped to build a website that leaves your competitors in the dust!
To optimize your website’s performance and create a blazing-fast experience, I’ve divided my guidance into a few key sections:
-
My guiding rule for website optimization
-
Loading of files
-
Redirects
-
Fonts
-
Images
-
The right tools for testing
1. My guiding rule for website optimization
Let’s start with a fundamental principle that trumps most other “rules” in website optimization: Less = Faster
The less you load, the faster your website will be. It’s as simple as that!
- If you don’t need it, don’t load it.
- For images: If it’s not visible, lazy load it!
By following this basic logic, you can dramatically improve your site’s performance right away.
Of course, there are exceptions and if you are very into performance and technical optimization, you know when this is not the case. Yet for most websites, the majority that could improve their performances with this starting point is enormous!
Now, let’s dive into the details and start optimizing!
2. Loading of files
To kick things off, let’s focus on file loading. Websites, particularly those built on HubSpot CMS, tend to load a lot of resources. Following my golden rule—”don’t load what you don’t need”—my top recommendation for creating a custom site is to start with a clean slate by disabling features you may not need:
- Disable HubSpot Chat
- Remove all forms
- Turn off comments for blogs
- Turn off social sharing
- Disable Google AMP (and don’t turn it back on!)
- Disable all tracking integrations
This will give you a cleaner starting point in HubSpot.
Of course, achieving this might be tricky with an existing website build with HubSpot CMS. Instead, begin by disabling one of the elements above, one by one, and observe their impact on your site’s performance. In many cases, you’ll notice some improvements in speed.
The results could fall into one of three scenarios:
- Your website is faster, but you need the tool.
Unfortunately, you’ll need to leave it on—but explore other optimization tips. - Your website is faster, and you don’t need the tool.
Keep it off for good! - There’s no noticeable impact.
If you don’t need the tool, it’s better to leave it off anyway.
With this approach, you’ll be well on your way to a faster, more efficient site. We are getting a bit more technical, so buckle up and let’s get started!
Local loading of files
The next step is a bit more challenging but crucial for performance. Loading files locally on your website (often technically referred to as your domain or origin) is often the fastest way to grab them. So what does this mean?
Imagine you’re in your kitchen, and you need a spatula to flip pancakes. If you keep the spatula in your kitchen drawer, you can grab it quickly and start cooking. That’s like local loading—the files you need are stored close by, on your server.
But if you didn’t have the spatula in your kitchen, you’d have to borrow it from your neighbor’s house. That’s like loading files from the internet. It takes longer because you need to walk to their house, ask for it, and bring it back.
And to make things worse, what if you need to borrow any tool because you have none? That’s a lot of walking.
Bring It into Practice with HubSpot:
To put this into practice with HubSpot, whenever possible, download a file instead of linking to it from another website. Upload that file directly to HubSpot and link to it from there. That’s it! This applies to images, scripts, videos, fonts—basically, anything you can download and host locally.
Set HubSpot File hosting domain
For the files you upload through HubSpot and use on your website, there’s one crucial step you don’t want to overlook. You need to set the default file hosting domain to your website’s URL. To do this, go to HubSpot Settings > Content > Pages. After scrolling down a bit, you’ll find the “Default file hosting domain” option. Make sure to select your website’s URL, so any file you choose from your library will use your domain.

3. Redirects
While this isn’t strictly a technical issue, it can significantly impact your website’s performance—redirects. These affect not just the URLs visitors type into their browsers or where you link to but also the files and images your site loads.
What is a redirect?
A redirect happens when a browser requests a specific URL, but instead of serving the requested content, the server tells the browser to go to a different location to find it. Think of it like this: You wave at someone to get their attention so you can ask a question, but instead of responding, they point you to someone else who has the information. Now you have to wave at the second person and start the process all over again.
This extra step takes time. While a single redirect might not seem like a big deal—and it’s sometimes necessary, such as when directing to updated content—having multiple redirects can significantly slow down how quickly the content loads. Imagine a chain of people pointing to each other before you finally reach the right one. Each step adds to the total load time.
Redirects in files and images
It’s not just the URLs visitors type into their browsers or where you link to. Redirects can also affect the files and images your site loads. If these resources rely on redirects, the browser must take extra steps for each one, which increases loading time. The more redirects, the longer the delay.
How to optimize redirects
To improve performance, aim to limit redirects as much as possible:
- Update Links: Ensure that URLs point directly to their final destination instead of using outdated or intermediate redirects.
- Streamline Redirect Chains: If there are multiple redirects in a row, update the old ones to point directly to the newest or final destination. Cutting out unnecessary steps saves time.
- Audit Files and Images: Check the resources your site loads to ensure they don’t have redirects, as these can slow down page load times just like URL redirects.
By reducing redirects on your website and for the resources it loads, you can improve its speed and ensure a quicker experience for visitors. A little cleanup can go a long way toward improving performance.
How to set redirects in HubSpot.
Rather than writing a detailed section, it’s simpler to refer to HubSpot’s knowledge base documentation. In summary, go to Settings -> Domains & URLs -> Redirects, where you can set up a new redirect for your pages.
4. Fonts
Fonts, along with images, are often the primary causes of poor Core Web Vitals scores. Here are a few common issues:
- More fonts than necessary: Following the Golden Rule—remove what you don’t use—is crucial.
- Fonts loaded through the CSS @import rule: This method is slow and can negatively impact your Core Web Vitals in several ways.
- Fonts loaded from external sources like Adobe Fonts (Typekit) or Google Fonts: It’s better to bring them locally, as explained earlier.
Once you have your fonts ready to load locally, we can start optimizing them.
While there are many articles with in-depth guides on how to best load fonts, here’s a short and simple overview of what you can do within the HubSpot CMS. The key is to ensure your fonts are available as quickly as possible (preload), styled as soon as possible, and using the correct font-display: swap setting so that text remains visible even while the font is still loading.
- Preload the fonts: Link the fonts in the
<head>of your website, as high as possible. Since fonts are crucial, preload them with this code:<link rel="preload” href="your_font_URL.woff2” as="font” crossorigin="anonymous”/>.
This ensures the browser loads them immediately after the HTML. - Add a font-face snippet: This step ensures the font is recognized by the CSS quickly, allowing your page to be styled as soon as possible. In the
<head>, add a<style>element with this code:
Now, your font will load and display as soon as it's needed. - Set fallback fonts: To reduce layout shifts and improve the user experience, define fallback fonts. If your custom font differs in size or style, the fallback ensures less movement when the swap happens. In the image below the differents in fonts, if you don’t match the styling. This will create layout shifts (CLS) when the new font is loaded.
An example, we use an adjusted Arial font as a fallback for our company. Here’s the code snippet:
Ensure this fallback is loaded before the custom font, and you’re all set!
To do some mixing and matching, try the online Font style matcher!
By following these steps, you’ll optimize your font loading and improve your Core Web Vitals score.
5. Images
Here we are—images on websites. On the surface, it seems simple, but to truly optimize images for performance, it gets a bit technical.
Loading setting
As discussed earlier in the “Loading of Files” section, we’ve already set the file domain to your website. That’s a great start! Now, let’s shift our focus to an important mindset to have when building or managing any website:
Is the image in the viewport when the page loads?
- Yes: Set the loading to eager.
- No: Set the loading to lazy.
I know it’s not always a perfect fit for every use case, but if you’re reading this, you probably already know when it applies!
How does this work?
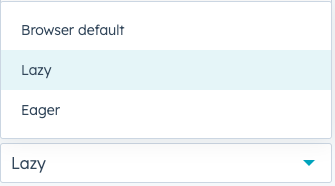
When a page loads, the browser processes the HTML file and reads the links to all the files on the page from top to bottom. In the case of images, if multiple images are not in the viewport when the page loads, it can delay other important parts of the site. Since the browser isn’t smart enough to prioritize images outside the viewport on its own, we can help it along by adjusting the “loading” setting. HubSpot offers three options for image loading: Lazy, Eager, and Browser Default.
As of this blog’s publication, “Browser Default” and “Eager” are the same.
- Eager: This has a higher priority and tells the browser to load the image as soon as it encounters it.
- Lazy: This loads the image only when it enters the viewport, with a lower priority compared to other elements. When you scroll near the image, it loads as soon as possible, but it doesn’t impact the initial load.
So, back to my question: Is the image in the viewport?
- Yes: Make it eager.
- No: Lazy load it.
Go back to your content, make sure all images outside the viewport are set to lazy, and prepare to be amazed by the performance boost!
More in depth information can be found on web.dev.
Image size
This one is simple: Don’t load images bigger than necessary. If an image only needs to be 1000px wide, make it exactly 1000px wide—not 2000px, not 1001px, just 1000px. I’m referring to the actual dimensions of the image file, not the “Exact width and height” setting. The closer the image size is to what’s needed for the site, the quicker it can be loaded by the browser.
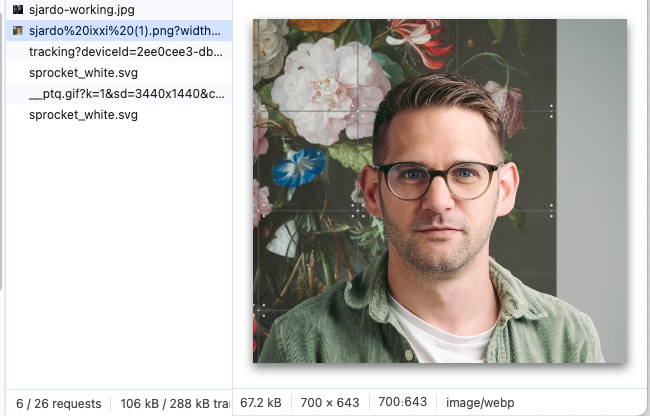
The Exact width and height setting in HubSpot’s image module is used when you need an image to always display at a specific size on any device. It defines the image’s dimensions in the browser and uses a source set to load different sizes for different devices and screen resolutions. The browser will then choose the most appropriate image size, which often results in reduced image file size. For example, I uploaded an image that was 2.82 MB, but after setting the dimensions, it became just 67.8 KB—now that’s a significant improvement!
Here’s the best part and my advice: Never set a fixed size. Always set a “maximum size” instead. This ensures the image remains responsive and doesn’t stretch beyond its intended size, helping your site stay flexible without breaking.
To further optimize, use tools like TinyPNG, Kraken.io, or HubSpot’s own image optimization to reduce the image size and ensure they’re set to the correct dimensions!
Fetchpriorty for your most important Image
Next up is a more advanced optimization step that requires a developer’s involvement: the fetchpriority element.
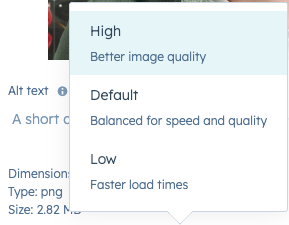
The fetchpriority attribute essentially tells the browser how important an image is. If an image is crucial to the page’s load, you can set it to “high”. If the image has lower importance, set it to “low”. If you're unsure, leave it as “auto”, and let the browser handle it based on its default priority. Setting an image to “high” ensures it loads faster than other images or files with a lower priority. By default, all files have a fetch priority. For images, it’s fairly easy to adjust this setting.
When to set fetchpriority to high?
Ask yourself: “Which image is the most important on the page, especially above the fold when the page loads?” Typically, it’s the Largest Contentful Paint (LCP) image that has the highest priority. Setting this image’s fetchpriority to high will speed up its load time and improve the user experience.
However, don’t apply a high priority to too many images, as this diminishes the effectiveness of this feature. For most pages, 1 image with a “high” fetch priority is enough. Go for the rule of thumb “if everything is important, nothing is”. So keep an eye not to overdo with this feature.
It's important to test the impact first, as rushing in without proper checks could lead to unintended problems.
Implementation:
By the time of writing this blog, this setting isn’t available by default for images. You'll need a developer to add it into a custom image module or an extra setting in existing modules that allows you to control the fetch priority.
Preloading important images
Just like with fonts, we can preload images. If an image is set to high priority, and you’re absolutely certain it should load first (otherwise, don’t set it “high”!), you can preload it. However, be cautious: preloading an image that's too large may hurt performance elsewhere on the site. Always test before final implementation to ensure it doesn’t negatively impact overall performance.
6. The right tools for testing
Testing and monitoring website performance: Optimizing for users will lead to better Core Web Vitals
When it comes to website performance and Core Web Vitals, testing and monitoring are as crucial as making optimizations. Remember, the goal is to enhance the experience for your visitors, not for yourself or your stakeholders. This means relying on field data—real user experiences—to guide your improvements and ensure you’re addressing real-world performance issues.
Why testing website performance is situational
Performance testing is essential, but it must be done thoughtfully. A single test can sometimes be misleading, especially if manipulated for vanity metrics or social media bragging rights. While such tricks might make your performance look impressive, the actual experience of your users could still be subpar.
Tools for performance testing and monitoring
PageSpeed Insights (PSI)
PSI is a simple, beginner-friendly tool that provides an easy-to-understand performance overview using a 0-100 score with color-coded indicators (red, yellow, green). While this tool is accessible and intuitive, it’s important to note that its results can sometimes be gamed, providing a false sense of performance.
The standout feature of PSI is its Field Data, which showcases how real users experience your website. This data is invaluable because it reflects actual user interactions, which is ultimately what you’re optimizing for.
WebPageTest: A professional’s go-to Tool
For more detailed insights, WebPageTest is a highly versatile and powerful tool. It’s my personal favorite for conducting single tests and tracking performance improvements over time.
What makes WebPageTest exceptional is its ability to offer deep, actionable insights through visual reports and summaries. These highlight what happens during your site’s load process, even breaking it down for non-technical users.
Key features include:
- Testing on specific devices, connections, and locations.
- Advanced options like running custom scripts, blocking specific domains, or adding custom headers.
- Identifying opportunities to make your site faster with detailed suggestions.
By comparing tests over time, you can measure the true impact of your optimizations and ensure continuous improvement.
Long-term monitoring for Core Web Vitals
Performance optimization isn’t a one-and-done task—it’s an ongoing effort. Continuous monitoring ensures your site performs well over time and allows you to catch issues before they affect your users.
Free tools for Monitoring
- Tools like treo.sh allow you to analyze performance trends over 12 months using real user data. These tools give you a clear picture of your progress and highlight areas for further improvement.
Premium tools for in-depth insights
If you’re serious about performance, consider investing in tools like RUMVision, SpeedCurve or CoreDash. These platforms provide:
- Comprehensive insights into Core Web Vitals at the page level.
- Alerts when performance metrics dip, ensuring quick action.
- Robust visualizations and dashboards for day-to-day monitoring.
- Pinpoint issues for URL’s and elements.
These tools don’t just improve performance—they can directly impact your bottom line by driving better user experiences, higher engagement, and ultimately, increased revenue.
Optimization is a marathon, not a sprint
After testing and implementing changes, your work doesn’t stop there. Performance optimization requires ongoing attention. By using the right tools and focusing on real user experiences, you can create a faster, smoother website that consistently delivers value to your audience and boosts your business.
Note: This article was originally published in the HubSpot Community. You can use the comments section here if you have any questions or feedback.
