
This article was authored by a member of the HubSpot developer community, Melinda Green.
So, you’ve found a great theme on the HubSpot Marketplace, but you need to make a few changes to it. Do you make those changes directly in the theme and risk them being overwritten? What if the vendor releases a critical update to their theme, and you don’t remember which of their files you’ve altered? You’re at risk of losing hours—if not days or weeks—of work.
This sounds like a job for child themes. If you’ve developed WordPress sites, you may already be familiar with the concept of child themes; in any case, it’s something that every front-end developer should know how to use.
Why Use a Child Theme?
Creating a child theme leaves the parent theme untouched, merely overriding the parts of the parent theme that you specify.
This is important for several reasons—probably the biggest of which is third-party theme updates. If a third-party theme vendor releases an important update to their code, like a bug fix, any customizations you’ve made to the original theme could be overwritten, making it necessary for you to identify the changes and redo work. This can be time-consuming and expensive, not to mention frustrating!
When you use a child theme, its files override the parent’s files, but remain unchanged when the parent theme is updated. Sure, changes upstream in the parent still might affect your functionality and styling (and you should always do a site review after upgrading a theme), but you’ll be able to start any needed revisions in the child theme from where you already are, not from backtracking to replace work.
But doesn’t that get confusing, having two sets of files? Well, that’s the beauty of a child theme: It doesn’t contain an entire set of files.
As you’ll see later, it holds only the files that need to override the parent. Maybe it’s a CSS file to add some cool animations. Maybe it’s a theme module to which you want to add a background image on every iteration. Maybe the site masthead needs its utilities in a different location. Your child theme could use one file that overrides the parent theme, or dozens. As a bonus, that makes your changes easy to find, too.
Ready to try it for yourself? The rest of this post will help you get started setting up a parent theme and creating your own customized child theme.
Start with a Parent Theme
First, you need to find a good starting point. Visit the HubSpot Marketplace and find the theme closest to what you envision for your site. Download and install it wherever you want to store your themes. HubSpot also has an open sourced CMS Boilerplate if you want to create your own parent theme.
Create Your Child Theme
Now, you can create and begin customizing a child theme.
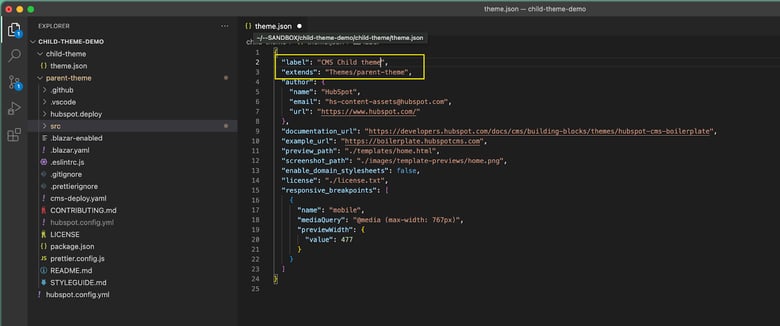
Begin by following the instructions to set up a child theme. If you’re using a local environment and you’re in theme.json, change the label to something descriptive of your child theme so that you can differentiate it from the parent in the theme selector. (This is done automatically if you’re using the Design Manager to create your child theme.)
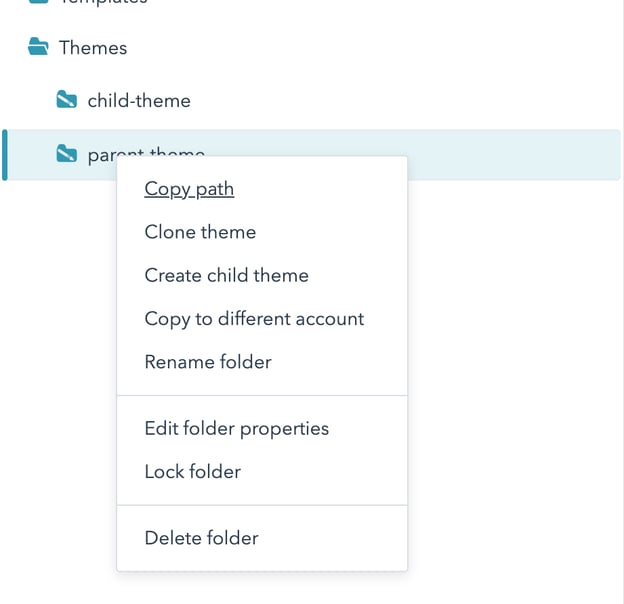
NOTE: The “path of the parent theme” referenced in the link above can be copied by right-clicking on the parent theme directory in the Design Manager. You’ll need to remove the initial backslash from this path after pasting it in.
Right-click on the parent theme in the Design Manager to copy its path.
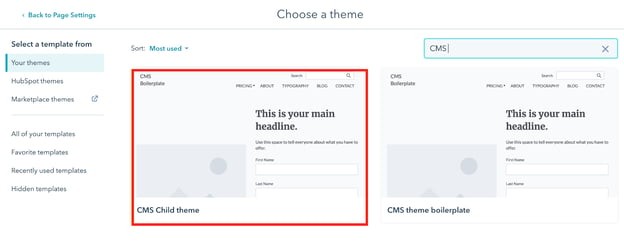
At this point, your child theme should show up in the page editor. Test this by creating a new web page, going to the Settings tab, clicking Advanced, and changing the template. You should see both your parent and your child theme available for use.
Using Your Child Theme
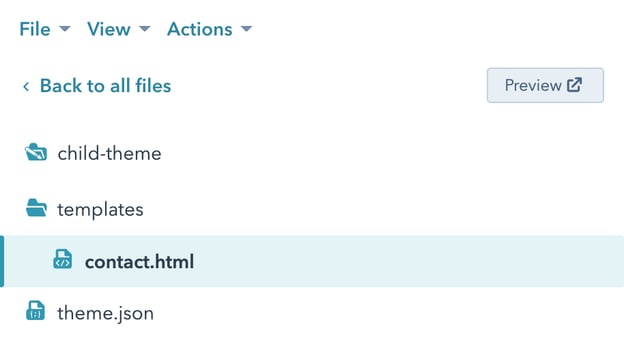
When you select your child theme, you’ll see all of the same templates that you see in your parent theme. But wait, your child theme only contains a theme.json file! That’s because the child theme “reads” its parent theme for every folder and file that’s not in its own tree. At this point, you actually see the exact same templates, modules, stylesheets, and scripts for both themes. The only difference between the two is what’s in theme.json.
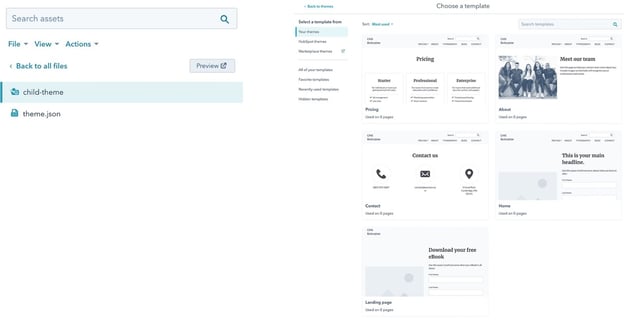
Go ahead and select an appropriate child theme template for your page.
Now, let’s say you want to change something in that template. Maybe you want to add a form to the Contact page, adding it directly to the template so it can’t be removed or replaced by a user.
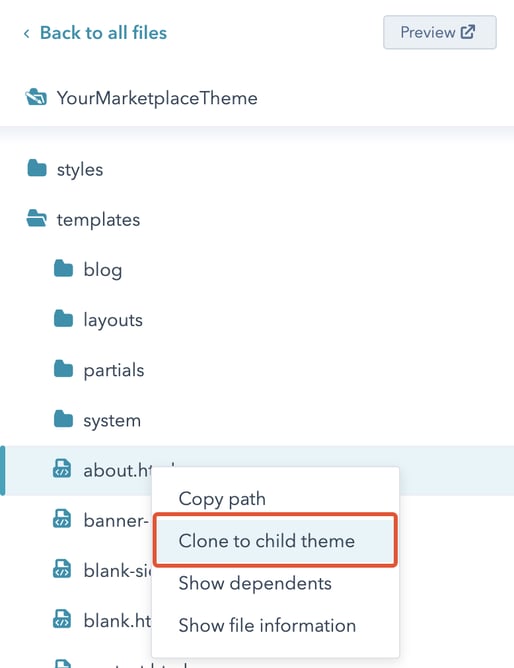
The first step is to duplicate your template. If you’re using the Design Manager and a Marketplace theme, right-click your parent theme’s directory and select “Clone to child theme.”
If you’re not using a Marketplace theme, you’ll need to navigate to the local environment or the Design Manager, open the parent theme, and find the template file. Next, create the exact same directory structure in your child theme, then copy and paste (or clone and move) the template file there.
Be sure to rename the new file to remove “copy”, so the filename matches the parent’s filename exactly. Only exact-match filenames will release inheritance from the parent theme.
If you’re using a local development environment and the CLI tools, make sure to upload this new file to your child theme in your HubSpot account.
Now, when you reload your page in the page editor, you’ll be looking at the child version of the template. Open your template file in the Design Manager or your local environment and add a HubL call to your featured image. While you’re there, also edit the template name to correctly identify it as the child theme.
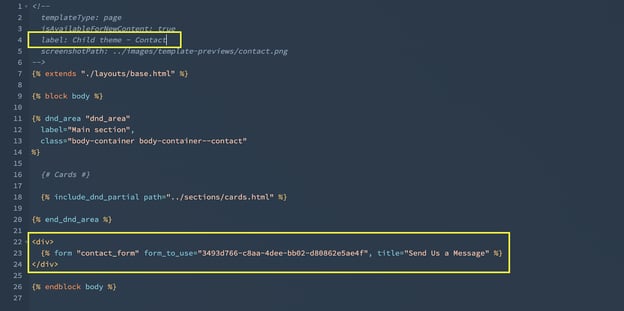
Save, upload (if needed), and reload your page. You should see your form appear on the page.
From here, the possibilities are endless. You can duplicate and alter stylesheets, scripts, base layouts, and templates (including partials)—you can build brand-new code files, stylesheets, and script files to include in your theme. At a more advanced level, you can alter the fields.json file and style-override files to set different selectable styles in the CMS.
It’s important to note that when you clone your fields.json file to your child theme, you are essentially disconnecting/overriding the parent styles to your child theme (much like you can do with templates). You can even build custom modules inside your child theme that won’t be affected by the parent theme, nor even available to it, should you ever decide to use the parent theme.
Remember, though, that this should all be worked out on staged or unpublished pages so your experiments don’t accidentally make it out into production.
Last Steps
Once your child theme is set up the way you want, it’s time to give its identification in the template selection tool a little more clarification.
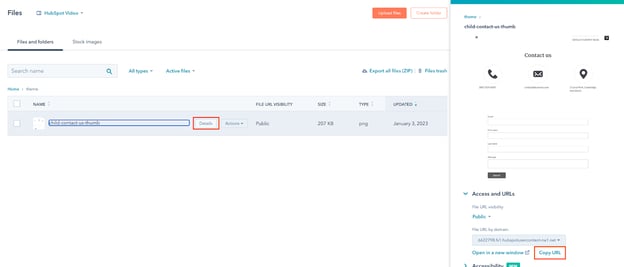
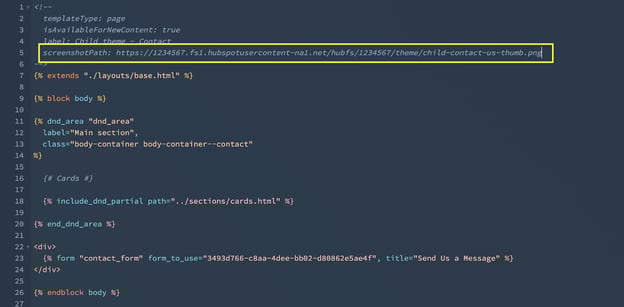
Create and then preview a draft web page with your new template. Save and crop a screenshot of your page (1000px wide by at least 700px high is good), upload it to the CMS File Manager or your theme files in an appropriate location, and grab its URL using the Details button in the File Manager or by right-clicking it in the Design Manager.
Then, open your child theme’s template file (or theme.json file, if you want to change the basic theme graphic) and paste in your URL. If you stored your image in the theme code itself, you can alter the first portion of the URL to make the path relative to your theme.json or template file.
And that’s it! You now have a child theme that leverages the power of a third-party theme without risking the loss of your hard work when that third-party theme is updated.
