 If you are using HubSpot, there’s a good chance your team is also using several other systems in conjunction with it to manage data for different parts of your business. For example, your sales team may operate out of a different CRM while your marketing team leverages HubSpot for top of funnel marketing activity and email automation.
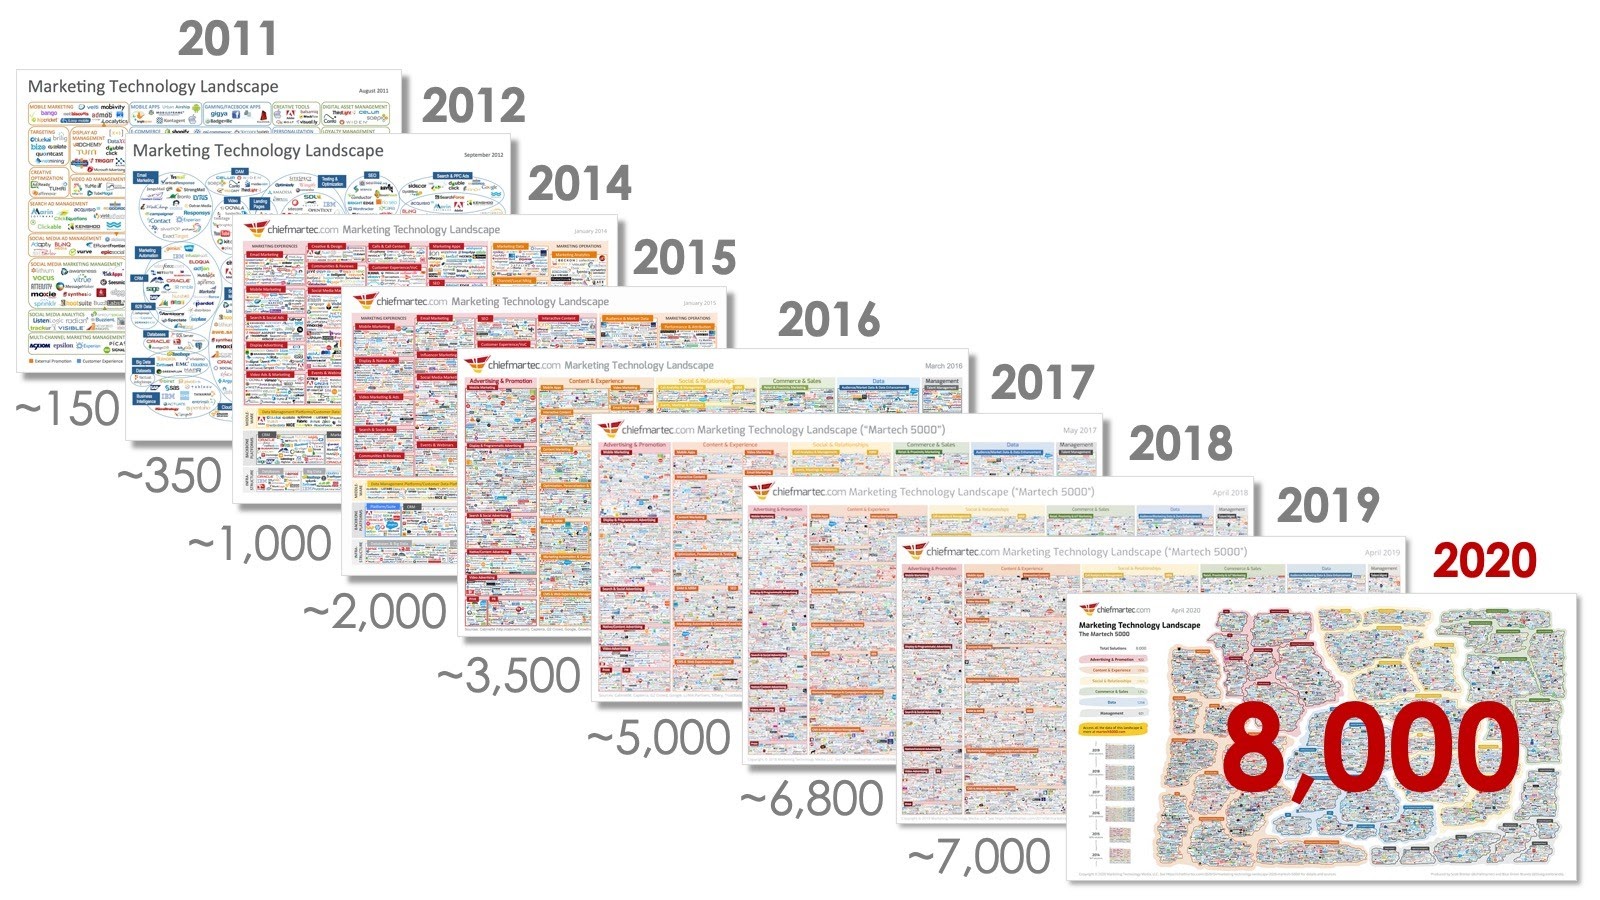
According to a report conducted by chiefmartec.com, the marketing technology landscape has transformed over the past nine years. There are over 8,000 applications out there right now compared to just over 150 back in 2011. That represents a growth rate of 5,233%!
There's nothing wrong with utilizing multiple systems, but it is essential that your data is kept up to date and in-sync across platforms. This ensures your teams are working with accurate information and reduces "data silos" - a situation where only certain people can access important information.
In addition to providing an array of APIs that allow you to interact with data in your account, HubSpot also provides webhooks. Both play an important role when integrating systems, but in this post, we will focus on implementing webhooks within HubSpot by using:
- Webhooks API (Free+)
- Workflow Extensions (Professional+)
- Webhook action via bots/workflows (Operations Hub Professional)
However, before we jump into the details, you need to understand what a webhook is and how it is different from an API...
What is a webhook, and how is it different from an API?
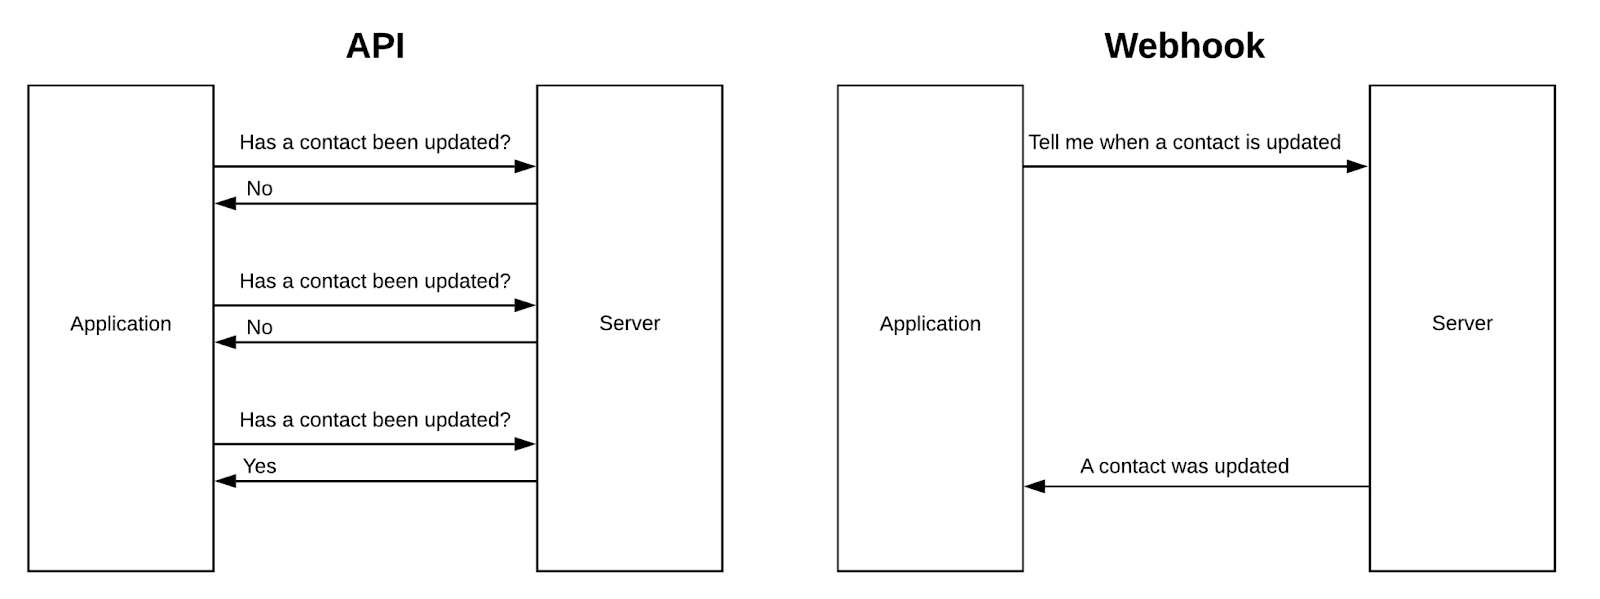
As you may already know, an API is a way of requesting or passing information to and from a system. You send a request, and you get a response with the data you need. But what if you want to know if the information has changed? With an API, you have to keep sending requests to check.
A webhook is similar to an API, however, you are automatically notified when the system you are tracking is updated. This allows you to keep your tech stack up to date without the continuous requests.
Here is a diagram highlighting the general differences between APIs and Webhooks. Notice how, with an API, we must make repeated requests to see if the data changes. With a webhook, we tell the server to let us know if something happens:
While APIs play an important role in bridging the gap between disparate systems, using them in conjunction with webhooks can help build a more efficient and robust connection. Webhooks provide the following advantages:
- Optimized API usage and reduced API calls: You may only be able to make a certain number of requests per day before hitting an API limit. As mentioned above, webhooks allow you to use your requests more efficiently.
- Constant data sync: You may want to keep your systems in sync in near real-time. With webhooks, you'll be notified as soon as something happens.
The party invitation analogy...
Imagine that you have a friend who throws amazing parties that you don't want to miss. Would you text them every hour to see if they are planning something, just to have them keep replying "no"? That is essentially how an API works.
Instead, you can tell your friend to notify you when the next party is planned, so you don't have to keep texting them. This represents a webhook. It's a much more efficient use of resources - and it helps ensure your number won't get blocked!

Now that we've covered how webhooks work, let's look at how we can implement them throughout HubSpot.
How to implement webhooks in HubSpot
Within HubSpot, there are a few ways to use webhooks. I've broken them down in more detail below. Each has different strengths and weaknesses, so it's important to ensure you pick the best option for your use case. It's also worth noting that the options available depend on your HubSpot subscription.
1) Webhooks API (Free and up):
The Webhooks API is available for all subscription levels from free to enterprise. It allows you to create an application that subscribes to various events occurring within any portal with your application installed. Those events include Contact, Company, and Deal creations, deletions, and property updates. Below is an example of what you'd see when creating these subscriptions:

You can create up to 1,000 subscriptions per application. At present, Tickets aren't supported by the Webhooks API, but they will likely be added down the road.
If you're looking for an easy way to subscribe to changes occurring in the CRM to keep data in sync, then the Webhooks API is the perfect fit. If you need more flexibility around what is triggering those webhooks, you'll need to consider either Workflow Extensions or the webhook action in workflows or bots.
2) Workflow Extensions (Professional and up):
Workflow Extensions can currently be leveraged in Contact based workflows, and should support other types of workflows in the near future. Using this API, you can create custom workflow actions that send data from HubSpot to a webhook URL.
I like Workflow Extensions for several reasons:
- Scalability: Can be used to integrate HubSpot workflows with other systems. For example, SMS providers, CRMs, push notification providers, conferencing tools, collaboration tools, etc.
- Professional: Can be used by professional customers to trigger webhooks from Contact-based workflows without an enterprise subscription.
- Usability: Is user friendly for end-users to create workflows and add these actions as needed.
- Efficiency: Allows you to customize the payload, so you are only getting the data that is required by your application, making it easier to process the information you receive.
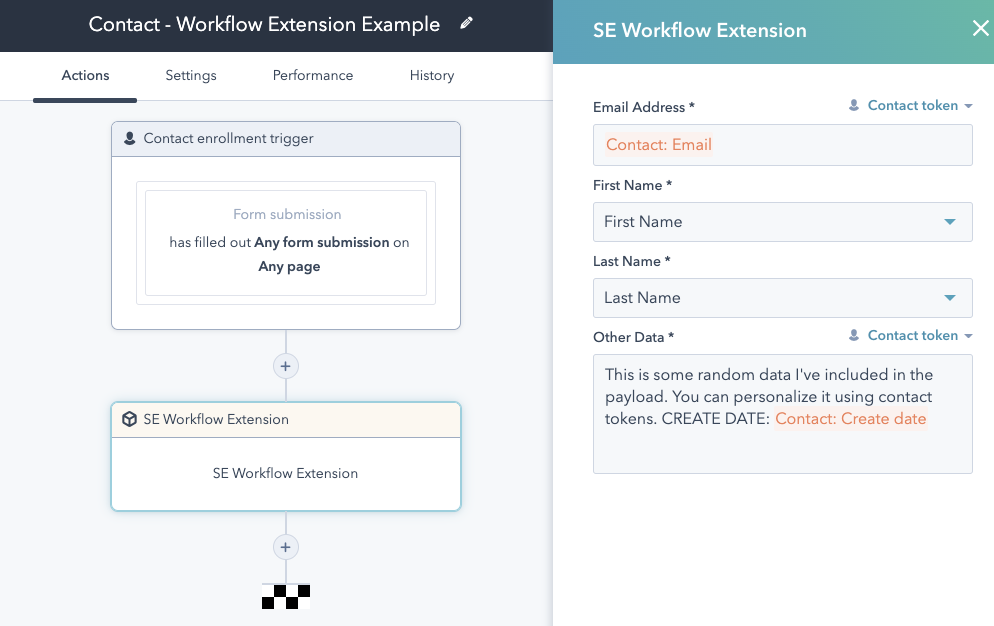
Below is an example of a very generic workflow extension. Notice how I could theoretically trigger this action based on any number of enrollment rules.
If you're looking for a more flexible way of triggering webhooks, then Workflow Extensions can help you. However, you have to consider that it's only available within Contact-based workflows right now. If you're looking to trigger webhooks based on HubSpot's other objects, you'll need to consider using the webhook action in bots or workflows.
3) Webhook action via bots/workflows (Operations Hub Professional only):
With an Operations Hub Professional subscription, it's possible to trigger webhooks using a webhook action in both HubSpot bots and workflows. Technical documentation can be found here for bots and here for workflows.
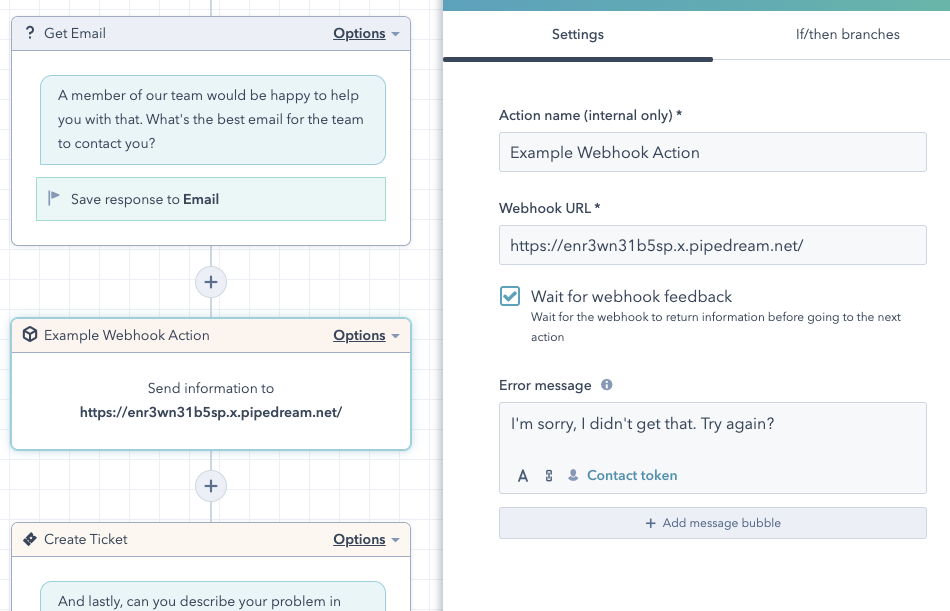
In the case of bots, the major benefit is that you can trigger a webhook based on a user providing a certain input to the bot. See the image below for how this works. Notice that you can also wait for a response before proceeding to the next action:
In the case of workflows, the biggest advantage is that you can trigger a webhook across all workflow types (Contact, Company, Deal, Ticket and Quote) using an array of different enrollment criteria. Below is an example of how this works:
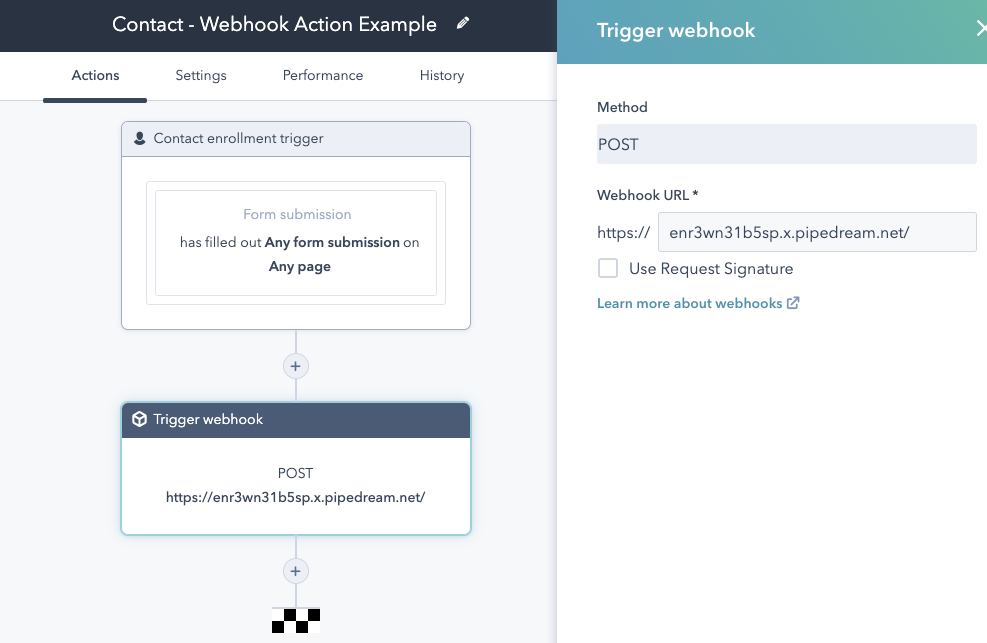
One thing to note: there isn't an option to customize what HubSpot sends. You'll be sent all of the information of the currently enrolled object and will be required to parse the data on your end.
Ready to learn more?
If you'd like to learn more about the methods outlined above, take a look at this short video.
NOTE: From April 21, 2021, the ability to trigger a webhook from a workflow and/or bot is exclusive to accounts with Operations Hub Professional. Previously it was a feature available to all Enterprise customers. If you are an existing Enterprise customer prior to April 21 you will be grandfathered into this functionality.
 There are multiple ways to leverage webhooks in your account, depending on your specific requirements and subscription. I hope this post has given you a clearer understanding of what webhooks are and how you can use them to get more out of HubSpot.