Key limitations
Keep the following limitations in mind before migrating your private app: Limited support for serverless functions:- If your existing private app includes serverless functions with core logic (e.g., the function transforms data that isn’t contained in the backend), you should not migrate it to the new developer platform until a full migration path is released.
- If needed, you can always build a net-new app on version 2025.2 of the developer platform alongside your existing app.
- Creating a project-built private app using version 2025.1 of the developer platform with serverless functions is still supported.
- Otherwise, if your serverless functions are only acting as a proxy to your backend, you can proceed with migration by following the guidance in the section below on using
hubspot.fetch()after completing the previous steps in this guide.
- The HubSpot CLI migration commands are not supported for existing private apps, as automatic migration is not currently supported.
- Support for the GitHub integration, which triggers automatic uploads and builds from GitHub, is not yet available. If your existing project is currently linked to GitHub, make sure you disable the integration before you begin the migration. To disable the GitHub integration and setup GitHub Actions for automating CI/CD, check out the instructions in this article.
Summary of the migration process
This guide will walk you through the following:- You’ll start by cloning your existing project so the original files can serve as a backup, then you can review each of the associated configuration files to ensure they conform to the new project schema. This will require minor updates to the names and structure of your component configuration files, as well as their respective properties.
- You’ll then update your existing top-level
hsproject.jsonandapp.jsonconfiguration files.- You can then follow each of the subsequent sections to update the configuration for your app components to conform to version
2025.2of the developer platform, based on the existing features you had set up (e.g., an app card built using UI extensions). - Note that, with the exception of the
hsproject.jsonfile, all other configuration files follow a predictable naming scheme (*-hsmeta.jsonwhere the*is based on the specific directory or component) and all share the same top-level properties:
- You can then follow each of the subsequent sections to update the configuration for your app components to conform to version
- After you’ve updated all the components of your cloned existing project, you’ll then upload your new project to your HubSpot developer account as part of the last step in this guide.
Clone your existing project configuration files
Before making any updates, clone your existing project so you have a backup you can reference or fall back to in case you run into issues. After you’ve cloned your project, open the cloned project files in your preferred IDE, such as VSCode. If you’re looking for a minimal project that conforms to the new2025.2 schemas that you can reference, you can download a boilerplate template:
- Make sure you’ve installed the latest version of the HubSpot CLI by running the command
npm install -g @hubspot/cli@latestand connected it to your account usinghs account authcommand. If you haven’t installed the HubSpot CLI yet, runnpm install -g @hubspot/cli. You should be onv7.6.0of the CLI before proceeding. - Run the command below in your terminal to create a project with the boilerplate template for an app with
privatedistribution andstaticauth.
- Follow the prompts to provide a name and local directory to download the boilerplate project into, along with any app features.
- Open the newly created project in your preferred editor. You can then compare the project directory structure and the associated
*-hsmeta.jsonschema files to your existing project to ensure the specifications match when applicable.
2025.2 of the developer platform is detailed in the app configuration guide.
Changes to hsproject.json config
The changes to the top-levelhsproject.json involve minor changes to the name and platformVersion properties, as outlined in the code blocks below:
Before:
hsproject.json file in your project lives in the same location in the new developer platform, but you’ll need to update the platformVersion to "2025.2". You may also want to update the name field with a unique name so that it doesn’t override your existing project when you upload it. For example, if the name of your existing private app was named My private app, you might want to append (Developer Platform v2025.2) or something similar to distinguish it from the old app.
Review and update your app’s top-level schema
The code blocks below provide examples of the config before and after the required changes: Before (src/app/app.json):
src/app/app-hsmeta.json):
app.json file. These config details for your app are now specified with your app schema file in the /src/app/app-hsmeta.json file. The key changes between your old app.json config and the new app-hsmeta.json config include the following:
- The top-level
publicproperty has been replaced withdistributionand should be set toprivate. Note that thetypesub-property of theauthfield should be set tostatic, which will restrict installation of your app to a single account. Learn more about app distribution and authentication in the app configuration guide. - Your app’s scopes are now specified as a sub-property of the
authfield, and are split out betweenrequiredScopes,conditionallyRequiredScopes, andoptionalScopes. Learn more about specifying each of these scope types in the app configuration guide. - You don’t need to define the top-level
extensionsproperty from your previous project, since the property is not present in the newapp-hsmeta.jsonfile. Any previously configured UI extensions (e.g., cards on the CRM record page) are managed using thecards/directory of your project. Within that directory, card configuration details are specified in a*-hsmeta.jsonfile, alongside the component code for your card provided in a.jsxfile that’s referenced using theentrypointproperty of the*-hsmeta.jsonfile. - You also don’t need to define the top-level
webhooksproperty from your previous project in the newapp-hsmeta.jsonfile, as webhooks are configured and managed using thewebhooks/directory of your project. Learn more in the migrate webhook subscriptions section below.
Update individual component configuration
These sections below outline how to port any UI extensions and webhooks over to your new app. If your old app had neither of these components, you can jump to the upload your project section.Migrate CRM cards built with UI extensions
The code blocks below provide examples of the config before and after the required changes: Before (src/app/extensions/card.json):
src/app/cards/NewCard-hsmeta.json):
cards/ directory of your project, replacing the old extensions/ directory from your old project. Within the new cards/ directory, card configuration details are specified in a *-hsmeta.json file, alongside the component code for your card provided in a .jsx file that’s referenced using the entrypoint property of the *-hsmeta.json file.
To port over your legacy app’s UI extension code, copy any relevant values over from your legacy app.json into the associated properties in the *-hsmeta.json file in the cards/ directory, keeping the following changes in mind:
- The value of the
typeproperty has been changed from"crm-card"to"card". - The
uidproperty has been moved up from a sub-property of thedatafield and is now specified at the top-level of your config. - The
dataproperty has been changed toconfig, which includes the following sub-properties:- The
titleproperty has been renamed toname. - A new
descriptionproperty allows you to provide more context around the functionality of your card. The description will appear in your app’s project settings. - The
moduleproperty has been renamed toentrypointand the value should now be a string that represents the path to your JSX component, relative to the root of your project (e.g.,"/app/cards/example-app-card.jsx"). - The
objectTypesproperty has been simplified and is now an array of strings representing the object types where your card should appear (e.g.,["CONTACT", "COMPANY"]). - The
locationproperty remains unchanged, and can be set tocrm.record.tab,crm.record.sidebar,crm.preview, orhelpdesk.sidebar.
- The
example-app-card-hsmeta.json config file and example-app-card.jsx JSX component are provided in the src/app/cards directory.
For a full guide on creating app cards on the new developer platform, check out this article.
Migrate webhook subscriptions
The code blocks below provide examples of the config before and after the required changes: Before (src/app/webhooks/webhooks.json):
src/app/webhooks/webhooks-hsmeta.json):
webhooks/ directory of your project. Within the directory, subscription details are specified in a *-hsmeta.json file. The structure of the file is largely similar to the previous webhooks.json schema in your private app, with the following notable changes:
- A required
uidproperty must be defined at the top-level of your*-hsmeta.jsonfile, which should be given a name to differentiate it from other app features (e.g.,"migrated_private_app_webhooks"). - A required
typeproperty must also be defined at the top-level of your*-hsmeta.jsonconfig and must be set to"webhooks". - The
subscriptionsandsettingsproperties remain unchanged fromwebhooks.jsonbut must be moved into theconfigproperty that’s defined at the top-level of your*-hsmeta.jsonfile.
Upload your project
After you’ve migrated over the configuration from your existing private app into the respective sub-directories of your project, you can upload your new app to your HubSpot account. From there, you can find your app’s access token that you can use to authenticate API requests and continue to build out functionality on the new developer platform. To upload your new project, run the following CLI command:Migrate serverless function handling
If your private app included serverless functions, you’ll need to create your own REST-based backend service and use thehubspot.fetch() API to fetch data. This will require you to migrate any existing service logic that was previously defined in your HubSpot-hosted serverless functions, as well as your private app access token to a third-party hosting platform, such as Vercel, DigitalOcean, AWS, etc.
To migrate your serverless function logic to a third-party hosting platform:
- Locate your serverless functions in the project of your existing private app in the
src/app/app.functionsdirectory. - Copy all the relevant logic from your functions. In the example serverless function below, only line 4 would need to be copied over.
- In the third-party hosting platform, paste in the logic from your previous serverless function definition, and ensure that any parameter names align. You’ll need to consult the documentation for defining serverless function on the platform you’re using.
- Copy your access token from your app’s project details page and add it as an environment variable with your third-party hosting platform so it can be referenced in your code.
-
Next, you’ll need to update the
permittedUrlsproperty of your top-levelapp-hsmeta.jsonschema file to include thefetchfield. The value of this field should be set to an array that includes the URL of your endpoint hosted in your third-party hosting platform. -
Then, update any references in your app card React code to call the new serverless function URL you set up. You can learn more about using
hubspot.fetch()in this guide.
Clean up
After you’ve successfully uploaded your new project, migrated over any serverless function handling (if applicable), and fully tested your app to confirm the behavior is consistent, you can delete your old project within your HubSpot developer account. Remember that you still have the original backup of your project locally, as outlined in the first step of this guide in case you ever need it as a reference. To delete your old project from your developer account:- In your HubSpot account, navigate to Development.
- On the Projects page, click the name of your old project.
- Click the Settings tab.
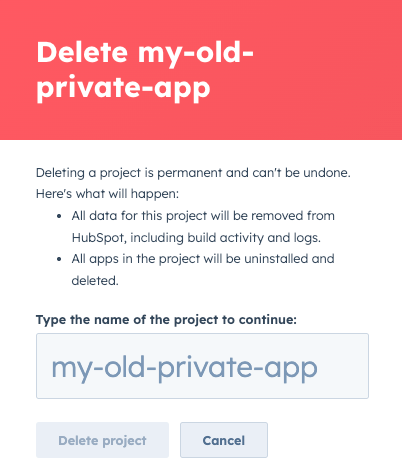
- Under Delete this project, click Delete [project name].
- Review the information in the dialog box to confirm that you’re ready to proceed. Then, enter the name of your project, and click Delete project.