
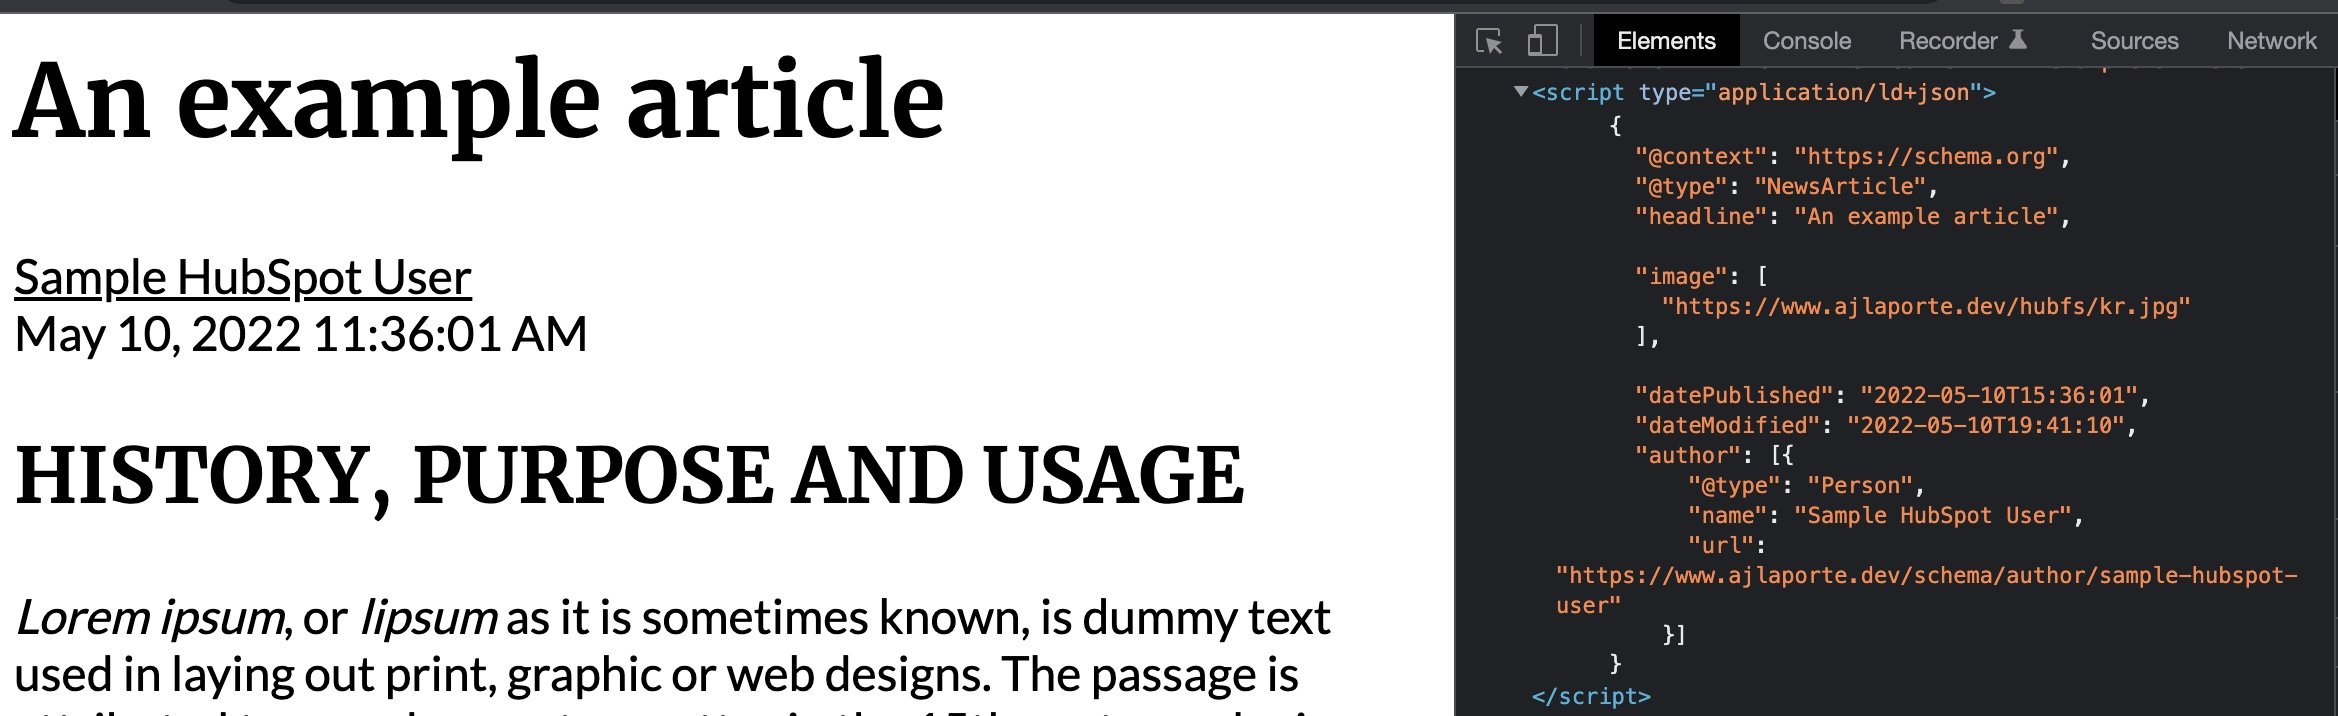
Structured data, in reference to SEO, is a summary of your page's content in a format easily interpreted by search engines. Search engines use structured data when classifying, ranking, and displaying content in search results. This data is often provided in the form of a JSON-LD code block placed inside the <head> element, which is Google’s recommendation. Below is an example of this in action:
It’s important to note, that while we are adding this code to our site in order to make use of a search engine's rich results feature, it’s not a guarantee that the search engine will display this data as search engine algorithms are very complex and tailor the results of a users query based on multiple factors. You can read more about Google’s structured data general guidelines here as these are the guidelines we will be keeping in mind as we implement our structured data.
There are many different types of schemas
There are over 760 different types of schemas listed on Schema.org (a website that was created June 2, 2011, by Bing, Google, and Yahoo for creating and supporting a common set of schemas for structured data – source) that can be implemented and it can be very overwhelming to a first-time reader on which to use. Luckily, Google does a great job of breaking down the specific schemas that are able to be used for their rich results. These are listed on their search gallery documentation, but for now, we’ll focus on the following structured data type that is one of the more common use cases:
Article: A news, sports, or blog article displayed with Top stories carousel and rich result features, such as headline text and larger-than-thumbnail images.
Template vs Module implementations
When choosing how to implement your structured data in HubSpot, there are two options we can evaluate. It's important to keep in mind that the option you choose for implementation should be whichever one works best for your situation.
Option 1: Adding code at the Template level
One option is simply adding this code at the template level. This method is best applied when you have a single schema that is consistent across your content. For example, if you have a blog that is all news articles, you can simply build in the Article schema at the template level and your content editor doesn’t have to worry about populating any information.
Option 2: Creating a Module
Another option is creating a custom module (either Local or Global) for use on pages or blogs. This method is perfect when you have multiple schemas types (ex: Article, Event, JobPosting, etc.) you are looking to implement inside your blog as you can build in options that can then be selected by your content editor at the time of publishing for each piece of content.
For the purposes of this walkthrough, our use case will be a news site and we will focus on the first option of adding code at the template level.
Tooling, concepts, and resources we’ll be utilizing
You should be familiar with the following concepts and resources as we will be utilizing them throughout this article.
- HubSpot CLI for fetching and publishing our template files to our HubSpot Account
- HubSpot’s Boilerplate and the blog-post.html template
- Hubspot’s require_head HubL tag for adding our code to the
<head>element - HubSpot's Developer Info for identification of HubSpot variables we’ll use to populate our JSON-LD values
- HubSpot’s datetimeformat HubL filter for converting timestamps into the proper format
We will also be using the following tools for development and testing. You may choose to use different ones while following along which is completely up to you as everyone has their own preferences when it comes to their tools of choice.
- Visual Studio Code (VSCode) for our IDE when making changes
- Google’s Rich Results Tester for validating our structured data
All of our code that we are going to reference is also available for review at the following GitHub repository.
Implementing our structured data in our template
Using require_head and adding our example code
We’ll begin by opening up VSCode, fetching our theme (if we haven’t already done so), running the hs watch command to check for changes, and opening-up blog-post.html template. Directly underneath our template annotations, we are going to add the require_head HubL tag:
This tag will take anything placed inside of it and move it into our <head> element, which is where our JSON-LD code needs to be. We’ll now copy and paste Google’s non-amp example code (this is the 2nd code sample on the article schema page) and place this inside of our tag.
Once we save our template, we should see the watch command running in our VSCode terminal and upload our changes. We can now do a quick pulse check to make sure our data is valid by creating a simple blog post and checking our post with Google’s Rich Results Tester. We should the see following results when running the check:

This is great, but as you can see, it's populated by the static information from Google’s example and we want to use our own article information instead of sample content.
Developer info, the content object, and variables we’ll need
We can populate this information by using built-in variables inside HubSpot that are found within the Developer Info. In order to access the developer info, browse to one of your articles on your blog and click the sprocket menu dropdown located in the top right corner and choose “Developer Info”. This will open up a new tab with a JSON listing of information.
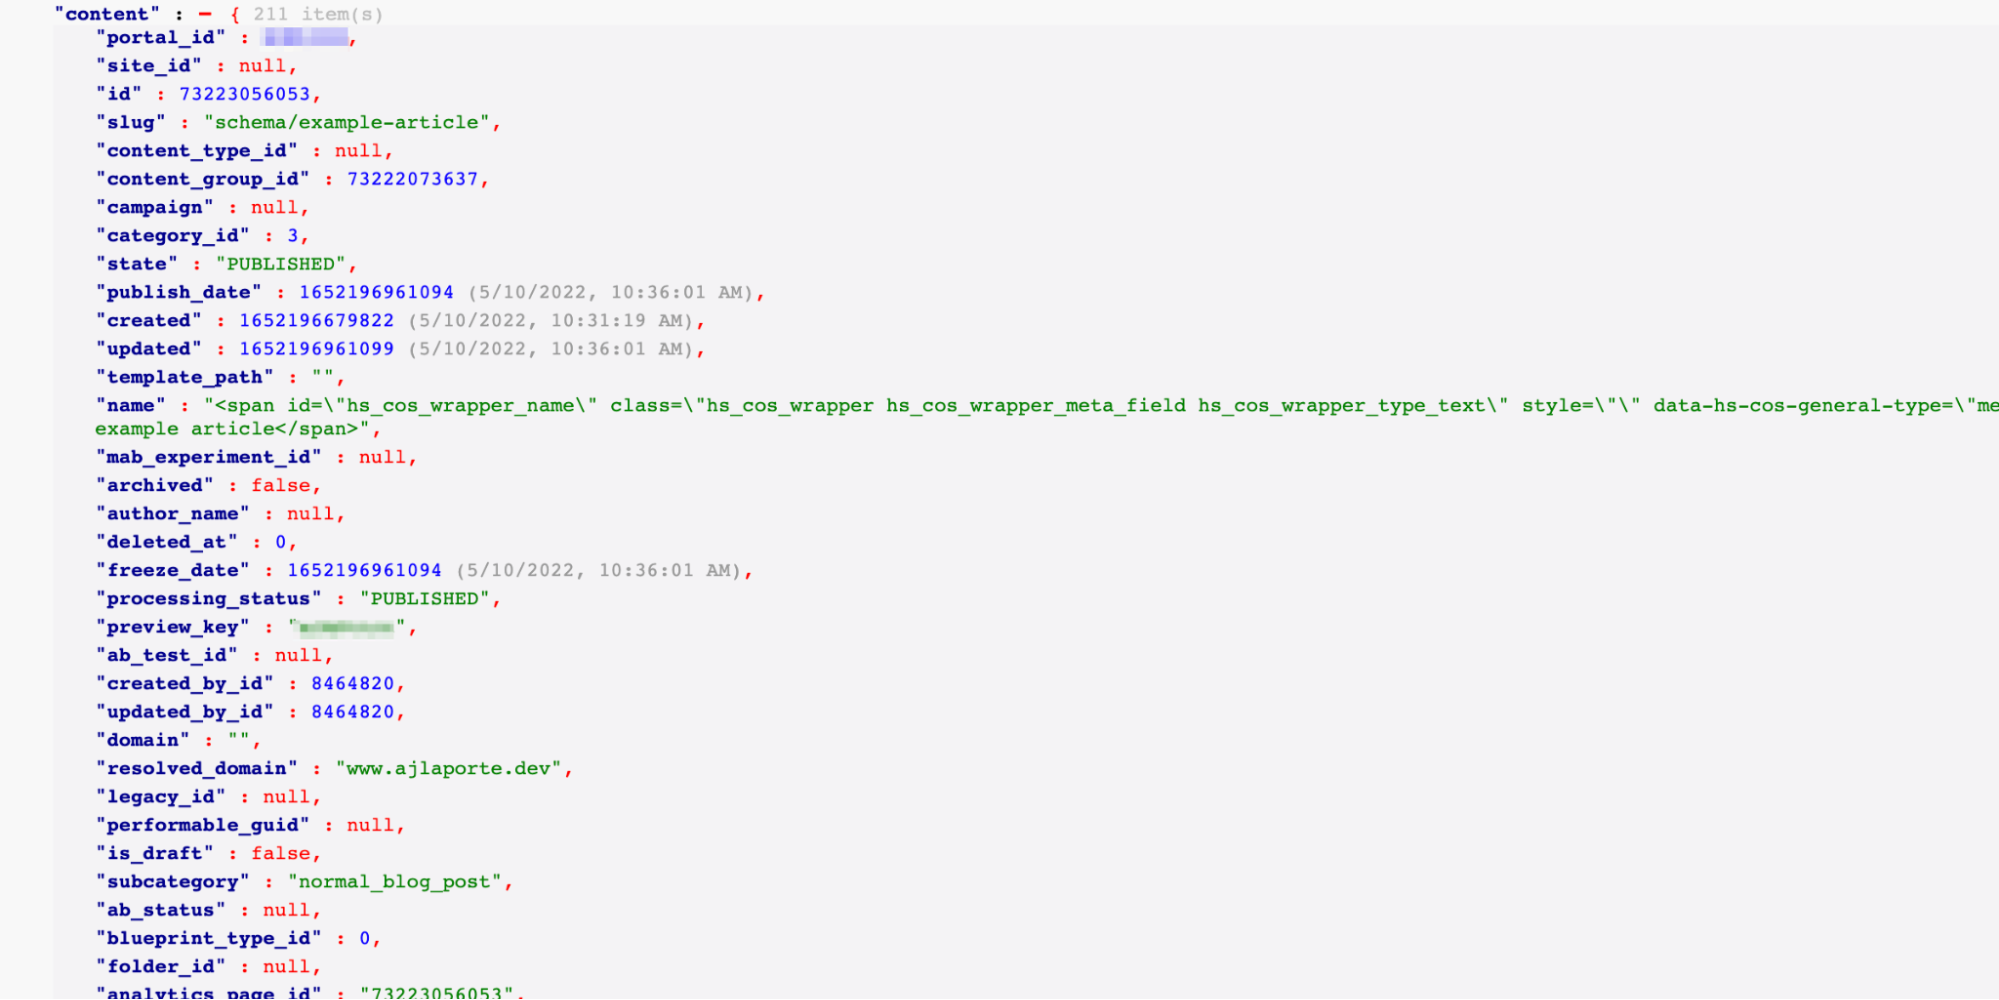
Note: this information is best viewed using a JSON viewer plugin/extension inside of your browser for better readability.
There is a lot of information packed into that page, but for this example we are only going to focus on the “content” object, which provides us with information about the content on the page, and the following variables from that object:
- {{content.title}}
- Description: The title of the article
- Corresponding JSON-LD key:
"headline"
- {{content.use_featured_image}}
- Description: A boolean to show if a featured image was enabled for the post
- Corresponding JSON-LD key: None, we will use this for conditionally adding the image information
- {{content.featured_image}}
- Description: The featured image for the article
- Corresponding JSON-LD key:
"image"
- {{content.publish_date}}
- Description: Epoch unix timestamp when article was published
- Corresponding JSON-LD key:
"datePublished"
- {{content.updated}}
- Description: Epoch unix timestamp when article was last updated
- Corresponding JSON-LD key:
"dateModified"
- {{content.blog_post_author.full_name}}
- Description: Name of the Author
- Corresponding JSON-LD key:
"name"inside of"author"object
- {{content.blog_post_author.slug}}
- Description: URL slug for Author
- Corresponding JSON-LD key: Portion of the
"url"inside of"author"object
- {{content.parent_blog.root_url}}
- Description: The root URL for the blog that the post resides in
- Corresponding JSON-LD key: Portion of the
"url"inside of"author"object
Updating our sample code with our variables
Let’s begin updating our sample code and replacing certain values with our variables from the table above. Our resulting code should now look as follows:
Next, we’re going to add conditional logic for our featured image as not all blogs always have a featured image although it is recommended. To do this, we will wrap our “image” object with an IF statement evaluating if the “Enable featured image” in our settings area is toggled on:
Last, we are going format our epoch unix timestamps so they are properly formatted. To do this, we will add our datetimeformat filter to our variables and supply the proper directives in our formatting parameter.
After we have done this, our code should now reflect the following:
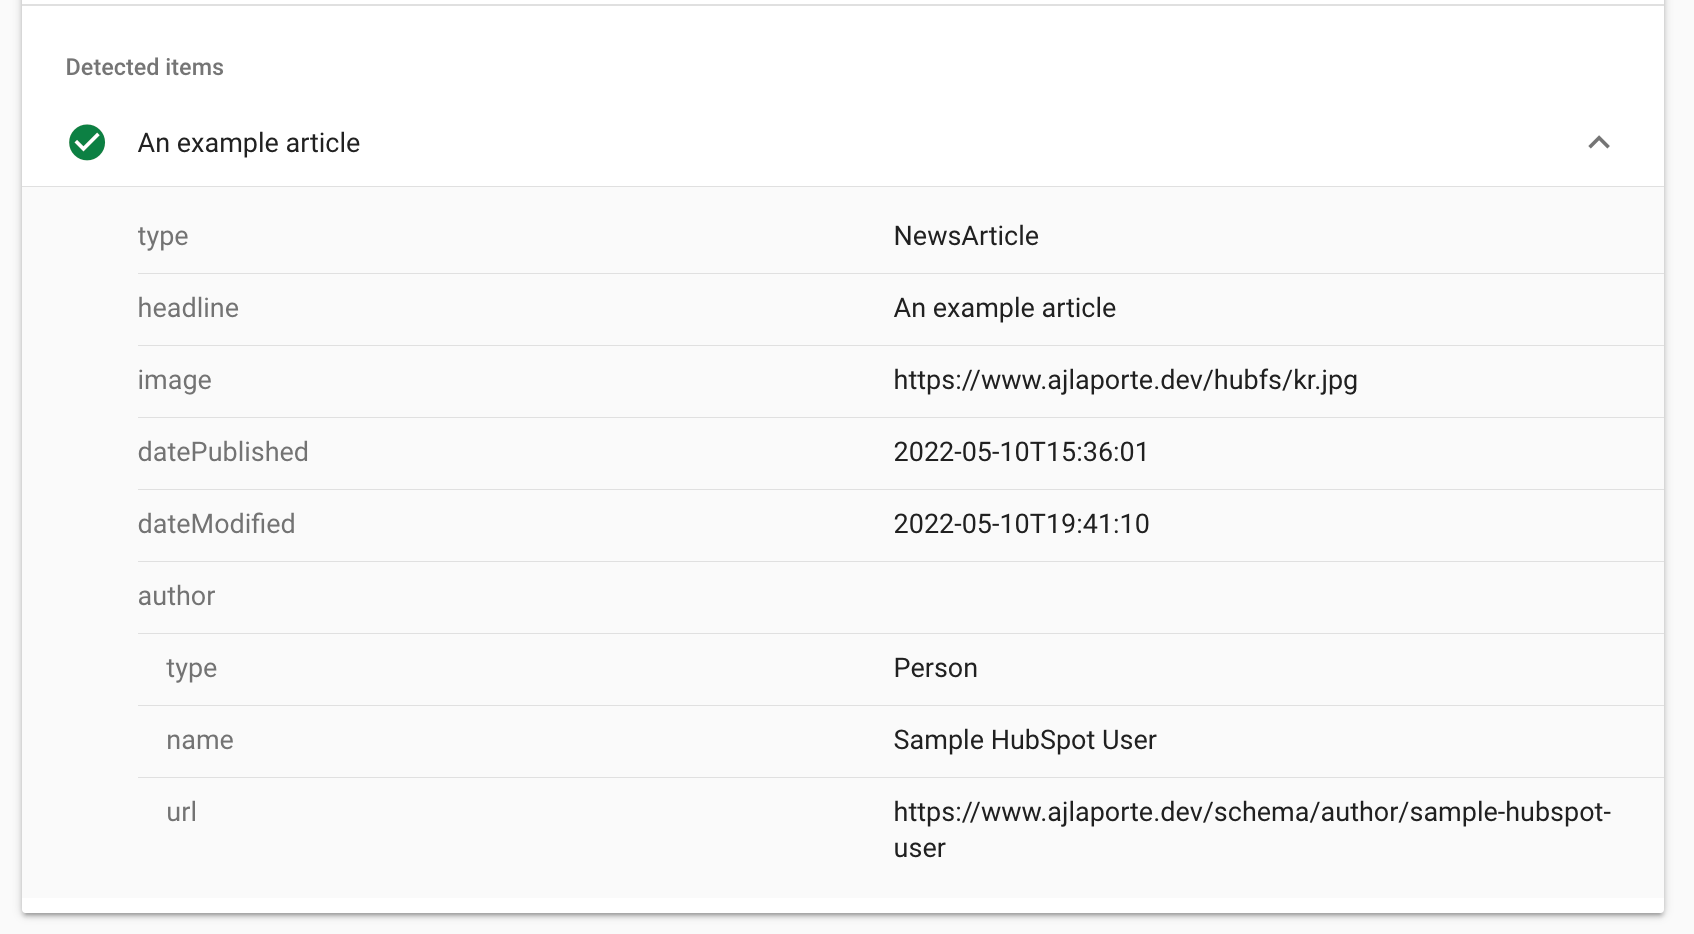
We’ll go ahead and save this and our watch command should now upload our changes. We can now re-run our Rich Results Tester and should see our articles information now populated:
And just like that, we have implemented our structured data inside of our blog post template. This means all blog posts that are created will share this same article schema and their values will be populated automatically. If your blog has mixed schemas (such as events, recipes, or job postings) you can make use of a custom module and apply the same concepts from above with custom fields to populate all the values needed to fit your schemas.
Alternatively, if you prefer to work with APIs and Python, there is a fantastic article written by Derek Hawkins about Automating Article Schema Implementation in HubSpot. Derek also recently presented on this topic at one of our workshops which is available for viewing on HubSpot’s Developer YouTube Channel.