
When migrating a website over to HubSpot’s CMS Hub, there may be the occasional need to quickly create a website's page structure (sometimes referred to as a skeleton) so your content team can begin the process of adding content to pages.
For smaller websites, this can mean simply creating the page in-app, choosing the appropriate template for the page, and then adding your content. For larger sites, you may want to speed up the page creation process and spend more time focusing on content entry rather than spending time in the page creation process. We can use a combination of private apps, HubSpot’s CMS API, and Postman to accomplish this in an efficient manner.
We will be approaching this article from the lens of migrating from another CMS to HubSpot’s CMSHub, and will be using a CSV file for prepping our content and acting as a source of truth for pages on our site. We will then convert this CSV into JSON for use with our Postman requests.
Did you know we also offer a content import tool inside of HubSpot? Visit the content import tool in your account today and learn more about our content import tool on our knowledge base.
First, what do we mean by a “website structure or skeleton”
In this post, when we refer to a website structure (or skeleton), we are referring to the pages that are within a website. Think of a skeleton as a “blueprint” (similar to how a blueprint for a building works) that details what pages are in your website and where these pages are located. For example, let’s look at the following URL:
https://developers.hubspot.com/blog/using-postman-with-hubspots-batch-cms-pages-api-to-quickly-create-a-structure-or-skeleton-of-your-website
In this example, when relating this to a blueprint for a building:
https://developers.hubspot.comis our foundation, exterior walls, and roof. It’s what everything will be built either on or into./blog/can be considered one of the rooms inside our building, such as an office, living room, kitchen, etc.using-postman-with-hubspots-batch-cms-pages-api-to-quickly-create-a-structure-or-skeleton-of-your-websiterepresents the items that are in that room, such as a couch, toaster, or velvet Elvis.
Under the hood of our pages is our metadata, such as Page Title and Description along with other data such as Internal Page Name or Assigned theme/template. We will use all of this data as we create our pages using Postman.
What is Postman and how are we using it?
Postman is a platform that developers can use for building and using APIs. It helps to simplify API lifecycles and streamline collaboration. We will be using Postman to make our request call to HubSpot’s batch endpoint for creating site pages. Using our batch APIs is the recommended path when you need to pass a lot of data into HubSpot using the fewest calls possible.
Creating our Private App and connecting it to Postman
HubSpot already has a great deal of information surrounding the creation of Private Apps, so we will do a more condensed version of those for the purpose of this article. If you want more detailed information, complete with screenshots, we recommend reading the Private Apps developer documentation.
Creating your private app
Let’s begin by going to our Private Apps area by visiting Settings > Integrations > Private Apps.
Note: If you have Sales or Service Hub Enterprise and are enrolled in the CRM Development Tools beta, you can access these tools through the top menu CRM Development > Tools > Private Apps.
Click on Create Private App and give your app a name and description. It’s always best practice to use naming that will convey the purpose of the app. Now, let’s click over to our Scopes tab and choose the following scope: Content: This includes sites, landing pages, CTA, email, blog, campaigns.
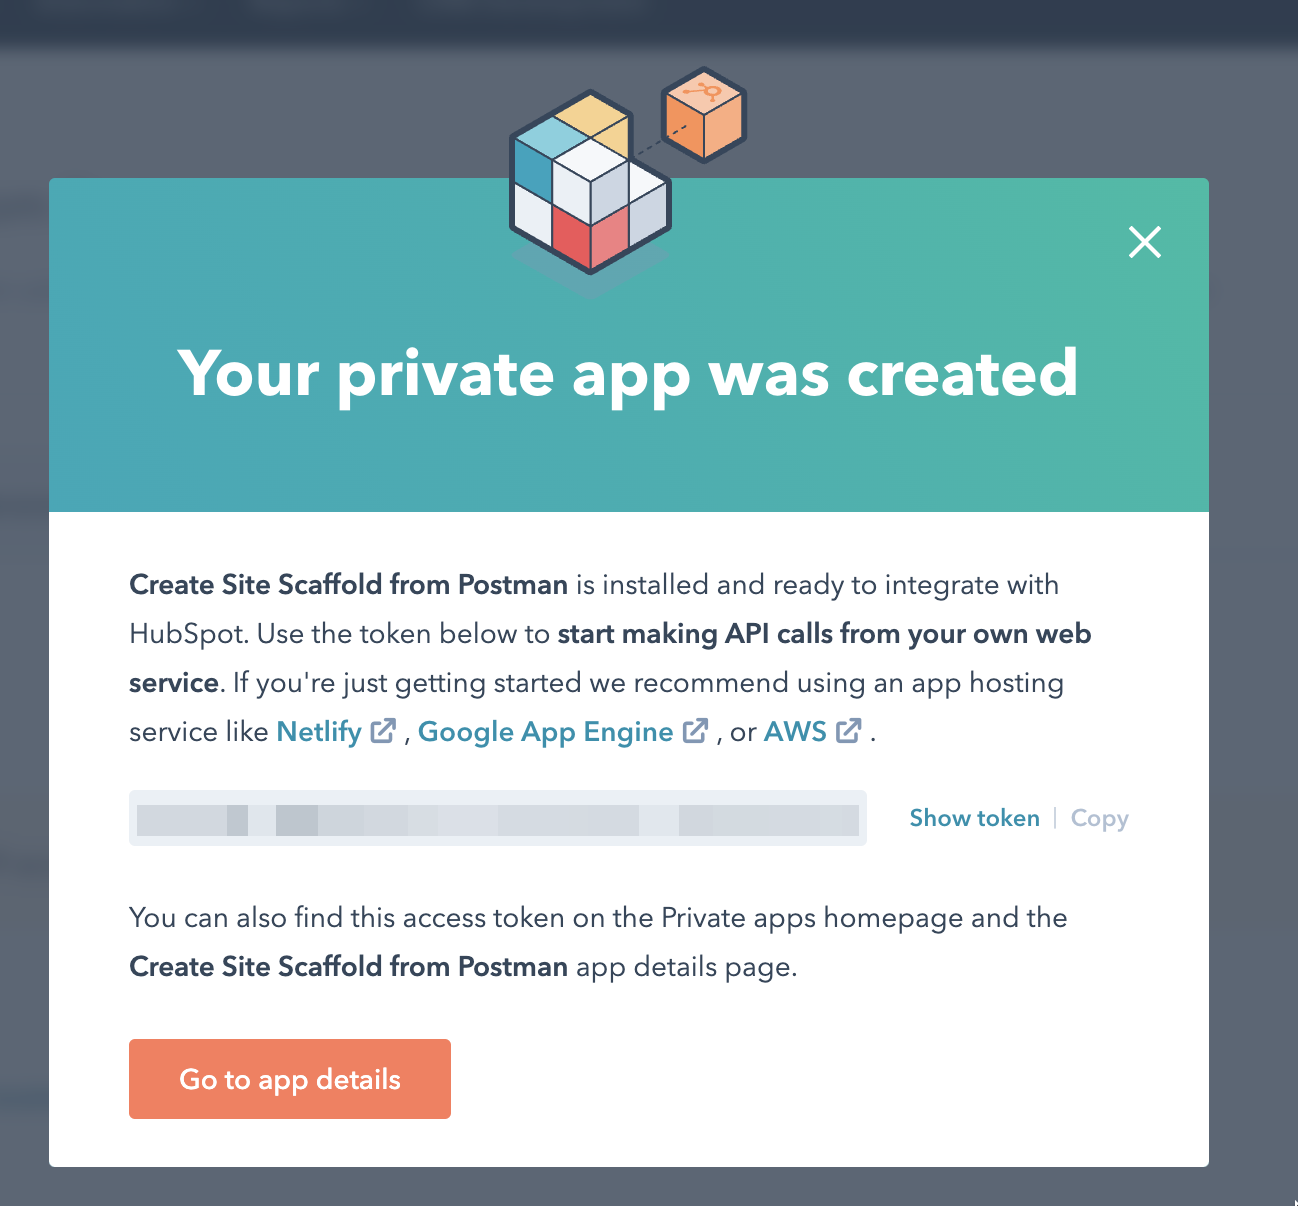
We can now click Create App and we will see a success model that includes our token for making our API calls. Make note of this token, as we will be using it in the next section when setting up our authentication inside of Postman. Continue by clicking Go to app details.
Note: Take precaution when using your token and always make sure to never openly publish your token in a public space.
Connecting our Private App to Postman
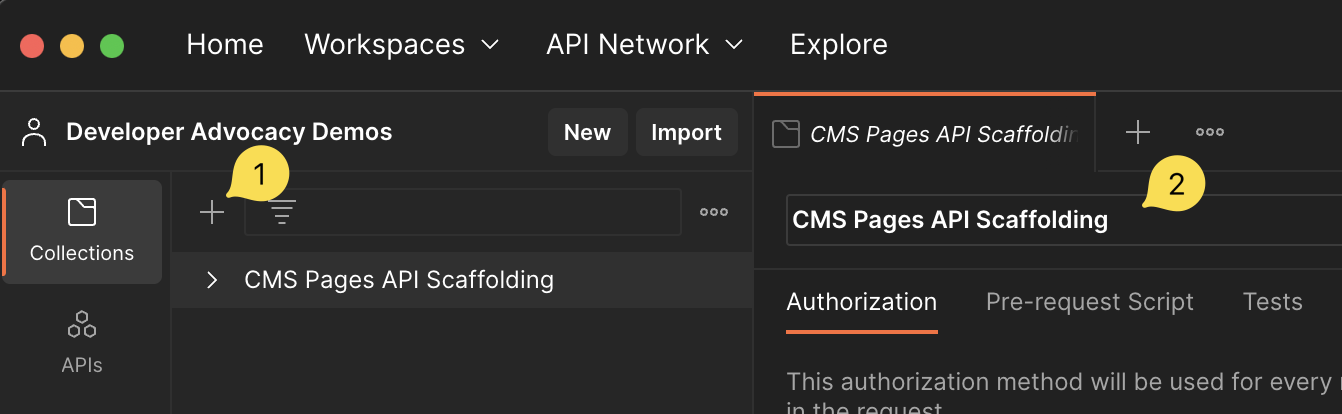
We can now flip over to Postman. We’ll start by creating a collection in our workspace. Click the + icon under our workspace name in top left to open a new tab in our center pane. This allows us to name the collection. We’ll use “CMS Pages API Scaffolding” as the name for our collection.
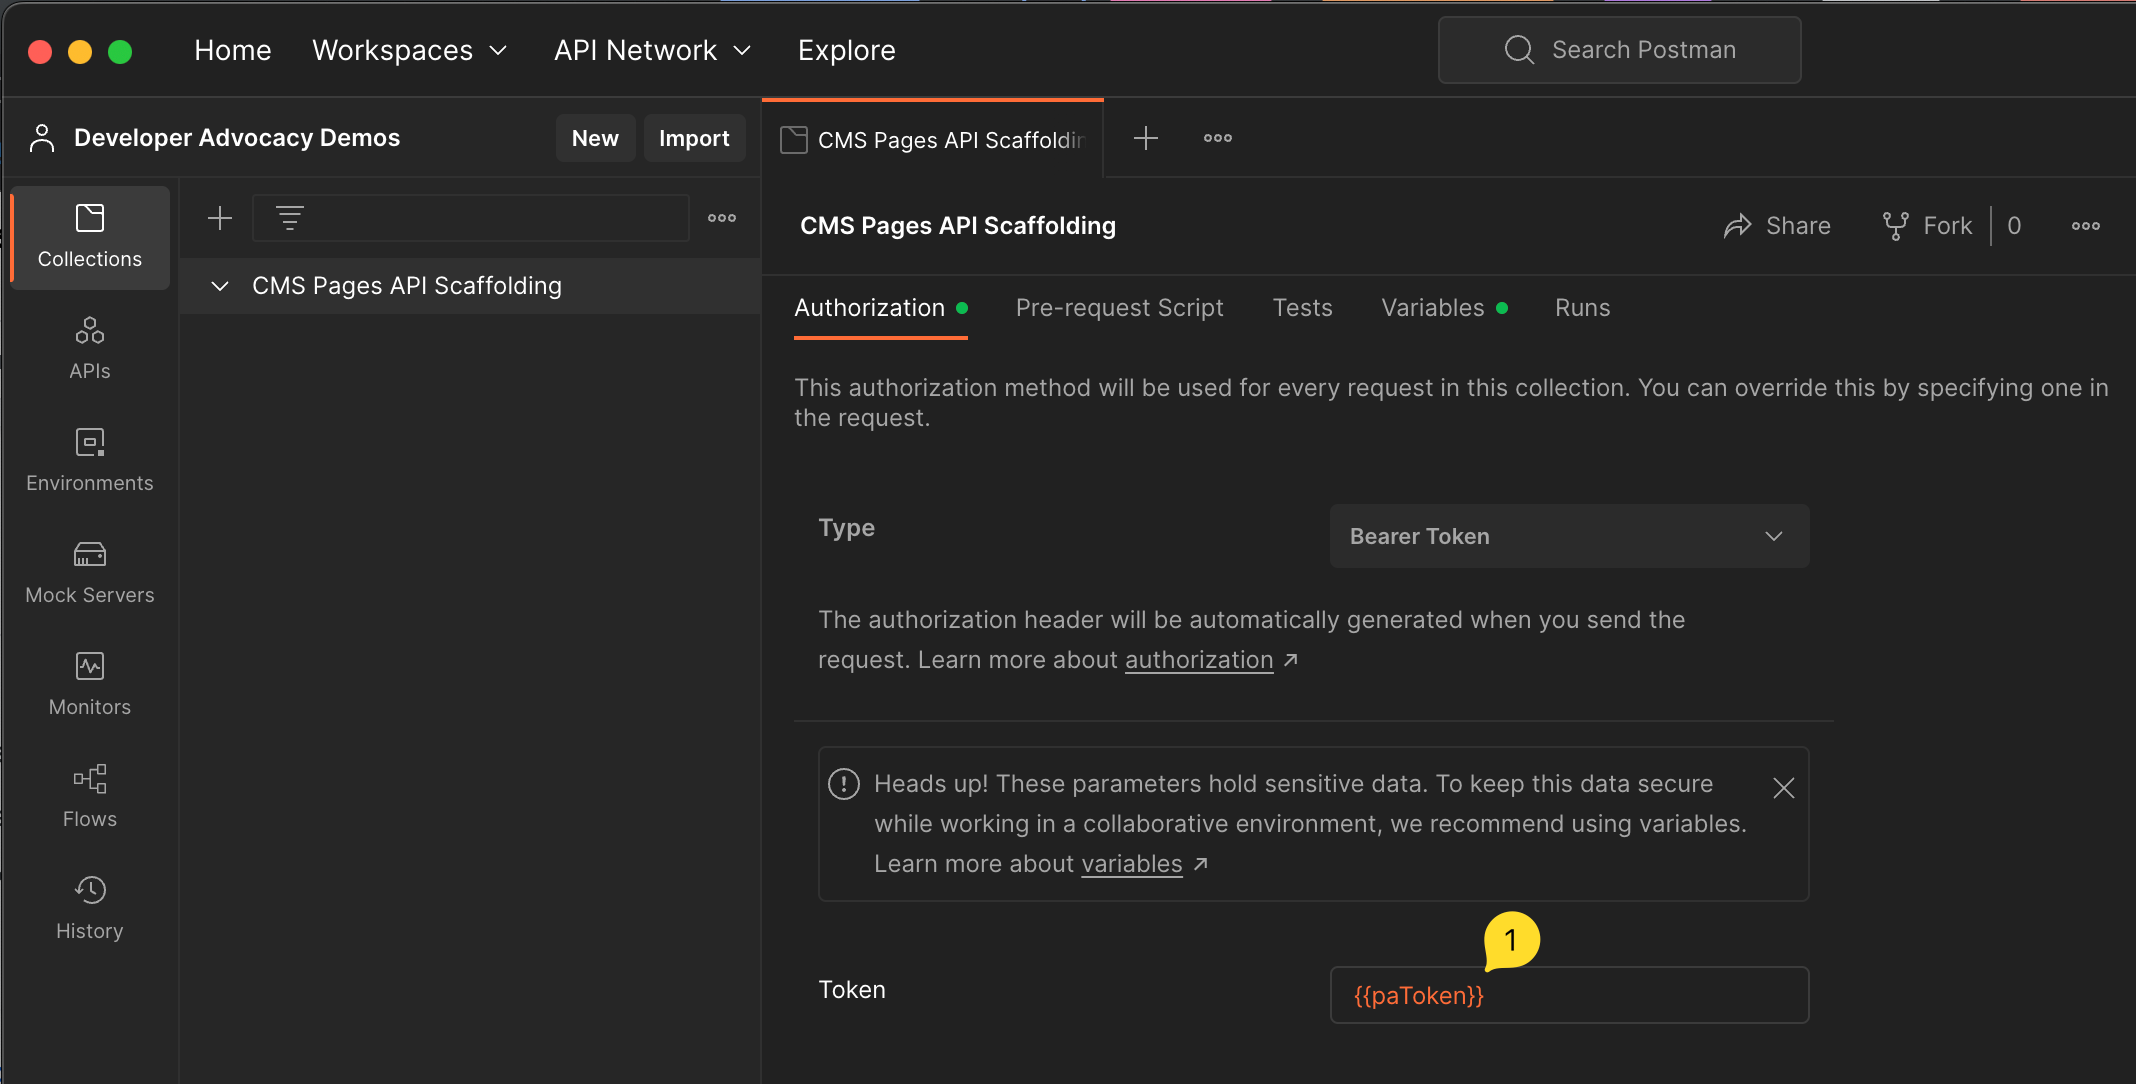
By default, we are brought to our Authorization tab inside of the collection details. Choose the following option type for our authorization: Bearer Token. We will now create a variable inside of our Postman collection to store our Private App Token, as this is the recommended way of using parameters that contain sensitive information (such as our token).
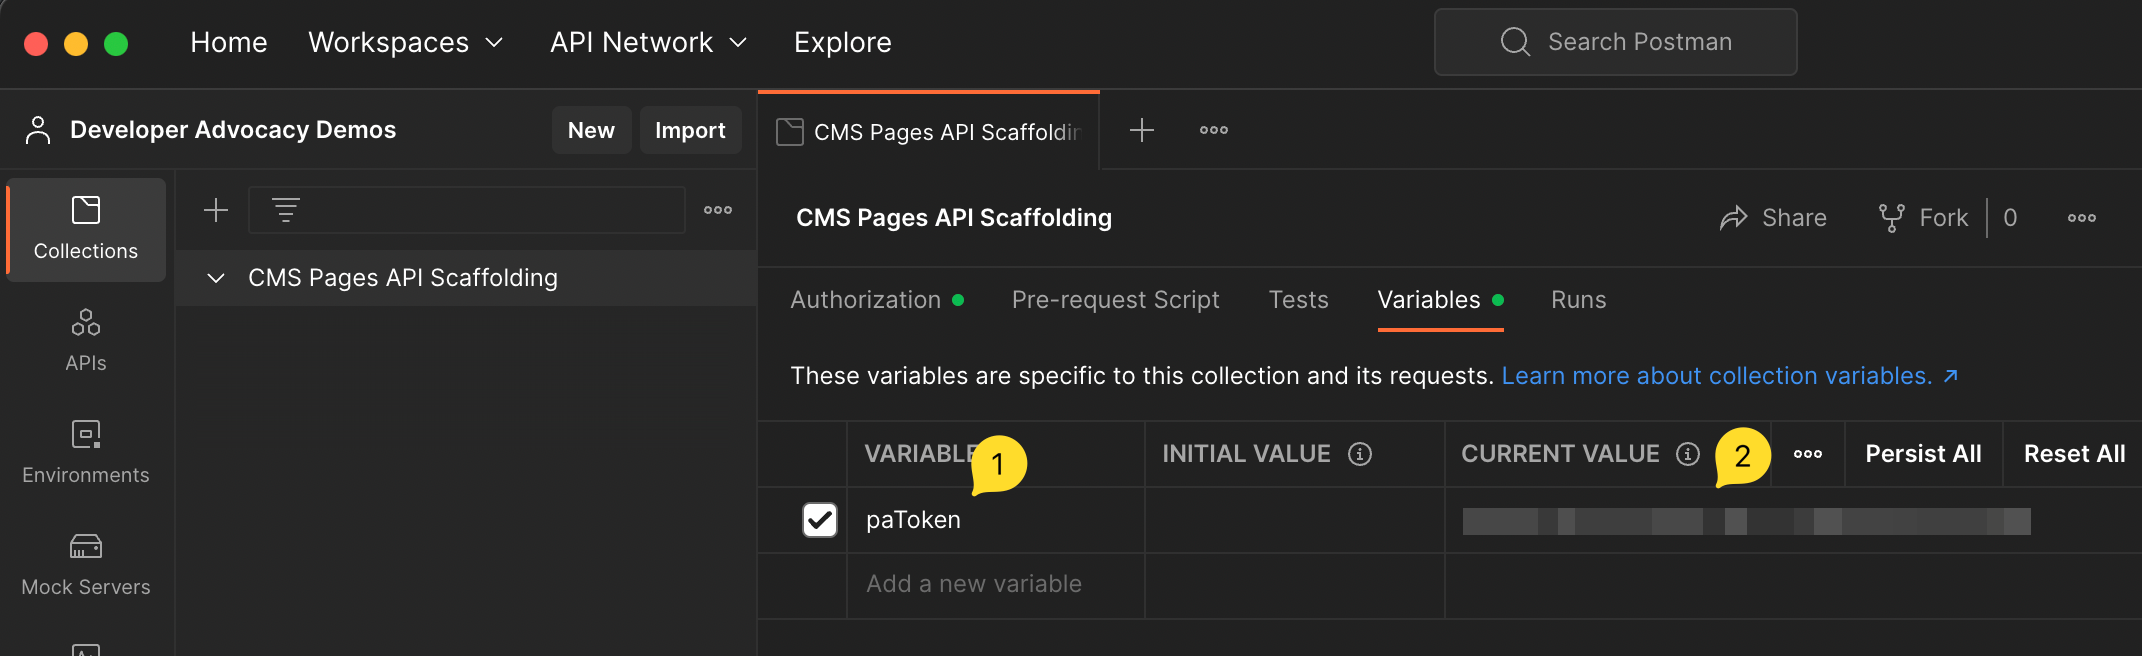
You can create your variable by switching to our Variables tab and then entering a name for our variable (in this case paToken) in the “variable” column and pasting our token into the “current value” column as illustrated below.
We can then go back to our Authorization tab and, inside of our Token field, enter our variable name wrapped in double curly brackets like so:
This will let Postman know we are using a variable and to reference that variable, whose value will be our token.
After entering in your variable, make sure to Save your changes.
Note: In Postman, the save indicator can be identified by the orange circle shown below in the tab name. If you see this marker, this means your work is not saved.
Creating our POST request in Postman
Next, we are going to create a new request inside of our collection by clicking the dropdown toggle next to our collection name and choosing the Add a request option.
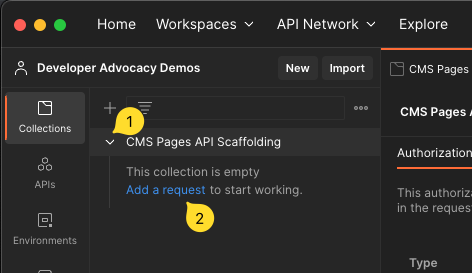
By default, Postman will create a GET request but, for our use case, we will need to change this. We’ll also give our request a name that reflects the API we will be using for easier identification in the collection. Let’s start by:
- Changing our
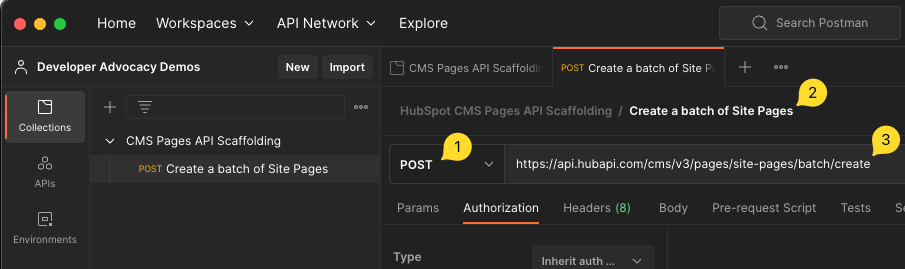
GETrequest to aPOSTrequest using the dropdown - Renaming our request to
Create a batch of Site Pages - Adding our request URL of
https://api.hubapi.com/cms/v3/pages/site-pages/batch/create
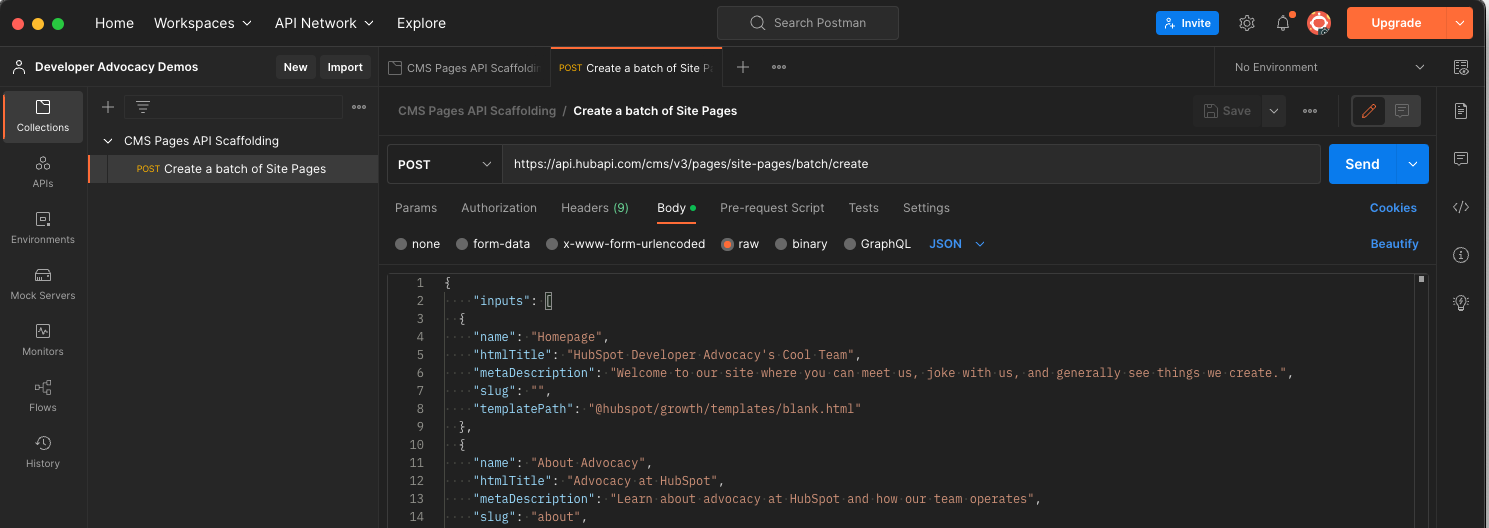
Lastly, we want to make sure to go to our Body tab in our request and choose raw with a format of JSON.

We can now move to prep our CSV file for conversion into the proper JSON array, which we will use when hitting this request URL.
Preparing our CSV file and converting to JSON
Creating our CSV and including the right information
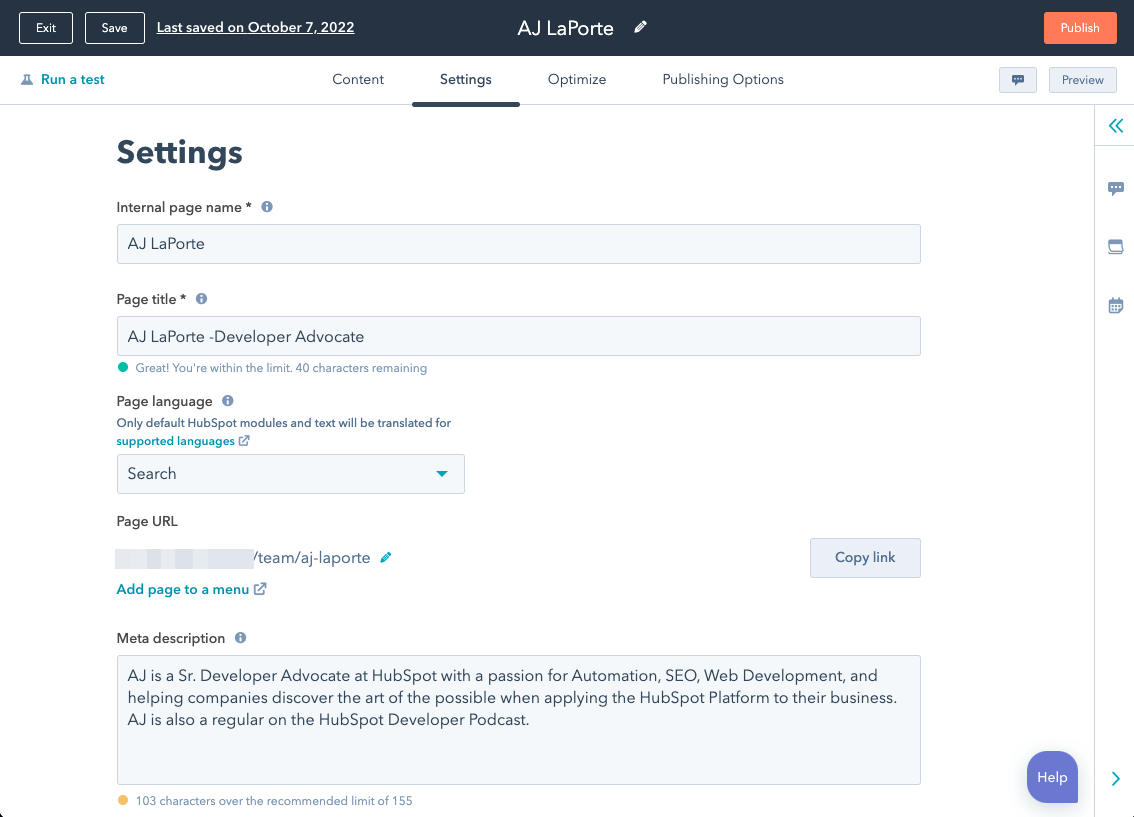
Let’s look at our CSV file and make sure to include all the basic information we will need for creating our pages. Below is a list of columns we will use, and how they translate to our pages inside of HubSpot. This information can be found in the “Settings” tab of the page editor.
- name - The internal names of our pages that you use to identify pages inside of the app.
- htmlTitle - The page title (external name of the page), which is often seen in the title bar of the tab as well the title of the page in search results.
- metaDescription - The description of the page that search engines will often show to explain to the user what the page is about.
- slug - The URL slug of the page that visitors will see in the browser bar.
- templatePath - The path to the template file that will be attached to the page. For our purposes, we are using the blank.html template from HubSpot’s Growth theme. This template is an empty template with no interior content, which is perfect for our use case since we are just building our site structure.
For the purposes of this demo, we will use an example of creating a small site of around 15 pages. Our data would look like so:

You will notice that cell D2 (slug column) is blank. A blank URL slug represents the main homepage of a site.
Converting our CSV to JSON
In order to use our batch endpoint, we need to make sure to turn our CSV into a JSON-based format so we can place our page objects into our inputs array for sending along in the body of our request. To do this, we can use an online converter, such as the CSV to JSON converter by the Flatfile team. Start by clicking the Choose File button and selecting your CSV for converting. Then, click the > Convert button and copy our JSON Output to our clipboard for use in the next section.
Adding our body and sending our request
Going back into Postman (with our JSON copied to our clipboard), we can now move to the Body tab of our request where we will place our data. We want to select the raw option for our body and change our content type to JSON. Inside of the body data pane, we will include the following content, per the example for our API:
Within the inputs array, we can now highlight and replace our square brackets by pasting our page objects from our previous step. This leaves our request looking like the following screenshot.
We can now execute our request by clicking the Send button. Our request should now have been executed successfully, and you will see content appear in the response pane below where we entered our page objects.
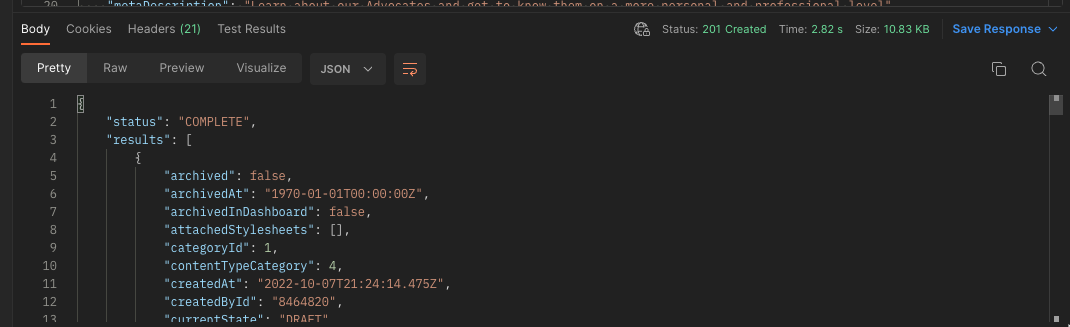
To confirm, we can switch over to our HubSpot account and check our website pages area to see our new pages:

When we go into one of our pages, we can also verify that our data got added to our pages properly.
Takeaways
While this method speeds up the process, there are a few things you should keep top of mind when creating your pages this way:
- Check your file to make sure you are mapping the appropriate key/value pairs to those available in the API.
- Make sure you are referencing the proper theme template files, and check for spelling if you are typing it out manually.
- Always make sure to check your API rate limits when working with any APIs.
- Always use a batch API (if available) when creating multiples of the same object type.
HubSpot also offers batch APIs for additional items such as Blogs, HubDB, Custom Objects, and more. Review our API Documentation to learn more.