
Scope requirements
Scope requirements
Create an app
To get started, you’ll need to create an app that you’ll use to register your custom channel with HubSpot, then handle incoming and outgoing messages to an inbox. You can follow the instructions in this article to create a new app. When configuring the scopes for your app, ensure that your app requests the following scopes:conversations.custom_channels.read: this scope allows you to access to read messages and threads that your custom channel has already published to HubSpot.conversations.custom_channels.write: this scope allows you to publish messages to HubSpot.conversations.read: this scope allows you to retrieve a list of conversation inboxes in an account using the Conversations API, so that you can connect channel accounts to specific inboxes.crm.objects.contacts.write: allows you to create contacts automatically from the conversations inbox or help desk, once they provide their email address and you have the Email capture setting turned on.
- App ID
- Client ID
- Client secret
Register your custom channel in HubSpot
After creating your app, you can create your custom channel in HubSpot, using your HubSpot developer API key, and the app ID of the app you just created. To register your channel, make aPOST request to https://api.hubapi.com/conversations/2026-03/custom-channels?hapikey={YOUR_DEVELOPER_API_KEY}&appId={appId}. In the body of your request, you’ll specify the configuration and capabilities for your channel:
- Specify the user-facing channel name as the value for the
namefield. - Provide a channel schema that includes an object that details the channel capabilities as the value for the
capabilitiesfield. - Certain fields are optional and can be updated later using a
PATCHrequest:- You can also specify a
webhookUrlfor handling webhook events (e.g., handling updates to channel accounts). - You can include a
channelDescriptionandchannelLogoUrlthat will appear in the setup flow for your channel. - Specify a redirect URL that users will be sent to after completing your setup flow with the
channelAccountConnectionRedirectUrlfield.
- You can also specify a
Channel schema
The table below outlines each of the available parameters for the channel schema in the request body.Channel capabilities
The table below outlines all available fields you can specify for thecapabilities field of your channel.
Specifying a threading model
By default, the threading model of your custom channel is set toINTEGRATION_THREAD_ID, where you’re required to include an integrationThreadId in every POST message request. This ID will always be returned in the channelIntegrationThreadIds property of the OUTGOING_CHANNEL_MESSAGE_CREATED webhook event.
You can optionally set your threading model to DELIVERY_IDENTIFIER, which is a good fit when there is only ever one open conversation between parties. If you set the threadingModel to this value within the capabilities object of your channel, you should not include an integrationThreadId in any of your POST message requests, because HubSpot will generate and manage its own threadIds based on the following rules:
- A set of
deliveryIdentifiers(e.g., email address, phone numbers, or other identifiers in the sender and/or recipients array of a message) may have a maximum of one active thread between these delivery identifiers at once. - Archived threads between that same set of participants are ignored.
- Outgoing messages can only be published on open threads, and there can only be one thread between a specific set of participants at a time.
- Incoming messages can only be published to the same
threadIdif either of the following conditions are met:- The thread is already open.
- The thread was closed with the latest message activity occurring less than 24 hours ago, in which case the published incoming message will re-open the thread.
- The
channelIntegrationThreadIdsproperty within the payload of theOUTGOING_CHANNEL_MESSAGE_CREATEDwebhook event will contain the value of thethreadIdthat HubSpot created.
Delivery identifiers
ThedeliveryIdentifierTypes field specified within the channelCapabilities of your channel specifies an array of delivery identifiers.
A delivery identifier is an object that includes a type and value, that describes sender or recipient delivery details:
If you need to review or update your channel’s configuration, you can send a
GET or PATCH request to /conversations/2026-03/custom-channels?hapikey={YOUR_DEVELOPER_API_KEY}&appId={appId}&channelId={channelId} using the same channel schema. PATCH requests also accept partial-update requests.
Connect channel accounts to HubSpot
After you’ve created your custom channel, the next step is to allow specific channel accounts to be connected to a user’s HubSpot account, so that messages can be sent and received.Channel account connection for specific accounts
If you’re developing a custom channel for your own business, or building a specific integration on behalf of a client, you can connect channel accounts directly to a HubSpot account. You’ll need to have direct administrative access to the account or have an app installed in an account that’s authorized theconversations.read scope.
When a HubSpot user installs your custom channel app in their account, a request will be sent to your custom channel’s Redirect URL, which contains an authorization code that can be used to request an OAuth token for accessing that user’s HubSpot account and its associated data. For more information on how OAuth works, check out this article.
Once you’ve obtained an OAuth access token using the authorization code, you can use this OAuth access token to send requests to HubSpot to connect specific channel accounts.
To connect a specific channel account, make a POST request to /conversations/2026-03/custom-channels/{channelId}/channel-accounts, where the channelId is the channel ID that you’ve registered.
The request body below provides an example channel account schema for an inbox ID of 123:
Creating a connection setup flow for your custom channel
If you’re developing a custom channel integration that you want to distribute to multiple customers via the HubSpot marketplace, you can register an account connection flow that will appear within the in-app HubSpot inbox or help desk connection flow. The screenshot below showcases how an example custom channel called HuddleHub would appear in the help desk connection flow in HubSpot. Your app’s name, description, and logo from your app configuration will appear as part of the custom channel option that users can click to connect.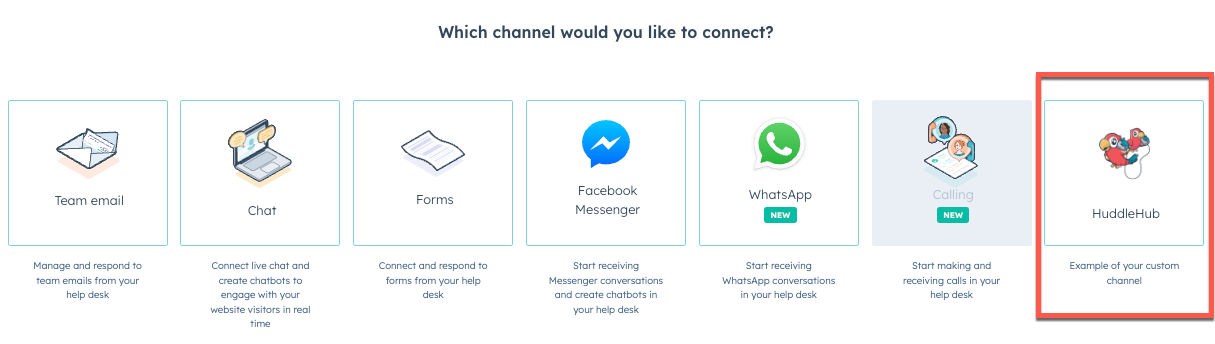
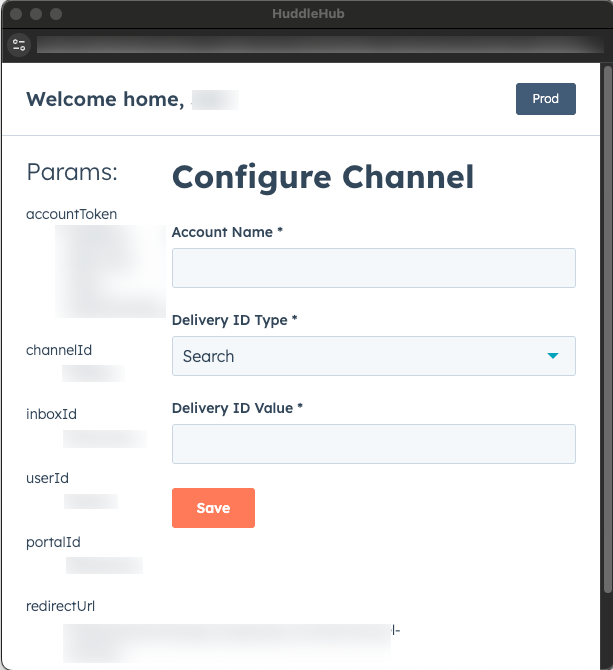
PATCH request to /conversations/2026-03/custom-channels/{channelId}. In the body of your request, set the channelAccountConnectionRedirectUrl property to the URL that you want HubSpot to navigate to when users click your custom channel in the connection flow. You can also provide a channelDescription and channelLogoUrl if you didn’t specify these fields previously or you want to update them.
Once clicked, HubSpot will open a new window with the URL you specified, and append the following query parameters that you can use to authenticate with a third-party service, or for any other custom behavior you might need to wire up based on the user’s HubSpot account, inbox, channel, or user information:
Once you’ve collected the user’s information in your page (e.g., using a form to collect each of the required parameters) and the user confirms their input by clicking a submission button, you can make a
PATCH request to /conversations/2026-03/custom-channels/{channelId}/channel-account-staging-tokens/{accountToken} and provide the following parameters in your request:
| Parameter | Type | Description |
|---|---|---|
accountToken | String | As detailed above, this is the same accountToken provided as a query parameter in the URL of your webpage when the user initiated the connection in their HubSpot account. This should be provided as a path parameter in the URL of your request. |
channelId | Number | The ID of your custom channel, provided as a path parameter in the URL of your request. |
accountName | String | This is a request body parameter that will act as a friendly name for the channel account that will appear in the inbox or help desk settings in the user’s HubSpot account.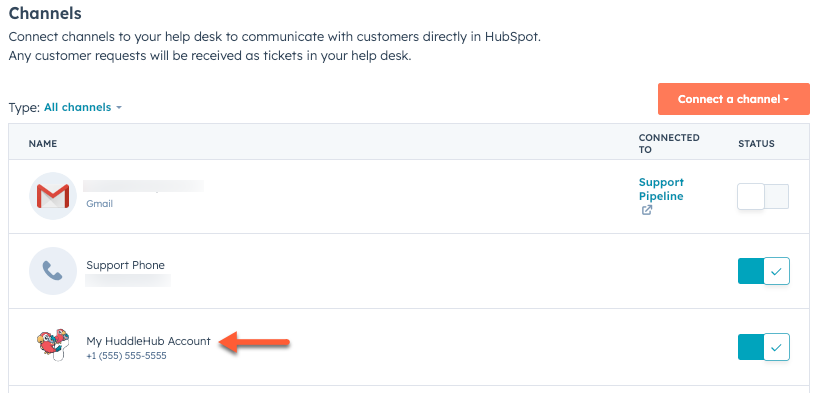 . . |
deliveryIdentifier | DeliveryIdentifier | Provided as a request body parameter, the deliveryIdentifier that describes the address of the connected account. See the Delivery Identifiers section above for more details on how a deliveryIdentifier is structured. |
PATCH request and gotten a successful response, you can redirect the user back to the redirectUrl detailed above and close the pop-up window.
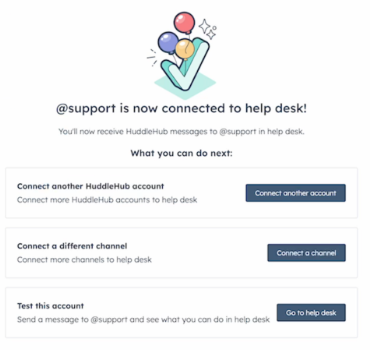
The user will then see a success screen in their HubSpot account:
Publish messages to HubSpot
When a channel account that uses your custom channel receives or sends a message in the external message service (e.g., a user gets a new direct message in their social account’s inbox), you’ll want to ensure that the message gets published to HubSpot, which will log it into the HubSpot CRM and the associated conversations inbox. To publish a message to HubSpot, make aPOST request to /conversations/2026-03/custom-channels/{channelId}/messages, where the channelId should be the channel ID that you previously registered.
Message schema
The body of your request can include the following fields:Supported message attachment types
Several message attachment types are currently available: files, quick replies, as well as a catch-all type for unsupported file attachments.File attachments
File attachments can be uploaded using HubSpot’s files AP, and the resulting file ID can be used to reference the file contents when publishing incoming messages to HubSpot. Consult the table below for details on how to structure a message attachment referencing an uploaded file:Quick reply attachments
Some chat services, such as Facebook Messenger, present suggested options as “quick replies” to users, allowing them to select from a predefined list of response messages. HubSpot supports this functionality by providing the ability to include quick replies as an attachment to your message. Consult the table below on how to structure a message attachment that includes a list of quick replies:Unsupported content attachments
These attachments are used to represent attachment types included in the original message that HubSpot cannot recognize. For example, if a channel account on the messaging platform you’re connecting to HubSpot via your channel receives a message that includes an attachment not listed in this article, and you want users viewing the message in their HubSpot account to know there was an attachment they might want to view directly on the messaging platform, you could use this attachment type when publishing the message to HubSpot. To specify an unsupported content attachment, the attachment should be specified as follows:Handling outgoing messages sent from HubSpot
To handle outgoing messages sent from HubSpot using your custom channel, HubSpot will send a payload as aPOST request to the webhookUrl that you specified when you first registered your custom channel.
The payload of the request that HubSpot sends will include a type of OUTGOING_CHANNEL_MESSAGE_CREATED. The table below provides a full reference on all fields included in the body of the webhook event:
The
message object in the webhook payload contains the following fields:
Handling updates to channel accounts
Whenever a channel account is connected, updated, or deleted, HubSpot will send a payload as aPOST request to the webhookUrl that you specified when you first registered your custom channel. This can be useful for cases where you want to take an action such as notifying your users that their connection to HubSpot has succeeded, or if the channel is later modified or deleted.
Channel account webhook event payload
The payload of the request that HubSpot sends will includes the fields listed in the table below. The event’s type will be provided in thetype field:
CHANNEL_ACCOUNT_CREATED: triggered when an admin successfully connected a custom channel to an inbox or help desk in their HubSpot account.CHANNEL_ACCOUNT_UPDATED: triggered when a HubSpot user updates a channel account that uses one of your connected custom channels.CHANNEL_ACCOUNT_PURGED: triggered when a HubSpot user deletes a channel account that uses one of your connected custom channels.
Archive a custom channel
To archive a custom channel, make aDELETE call to /conversations/2026-03/custom-channels/{channelId} using the ID of the channel you want to archive as the channelId.
If successfully archived, you’ll receive a response of 204 No content.